If this is your first visit, be sure to
check out the FAQ by clicking the
link above. You may have to register
before you can post: click the register link above to proceed. To start viewing messages,
select the forum that you want to visit from the selection below.
Hi Fernando, I really like how the Jaguar is turning out mate. That camouflage scheme looks very good. About the preshade, well not all's lost, weathering could cover the loss I reckon ey.
Next time try to thin the Gunze paints very heavily (like 70%-30% thinner-paint) and just very gentle passes. Of course it takes a while to cover the surface but you'll see you can keep the preshade. Just requires some patience and discipline
Ross, nice of you to drop in and thanks for the kind words.:hugging-face: Colin, thanks much appreciated.:thumb2: Jim, thank you, yes one of the joys of using an airbrush.:tongue-out3:
With Revell enamel and Vallejo Model Air I had decent results, just have to build up my experience this one is no.2 to date with Gunze paints …. Wouter, thanks for the kind words and I’ll give your mixture a try the next time.:thumb2:
Think I did this coat in a 50/50 mix and the weathering will resurrect most of filth I had planned. Joe, thanks and nice of you to drop in too.:thumb2:
Glad it turned out ok since the Revell instructions were less than consistent in the camo pattern…
Well with all the fine sunny weather that had visited Holland the past weekend just a little had been done, it felt criminal to stay longer inside.:tongue-out3:
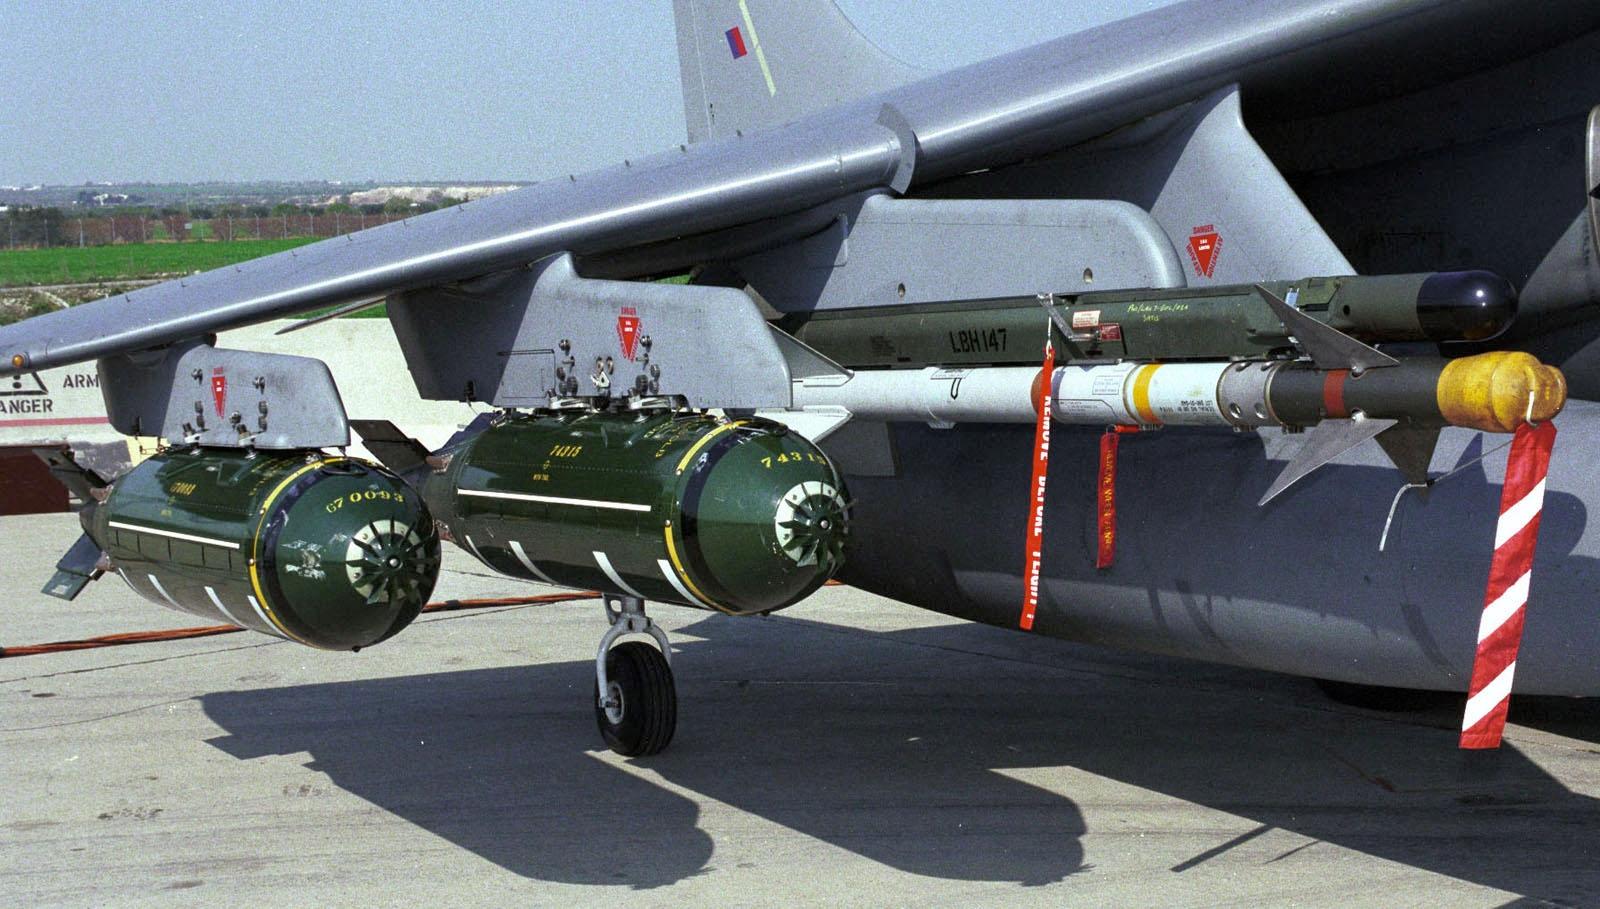
Modified the BL755 bombs a bit, the general shape and fins seemed ok but the prop fuse thingy really put me off….
Left the kit part like a bottle cap, right the modified one:
[ATTACH]300520[/ATTACH]
Looking a bit more like the real one eh?:
(for discussion purposes only)
Sanded the nose cone shape first, drilled a 1.2mm hole in the centre and filled it with a punched 0.8mm disk.
The fans were 1mm pieces of 0.25x0.5mm strip slightly angled to have a prop like look.
Also made a start on the detail painting but more on that in the next update later in the week.
Camo looks great to me Fernando , I always obliterate a pre shade too!The bomb fuses look amazing , very fiddly but so worth it when you compare it to the kit effort. keep the updates coming , cheers tony
Ross, nice of you to drop in and thanks for the kind words.:hugging-face: Colin, thanks much appreciated.:thumb2: Jim, thank you, yes one of the joys of using an airbrush.:tongue-out3:
With Revell enamel and Vallejo Model Air I had decent results, just have to build up my experience this one is no.2 to date with Gunze paints …. Wouter, thanks for the kind words and I’ll give your mixture a try the next time.:thumb2:
Think I did this coat in a 50/50 mix and the weathering will resurrect most of filth I had planned. Joe, thanks and nice of you to drop in too.:thumb2:
Glad it turned out ok since the Revell instructions were less than consistent in the camo pattern…
Well with all the fine sunny weather that had visited Holland the past weekend just a little had been done, it felt criminal to stay longer inside.:tongue-out3:
Modified the BL755 bombs a bit, the general shape and fins seemed ok but the prop fuse thingy really put me off….
Left the kit part like a bottle cap, right the modified one:
Looking a bit more like the real one eh?:
(for discussion purposes only)
Sanded the nose cone shape first, drilled a 1.2mm hole in the centre and filled it with a punched 0.8mm disk.
The fans were 1mm pieces of 0.25x0.5mm strip slightly angled to have a prop like look.
Also made a start on the detail painting but more on that in the next update later in the week.
Thanks for looking in.
Fernando
Eduard are about to release a set of 8 BL755 cluster bombs in their Brassin range.
On the bench: Airfix 1/48 Sea King HC4, Revell 1/24 Trabant.
Coming soon: Airfix 1/72 Phantom FGR2.
Just finished: Airfix 1/48 Stuka & Airfix 1/72 Sea King HC4.
Fernando.
Hi mate, sorry I've missed so much of this, still trying to get used to the workings of the site .
Love the pipe work and the office, becoming your trade mark in my eye! Always neat work .Shall keep up in future.:smiling4:
John.
Good evening all, sorry for the late update life and good weather kept me a bit more than anticipated from the bench…. Tony, thank you fiddly indeed but it was a simple and cheap way to get a better looking bomb.:smiling4: Ian, thank you too:thumb2: Rick, thanks for the info, always handy to have for the a future Jag model….:thinking: TonyB, true adds a different look to the kit too.:hugging-face: John, no need to be sorry.
Like the old place, we keep each other pretty busy here too so it’s easy to miss a tread.
Thanks for the kind words:thumb2:, I’m trying to detail my models more nowadays just need a bunch of good photos of the real thing.:smiling:
Managed to complete most of the detail painting as called out per kit instructions and some creative additions on my part.:hungry:
Decals were placed and being the stiff Revell type a few rounds of Microsol were required to let them settle nicely, this was followed by a thin wash of AK 2071 to bring out the details.
When dry the Jag got a coat 50/50 VJ matt and gloss varnish to protect all the work:
[ATTACH]301897[/ATTACH]
[ATTACH]301898[/ATTACH]
[ATTACH]301899[/ATTACH]
Under and over wing stores got their decals and wash too, the BL755 just need their gloss coat again as I inadvertently gave all the same finish:sleeping:…..:
[ATTACH]301900[/ATTACH]
Also made a boarding ladder from 0.75 & 0.5mm rod and some 0.75mm sheet:
[ATTACH]301902[/ATTACH]
May not be totally accurate, but I’m pretty pleased with the first attempt so I’m keeping it for now.:tongue-out3:
Still a bunch of small things to complete before she's finished but the finish is in sight.
Thanks for looking in.


Comment