Scale Model Shop

Collapse

Messerschmitt Bf109G-6 Academy 1/72

Collapse
This topic is closed.
X
X
 
  • Time
  • Show
Clear All
new posts
  • Guest

    #1

    Messerschmitt Bf109G-6 Academy 1/72

    Well here goes, my first attempt at modelling since i was a child.

    1st thoughts are... i don't remember the pieces being so small and fiddly, where are my spectacles.

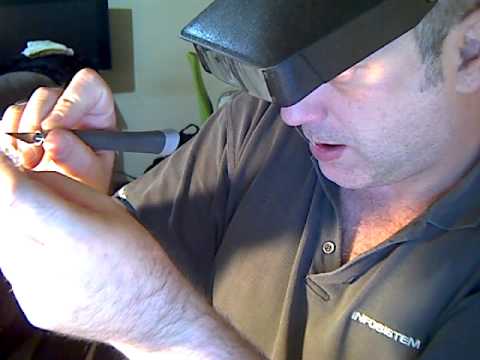
    2nd thought was... i'm going to need some form of magnifying glass, possible one of those head mounted jobbies.

    The kit

    It seems very nice quite detailed considering the small size of the bird, cockpit detail is not as detailed as they make out on the box so i dont think i'll be bothering with the open canopy option, i'm not up to making a cockpit from scratch like you guys.

    A dry fit of the parts show that they seem to go together quite nicely but i'm a little concerned about the seam along the fuselage, any tips on how to get rid without losing the panel details?

    All parts have been undercoated with vallejo grey undercoat and

    Anyway, heres where i'm upto and the 2nd pic shows what i'm having to work around as i "borrow" my young sons modelling bench (when i've finished he's grounded until thats tidied haha)

    [ATTACH]43427.IPB[/ATTACH]

    [ATTACH]43428.IPB[/ATTACH]


  • mossiepilot
    SMF Supporters
    • Jul 2011
    • 2272

    #2
    Should have fun with this one, academy make lovely kits.

    And that looks about right for a healthy modelling desk, mines not far away from that - lol.

    Tony.

    Comment

    • Guest

      #3
      welcome back to the modelling world

      once ypou try it, bnever can gave up from that hobby... same thing with me... 2 years now after cameback from my young days... had 15 yrs of pause

      Nice choice of the model. And I agree with you, buy some magnified glass - head mounted... I have use them almost all time

      Panle line on the back of fuselage? You mean on that line? from the cockpit till vertical fin?

      For info, there must be panel line, because Messer was joining from two halfs together, and panel line on the back and bottom was visible

      but, if you sand aways some panel line... just rescribe it with some scriber

      Roman

      Comment

      • stona
        • Jul 2008
        • 9889

        #4
        You'll have to sand or scrape it off.

        Roman is absolutely correct,there is indeed a line that runs down the top and bottom of a 109 but it's hard to see on the real thing. I've looked at several Bf109 airframes and it is a very subtle and usually well engineered joint.

        This is a G-14 undergoing restoration.

        This is actually a good photo of the antenna wire attachment to the fuselage on a Bf109F but the same "seam" is just about visible in the background.

        On your come back you might choose not to worry too much about it. Otherwise you would have to rescribe the lines you have lost as Roman suggests.

        Applying some tape either side of an area to be sanded will help to minimise the colateral damage.

        Cheers

        Steve

        Comment

        • Guest

          #5
          I think rather than get bogged down too much in having it look perfect i'll take the "make it fun" option to start with.

          As my skills improve (hopefully) then i can go into more and more detail. As long theres not massive gaps or blatantly obvious joints i'll be happy and theres always the builds you guys show us to spur me onto the next level.

          Thanks for your help and support.

          Comment

          • Guest

            #6
            That looks a bit like my bench after it's been tidied :hmmm:

            Comment

            • Guest

              #7
              Day 2 and its coming along slowly, partly because i'm forcing myself not to rush it and partly because its not fair to kick my young son away from his desk LOL

              So, two more pics, one to show where the kits upto and one to show the wing joint, do you think that needs filling or with it be hidden by the painting?

              Also how the heck can i mask this canopy? i was used to using maskol but that was on older kits with canopies that had big raised detail, not fine stuff like this academy one.

              [ATTACH]43432.IPB[/ATTACH]

              [ATTACH]43433.IPB[/ATTACH]


              Comment

              • Guest

                #8
                good progress you have keep it up

                masking of canopy... I'm always work with tamiya masking tape, put it on the canopy and after that cutting tape on the edges of the canopy frame with BRAND NEW SHARP blade, othervise blade will not cut...

                and my recomendation, when you cut it look thru canopy into the source of light how you can see frame

                Comment

                • Guest

                  #9
                  well i'm not happy, i've been trying to get the colour right for the first coat of paint and can't quite get it right.

                  Also joints are showing though.

                  first pic shows my home made spray cabinet

                  2nd pic shows the travesty that is the wrong colour[ATTACH]39532.vB[/ATTACH][ATTACH]39533.vB[/ATTACH]

                  [ATTACH]43444.IPB[/ATTACH]

                  [ATTACH]43445.IPB[/ATTACH]


                  Comment

                  • Guest

                    #10
                    If I see right from box of your Bf109 underside color is RLM 76 color - Light blue

                    Your color is to blue for this model...

                    If you have store in neighborhood go there and get one of these coloros:

                    Model Master (Testors) 2086 named Lichtblau(RLM76), Valejjo Model Air No. 46 named Pale Grey Blue, LifeColor UA074 named LightBlue RLM076

                    Here is great conversion paint chart web site, you can find here everything for colors:

                    The Ultimate Model Paint Conversion Chart

                    and for WW2 Luftwaffe planes:

                    here is one very simple but usefull picture, all color you need for Bf109 in RLM

                    And I think I'm not wrong, colegue Stona is mutch better for WW2 Luftwaffe planes, hope he will also see your post and give advice

                    But in gereraly you will not be wrong with any of this RLM colors from this picture

                    Roman

                    P.S.

                    You ask about masking canopyes

                    I have made my first tutorial video for that, hehehe, I'm so funny looking, please dont LOL ...

                    Hope you can see the principle of doing that...

                    [video=youtube;DCnh9twYWmA]

                    Comment

                    • Guest

                      #11
                      the 41-44 is almost the same as the one shown in my instructions, my local store only stocks humbrol acrylics so it looks like im going to have to buy some online and put the build on hold for a few days.

                      Thanks for the masking tips, looks like i'll be ordering some tamiya masking tape too LOL.

                      Comment

                      • stona
                        • Jul 2008
                        • 9889

                        #12
                        Nice video Roman. The only thing I do very slightly different is to stuff some Blu-Tac inside the canopy before starting. It will prevent any chance of breaking or cracking the clear part whilst you do the masking.

                        Luftwaffe colour schemes were approved by the Reichluftfahrtministerium,don't you love those compound words, which is simply the Reich Air Ministry. This is abbreviated to RLM and the colours were given a number code. Your underside colour would be RLM 76. Names were also given,RLM 76 would be "Lichtblau" or "Graublau", but these were not official designations and just cause confusion today.

                        The chart Roman posted is fine as a rough guide.Although the official factory schemes were generally followed Lufwaffe units made adjustments to the schemes to suit local operating conditions resulting in many variations.

                        Stick to the painting guide to start with,they are generally well researched. Most kit schemes are of known aircraft for which photographic references exist. Don't be scared to ask questions about any particular aircraft,someone may well either have done it or have some information on it.

                        Cheers

                        Steve

                        Comment

                        • Guest

                          #13
                          that conversion chart is really useful, thanks for all the help

                          Comment

                          • Guest

                            #14
                            well i've got all the paints i need and the kit is just about ready for painting. masking the canopy was a real nightmare but i've got it done "of a fashion" I now undrestand why people prefer to build the larger scale kits now LOL

                            Comment

                            • Guest

                              #15
                              well i finally got it finished and plucked up the courage to show it to you guys

                              I'm not totally happy with it especially when i see what you lot can do but its my first go at weathering and i know with practice i'll get better.

                              This forum has already helped me a lot.

                              thanks

                              [ATTACH]43604.vB[/ATTACH]

                              [ATTACH]46847.IPB[/ATTACH]

                              Comment

                              Working...