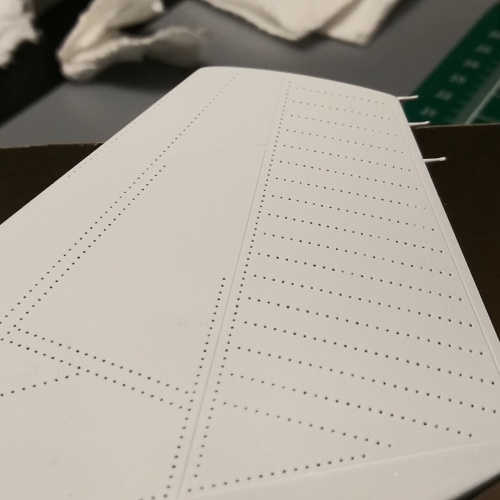
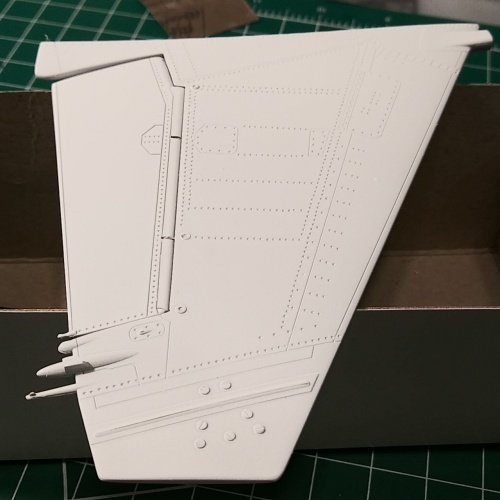
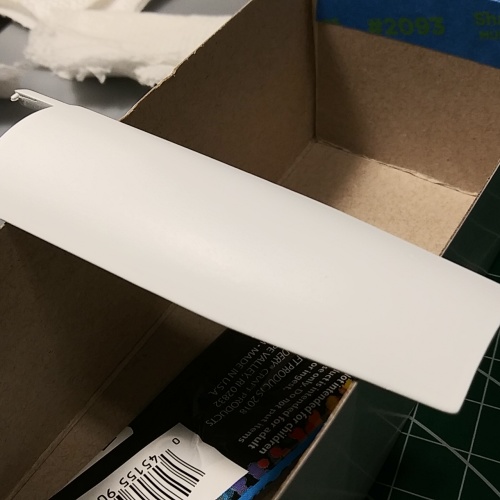
Sukhoi Su-27 Flanker B Trumpeter Scale 1:32
Collapse
X
-
-
I hope the final coat looks good as well when the time comes. :smiling:
I am also tempted by very "crazy" or at least not very common idea. You know how wings gets into the pins at the bottom of the wings so they will never come out after fuselage halves are joined?
I saw the guy struggling with wings dropping, actually one wing dropping, and it took him a long time for it to get glued to the fuselage without hanging down.
These two pins that will not let the wings to slide out also do not let them to get closer to the fuselage side to get the better fit for gluing area where wing root touches the fuselage side.
So, the crazy idea is to make wings to be able to slide in and then glue them after gluing the fuselage bottom and top together.
I know it is crazy, but I think doable. :nerd:
Please share your thoughts on that, I am curious of what you think. Thank you! Please read my explanation carefully, I am not sure I explained it clear enough.Comment
-
WELL Andrzej I USE this idea quite a lot on bit on my tiger to hold bits firmly in place as i just drill a 1mm hole in one bit an the same in the bit i want it to go too then i glue in brass 1mm pins an then put C/A on them an push togeather an ive not had a brakeage yet very firm hold
chrisbComment
-
WELL Andrzej I USE this idea quite a lot on bit on my tiger to hold bits firmly in place as i just drill a 1mm hole in one bit an the same in the bit i want it to go too then i glue in brass 1mm pins an then put C/A on them an push togeather an ive not had a brakeage yet very firm hold
chrisb
I like the idea. I do not think I will be needing to use pins as there are tabs that will slide into the slots but I might do that on elevators.Comment
-
SteveComment
-
Cheers,
RichardComment
-
I do agree 100%, it is a constant learning process and it should be fun along the way. I am trying to enjoy everything that happens, even bad experiences.
Here is an example, I had two little parts that need to be glued in before fuselage halves are glued together. That means they need to be painted and washed.
I painted them with Vallejo Air (brushing on), I added gloss coat and then tried black Vallejo wash.
I waited 45 minutes so the wash was dry.
Then I started removing it using Q-Tip dipped in Vallejo Paint Thinner (as per instructions).
No good, first of all, I should not use black wash as it looks just too dark on light bluish grey.
Second, it did not remove the wash smoothly, when I used more wet Q-Tip it started to remove gloss and paint underneath.
I decided to clean it all off and repaint and try one of these Flory's clay washes, it supposed to come off easily, just depending on how much water we use, it could be totally removed without damaging paint (gloss varnish in this case) underneath.
In other words, bad experience and a lesson.
Will try again and no rush.Comment
-
Guest
If the surface to be glued isn’t too complex, you can also just scrape off the paint with a knife.Comment
-
Here is my front canopy and broken back one.
Take a careful look at the pictures. I dipped the front one in the Pledge Floor Finish (after sanding with various grits and polishing with auto plastic compound.
There is shady area, and it is not on the outside or inside, I looked against light.
How did that happen? Something I did or it was there, I do not remember now.
The cracked and glued canopy will be sanded and dipped in Pledge Floor Finish, but cracks will be visible, so I am not trying to make cockpit look nice, I made mistakes and glued it together so it is very hard to do anything.
This is my learning and testing model anyway, so it is all good! :tongue-out3:
Let me know what you think about that grayish area. I am very curious how it happened.Comment
Comment