Excellent stuff. The decals are really breathing life into these two.

-
-
Shaping up nicely Andy......the decals do make 'em pop. :thumb2:Comment
-
Good morning all
As promised I thought I'd do a short-ish comparison of the kit decals and the AM one by H Models....
First though, the good news is that I'm just over half way having added 64 decals so far to the two kits!! The bad news is that the ones left are all the tiny tricky little ones.....:cold-sweat::crying:
Anyway back to the comparison.....
Quality - H Models win. Generally less carrier film except oddly on the numbers, thinner but the kit ones fuselage numbers went down better than I thought. But the AM ones are definitely better ptint quality especially on the small detail stencils and markings, where they also had better colour variation on the 'text' markings rather than the mostly black of the kit decals.
The only problem I had is that H Model large decals stick very well as soon as they go down....so a couple of the crosses are very slightly askew.....i even lost one completely where I had to scrub it off because I slipped as I put in place.
Quantity - AM decals win again. Although you can do four decal options with the kit ones, they only have one set of fuselage 'side' crosses. H Models give four full sets of the 'main' decals, including two part swastikas for those that use them.
Understandably, you only get one set each of the little details markings and 'interestingly' not only do they have a very similar layout, they are numbered exactly the same on both sets. I can only assume there must be a common 'parent' set they've both copied or one has copied the other.
Instructions - AM decals win hands down and I am very glad I bought them because the kit instructions give placement instructions for less than a third of the markings provided - pretty poor in my book. The AM kit has very good instructions for all of them but they don't have the decal numbers on the instructions so I ended up using my phone as a massive magnifying glass in some cases to work out what was what and then wrote them on the destructions.
Also, in once case they call out for double the type of a particular marking provided, causing me to make a mistake.....plus the external fuel tank side aspect drawing has the markings on the bottom but on the overhead drawing they're on the top! So I put them on the bottom so you will at least see them!
So in short H Model decals get the thumbs up with a couple of qualifications
Anyway enough waffle....
ACW as usual.
Andrew
PS apologies for the quality of some the shots - they were taken to prove a point, not quality.
-----------------------------------------------
AM vs Kit
AM first pic.


AM definitely better...

AM destructions


Size
As you can see, they're pretty small......the white blob in the bottom of the second shot is the head of a cotton bud!


On the planes....what this is supposed to be about....
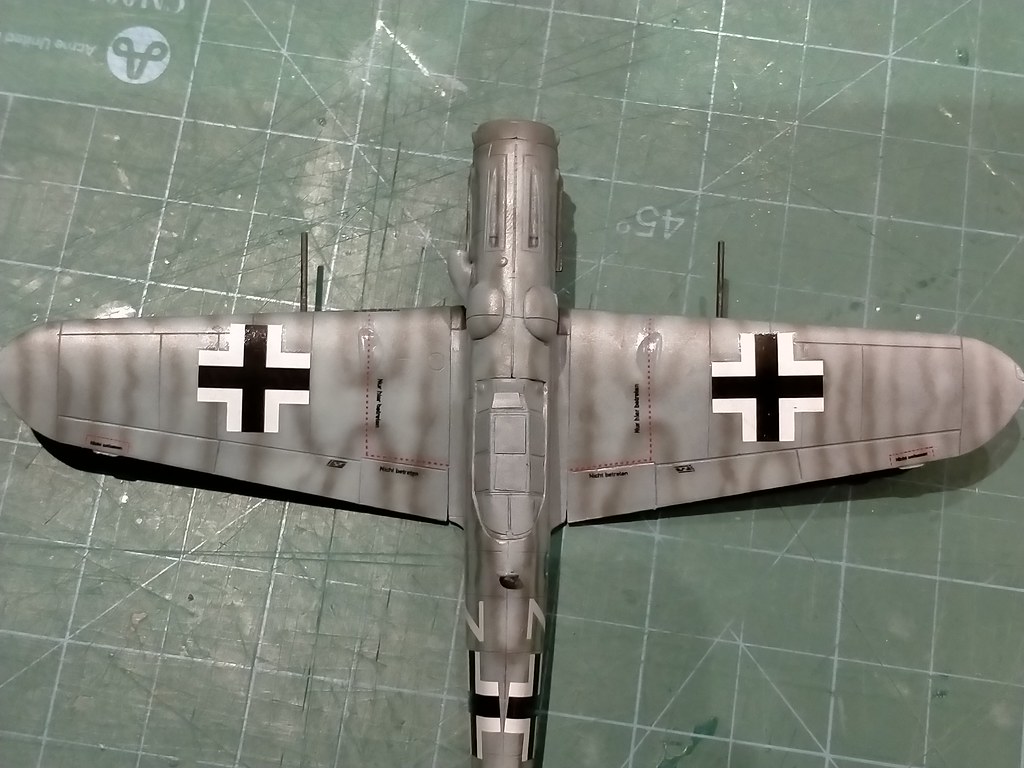
The light blue 'White 7' has the kit decals, except for the crosses and swastikas. The darker 'Yellow 4' is all AM decals.


Other details shots.....


Comment
-
OK, so I I had a couple of good sessions yesterday and got the rest of the decals on.
A mishap with a couple of the really small ones and previously mentioned slightly dodgy instructions mean a few a missing/in the wrong place/not used but at this scale it's not too obvious I hope.
Next up is to finish the nose mounted MGs and then some weathering. Special thanks to AlanG and Ian M for some pointers on the exhaust soot colours and helpful techniques.
ACW as usual.
ATB
Andrew
-----------------------


Comment
-
Looking good :thumb2:Comment
-
Very nice indeed Andrew.Comment
-
Well Andrew the decals look good. Decals add so much to aeroplane builds. Bet you're glad they done. You'll dream of tiny decals tonight - nightmares :smiling:Comment
-
Lovely job Andrew!Comment
-
Thanks Tim. Glad you're liking it.
Thanks Jim. Very glad indeed. I think it might have to taken 5 or 6 sessions and maybe more.... whilst it was a pain not being able to get a couple of good runs at them, at least they had the chance to properly set between sessions and so I didn't lift a single one off whilst adding more.
Thanks Bob! Glad you're enjoying it!!!!
ATB.
AndrewComment
-
Andrew, White Seven and Yellow Four are the Bomb!!! You should be very proud of these two as they truly represent their Historical forebears. Well done my friend and a Tip 'O the Hat to you. :thumb2: :thumb2:Comment
-
Hi all
So after a week away last week, I managed to get some more done last weekend and during the week, meaning I'm nearing the finish line.
Last weekend I applied the black over the sides and the fuselage crosses on Yellow 4 plus some exhaust soot on both.
Thanks to Ian M for suggest Vallejo Game Wash as an option for soot and AlanG for advice on the colour - to quote: "Luftwaffe aircraft had oily brown stains due to the fuel used coming from coal-oil. Where as allied aircraft had a grey colour due to the high lead octane levels" - therefore I used black, sepia and burnt umber @ 2:1:1, which I think looked ok but needs a bit more experimentation.
The soot is more obvious on the blue one because I used that to experiment with....plus it's merged a with the camo too, which makes it look wider than it actually is. On Yellow 4 it shows up less in part because I was bit more restrained but also because of the darker wing roots.
I also applied some light pin washes over the undercarriage and wheel well using my homebrew off black/brown. It's fairly subtle so it's not that noticeable but I didn't want to go over the top but it is a bit more obvious in real life
ACW as usual.
Andrew


Comment
-
Looking good,getting close to the finish line .Comment

Comment