If this is your first visit, be sure to
check out the FAQ by clicking the
link above. You may have to register
before you can post: click the register link above to proceed. To start viewing messages,
select the forum that you want to visit from the selection below.
That old bevel engine does look so much nicer though, I reckon. Bit lacking in performance and reliability compared to the newer one nevertheless...
Nick
Originally posted by Snowman
Hi ya!
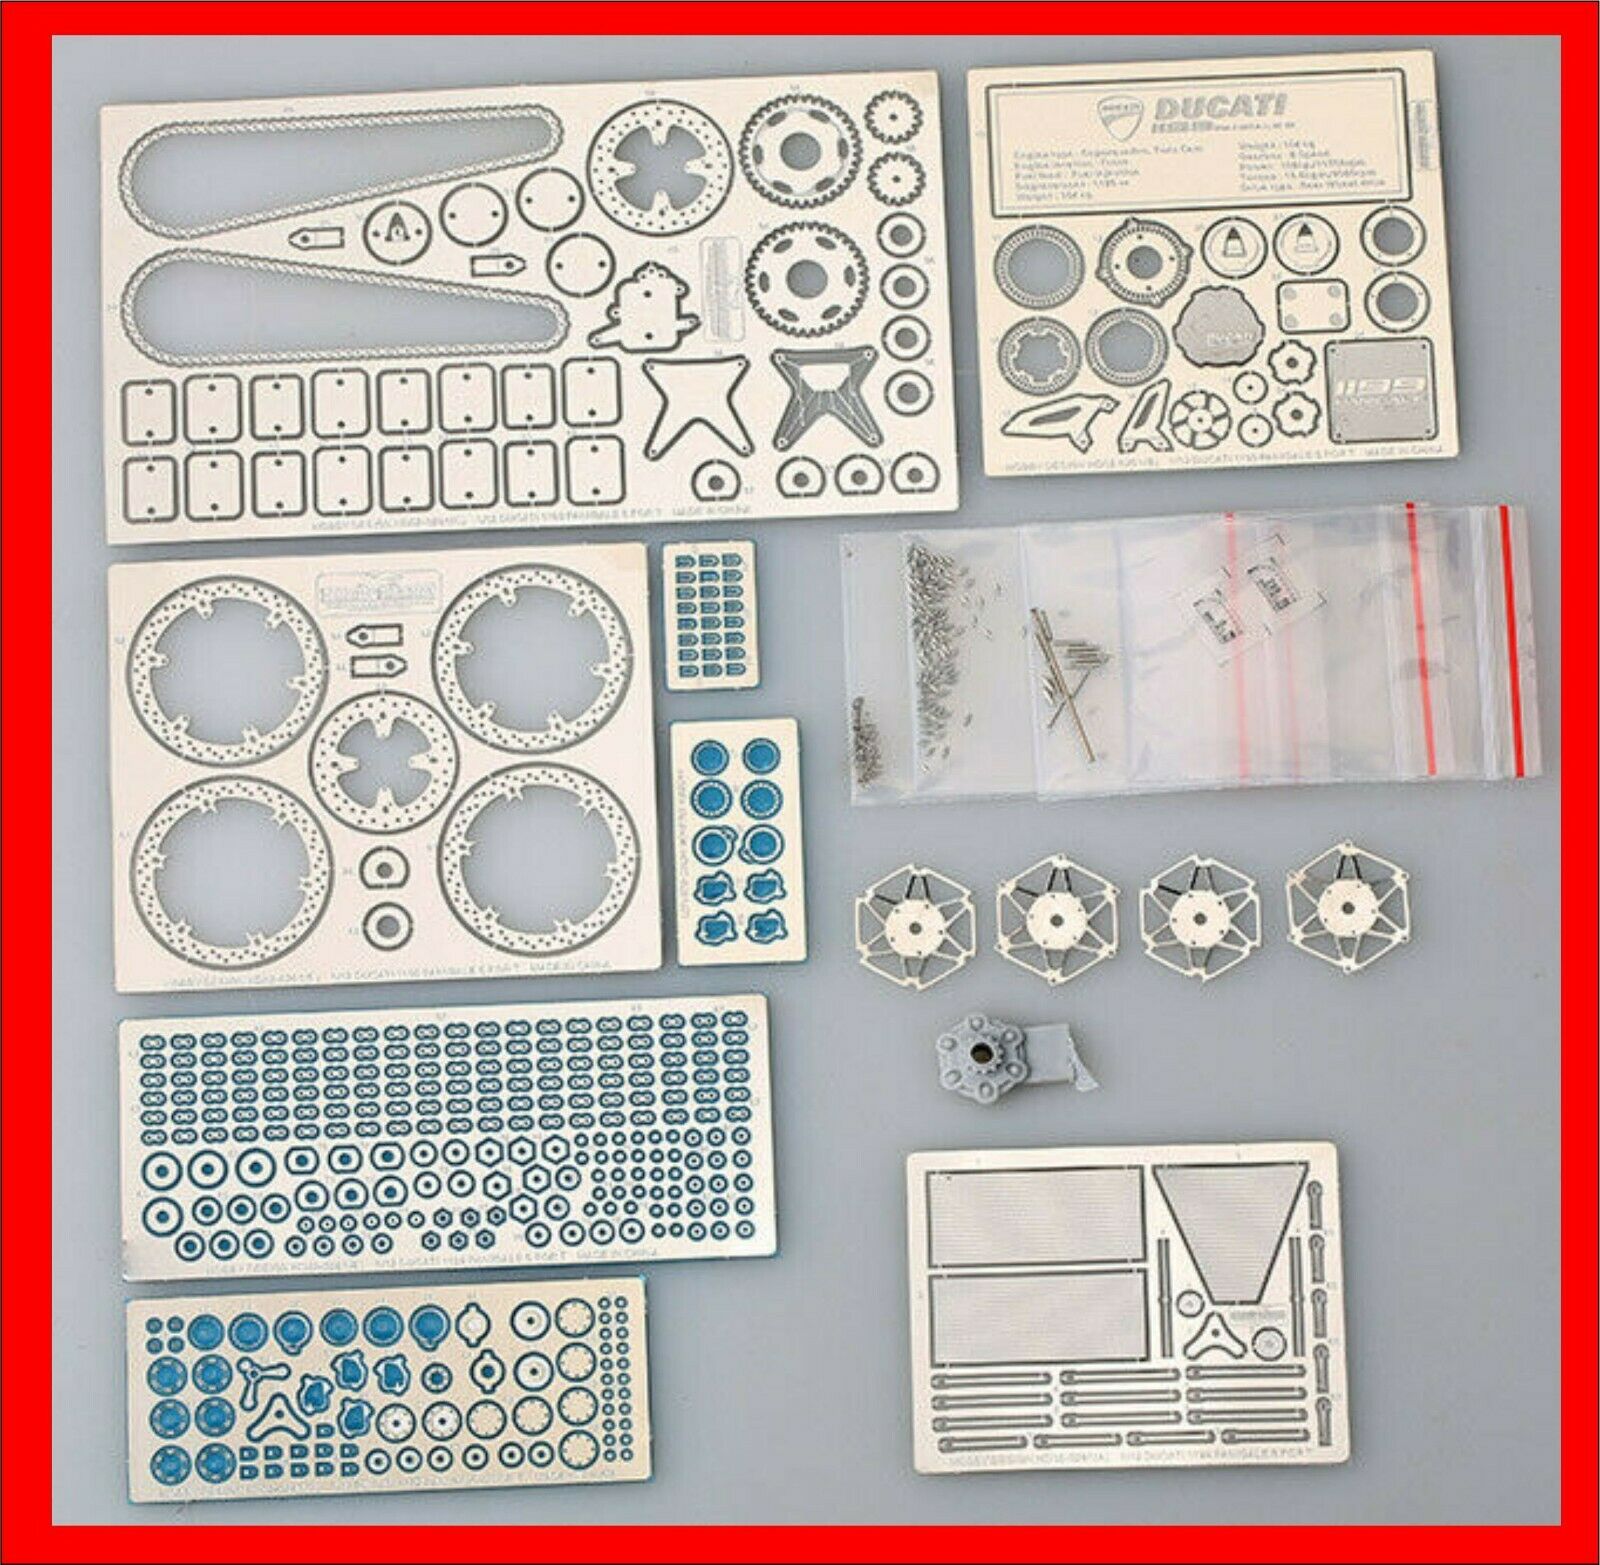
Made a start on the 1199 engine.
OMG, its world apart from the old 900SS / NCR bevel heads! Those old engines were comparable to lawnmower engines in terms of construction and complexity!:astonished:
Here is an image of the NCR's engine...
[ATTACH=CONFIG]n1169349[/ATTACH]
And here is an image of the 1199's engine!
[ATTACH=CONFIG]n1169350[/ATTACH]
Onwards and upwards, till next time!
Thanks for watching
What did you use on the bell mouths? And cam covers?
The temptation was too great, I couldn't help myself.........
All that wonderful detail!
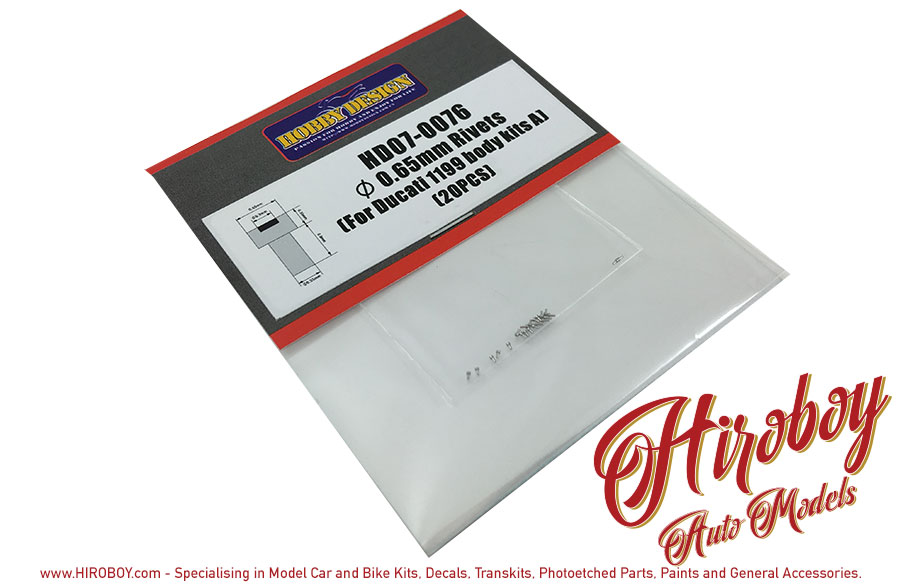
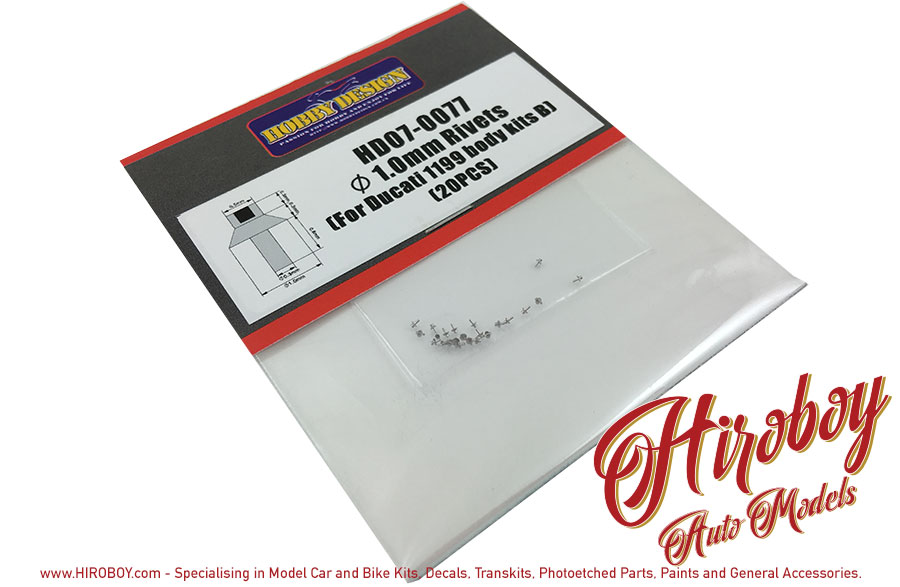
After looking at my build, I noticed that Tamiya did not even bother with moulding the fairing screw heads, they had given me were decals!! The HORROR!:flushed:
So, I promptly started searching for suitable rivets at your usual suspects, but to no avail.:disappointed: They are as rare as chickens teeth.:tired:
Then I happen to stumble across a front fork kit and and a Hobby Design PE kit, oh really.....:thinking:
So, following my shocking discovery with regards to the application of decals for fixings and contrary to my opening statement, I have now procured aftermarket bits....:astonished:
I'm sorry for misleading you, but initially that was not the route I intended, I blame Tamiya, so there!
Looking great Gavin. Bike kits always seem like you are building a real one :thumb2:
For the fairing screws, would something like Peco track pins (used in model railways) work? They are very fine, made of blackened steel, and are readily available. Failing that, lace making pins would be useful. They are available in a wide range of head and shank sizes, though being brass they’d need to be blackened. I used to use them for all sorts of jobs on 1/76.2 scale model railways.
I did try some guy out in Phoenix Arizona, Mac’s Modeling, LLC, he apparently had the bits I was looking for.
As such I’m still awaiting a response to my request.
Plan B was to use T2M (Tuner Model Manufactory) parts that seem to be only available in OZ, via ebay. I place an order for those as a back up as it was the closest I could find.
eBay
[HEADING=2]T2M 0.7mm Rivets for Rims (Drilled Type) T2M-1061 | eBay[/HEADING]
T2M 0.7mm Rivets for Rims (Drilled Type) T2M-1061 (SKU: T2M-1061). Manufacturer: T2M (Tuner Model Manufactory). All orders are wrapped very carefully before dispatch. Product Type / Brief Info International Money Orders or Checks are Not accepted.
Unfortunately or fortunately, depending on how you view it, I have succumb to the “need for detail”. I was so hoping to avoid it, but that proved to be a “bridge too far”.
I have searched high and low for the rivet screws to replace the evil decals and I finally happened upon a guy online, "Mac" of Macsmodeling.com in Phoenix Arizona.
Bish, bosh, bash. good price and decent postage and they have finally arrived!
Now I have to get myself in gear and get building!
Hi all, it's been a while.
The modelling has been side lined by life's demands but I managed to make a start on the disc brakes and have now assembled one front brake hub.
I need my head read, I forgot just how small and fiddly the bits were, but the results speak for themselves and justify my decision to head down this rabbit hole.
Well here are some images showing the the assembly process and the plastic part that is to be replaced.
I now need to assemble the second front hub and the rear hub, airbrush satin black prior to fitting the disc brake PE.
Finally decided to put down some colour on my Ducati build and did some impromptu experimenting with the Alclad colours, using a flat black base before applying the dark aluminium for the engine block and applying the gloss black base before the bright silver candy base then the candy red. I'm really chuffed with the results.
Thanks for looking!
Just had a catch up wth your build Gavin, looking very nice indeed. Having just built the Kawasaki H2 with the Hobby Desgin PE kit I know the struggles of putting the multi part brake assemblies together. I'm also chuckling to myself as I know you have the chain to go as well.
Just had a catch up wth your build Gavin, looking very nice indeed. Having just built the Kawasaki H2 with the Hobby Desgin PE kit I know the struggles of putting the multi part break assemblies together. I'm also chuckling to myself as I know you have the chain to go as well. :smiling3:
Hi ya, yeah I still have flash backs from my NCR build! :cold-sweat:


Comment