

-
-
Morning John
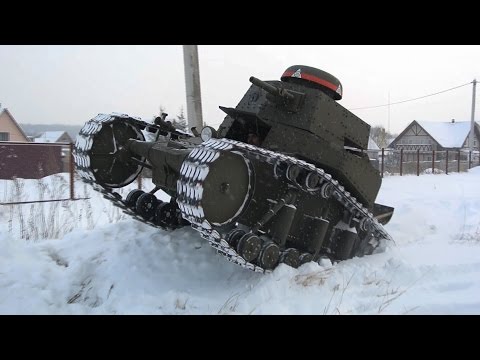
You may find this interesting - scratch building in 1:1
Blasts around in snow towards the end which gives some good reference of where the snow collects
Comment
-
Figures are coming on
Wired one arm so can get a hand in a part of the stuck tank.
Only 4 , but as only 2 crew per tank .
Filler to be applied when all dry .
Before doing that I started the base.
Into the attic again , returning with
This is after I'd cut that right hand end off . Spare section from the cave refurb.
Taking one frame .
Other makes and suppliers are available.
One section of insulation.
Front paper removed and a hole made.
.
Depth checked.
Exterior wall filler ,grey in colour, a little water, a dash of thinned PVA and some acrylic artists colour added.
Stir well
Colour is perfect for the Kursk area.
Then left outside in this beautiful day to dry.
A few cracks appeared later where the thickest filler was, these will easily fill later when the soil is added on to a PAV coat .
Those tracks .
.
Well for me the glues ok, might leave it a bit longer before attempting to fit. Fell apart in the middle as I had to feed it under the track guards support .
But other than that minor niggle pleased ..More practice will help .Comment
-
Great work JohnComment
-
Dude 2,
You are kind of losing me here John....Why the pics out of Frankenstein's dungeon??? The poor guys didn't have a chance under the knife, but are looking good…..
And what does making icing for your cake have to do with model building??? You should really wash that spatula handle as it looks pretty dirty. And why is there a dent in your cake??? Did you have the oven set to the wrong temp again???
Have you been sniffing the Rhodendron's again??? I warned you about that Buddy!!!
Coat on, door found...……………..
Prost
Dude 1Life's to short to be a sheep...Comment
-
do not like the look of your sandwich spread :thinking:Comment
-
I’m just glad he clarified that brown splodge is paint and not something scavenged from the garden! :surprised:Comment
-
That reminds me - I must have a peanut butter sandwich for tea tonitie :smiling5: :smiling:
Great update JR. Looks like you have been very busy. Keep at it mateComment
-
John,
This might work for you when assembling the tracks assemble them on masking tape on the sticky side. Run the glue into the gaps then wrap them around the wheels and sprockets the tape will support them while they form and dry.Comment
-
Flicking through the pictures I wondered what the heck you were doing with Lee Armstrong's footprint!Comment
-
Right, thanks for the abuse from certain quarters, expected and enjoyed :smiling: Dude 1 and Rivet( Mr Jones )
Lee, thank you buddy .
Dude 1, the knife handle in modern parlance has a patinia to it, and there fore has to be left intact to retain the look and feel of the item in question.
The cake icing was doing well until a large bluebottle attempted to land on it .At this point I attacked the bluebottle with a hammer , thus the dent !
Bob, that spread is very rich in natural ingredients, quite benifical to the elderly, very good poor for binding the output of the gut !
No that is coming later Simon :smiling::nerd:.
Comment
-
Right standby to be amazed or amused. :smiling2: possible both.
I took Paul's advice :thumb2::thumb2::thumb2::thumb2::thumb2:and used the tape method, that was fun fighting with a length of tape the wrong side up and trying to untangle one hand while sticking another section of tape with the other hand to the first.
Getting that done was exciting , the best was yet to come.
I managed to stick 30 odd track links down and applied glue to the section !
The only problem I had was some of the links hadn't glued very well. now you could blame me, but reading what Simon said about cleaning them up and the size I think I did quite well.
I don't think If I had put the top section on as the distructions said I would have got any tracks on,will be interesting to see hoe Simon gets on.
The few that came apart had to be glued on the model , this proved to be awkward as you had to feed in the two pin into the 3 pin, its a good job the glue allowed some movement, but I still had to revert to CA to do it quickly.
Used cooper wire for some of the handles, the others were to small . lost one and found another that would do. These had to go on the back of that PE , so CA again. Normally I glue the tweezers to the part, this time it was the whole bottle to my hand, the CA ran down the out side and of course I didn't see it until too late.:disappointed:
The right good eye has been troubling me this week, I had been able to do some work with out the optivisor, but the last few days its been oop: have to keep blinking to clear it.
With out more ado
You can see the miss fitting links, just over from front wheel.
Good job I didn't use the black glue ! Jut can see the where I've been
That gap above the doors is due to the fact that I fitted that damned section of PE before I fitted the top , had I done it the other way the gap would be gone. As it was I had to hack a section off the rear top before I could even get the top part forward.
Suppose I should put in some filler, but to tell the truth I just can't be bothered anymore. Each time I attempt to build a kit there is a part that defeats me and it end up looking a mess.
The only thing I really enjoy is the buildings and the diorama.
John.Comment
-
Pm sent :nerd:Comment


Comment