Scale Model Shop

Collapse

"Easy Pickins" 200mm diorama, Normandy, WWII

Collapse
X
 
  • Time
  • Show
Clear All
new posts
  • Steve Ski
    • Jul 2024
    • 222

    #31
    Whiskey and Wine Barrels


    Since I’m not in the mood to work the base ground work yet I’ve worked the tree trunk for more texture and started making barrels. I’m going to make everything that I’ve got listed for the lean-to before doing any of the ground work. I plan on having chains, ropes, metal gears and pulleys, saws, hammers, sledge hammers, axes, shovels, brooms, rakes, etc. This will be a storage lean-to/work shop or open storage shed.

    Trying to find something that was a close size for a wine barrel was a slight challenge until I found an older rattle can that would fit almost perfectly. I’ve got a few wine barrels and an old whiskey barrel here at the Ranchito, so getting the dimensions was no problem. I matched them up against the Ranger figure to get an idea as to whether they would be in scale and they are.

    Before starting on these I watched a few vids on YT to get the basics, and off I went. I used pine strips for the larger barrel lid and body, but the whiskey barrel required a more flexible material, balsa wood. After cutting the strips to a reasonable width I pinched them with needle nose pliers every 3/16ths to ¼ inch to create the subtle curves. The pine was a little dicey at times, but the balsa wood was easy to manipulate. Each strip needs to be tapered top and bottom to account for the barrel width at each end, so they were sanded slightly to accommodate the difference.
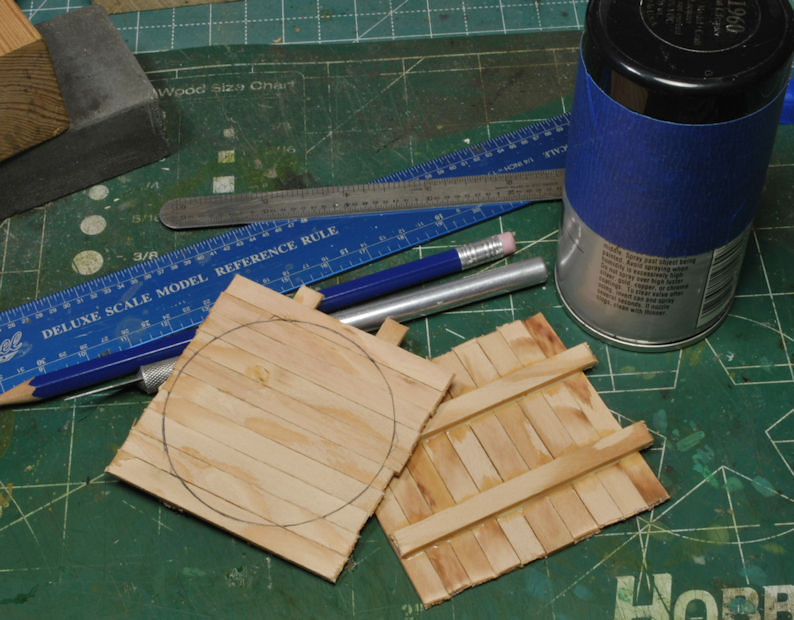
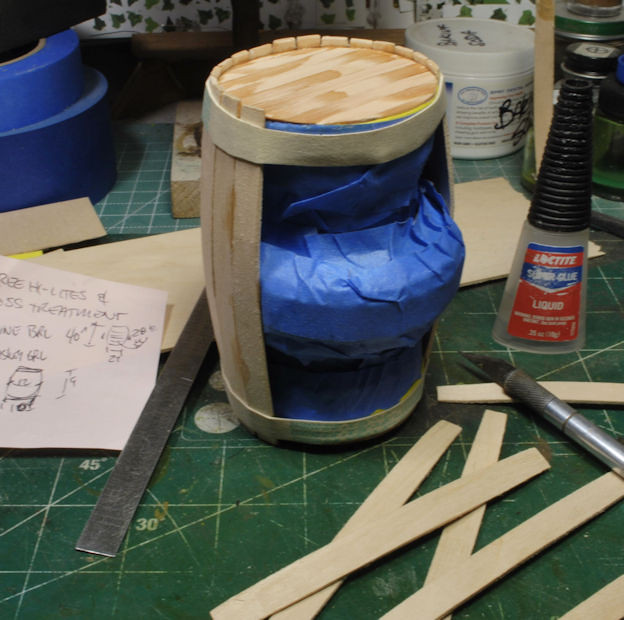

    As you can see, I wrapped the rattle can with some flexible yellow foam and blue tape to get the middle width. The same process was used on the wooden dowel used for the whiskey barrel. I applied super glue and got started applying the strips. Once you get a few in place the rest are easy to keep proper alignment. Then cut and sand the ends, you’re done.
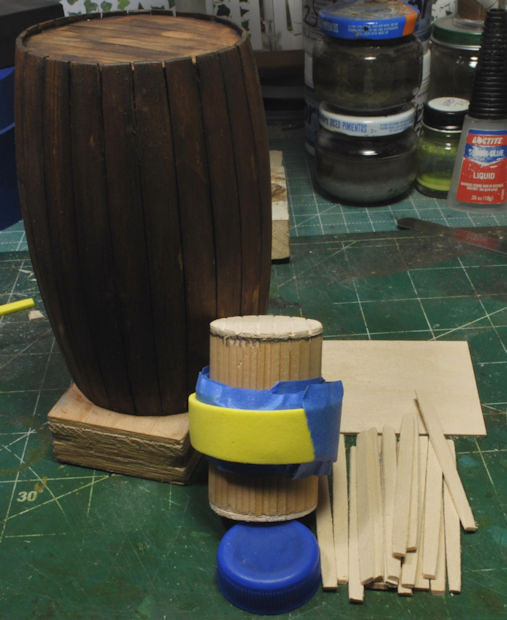
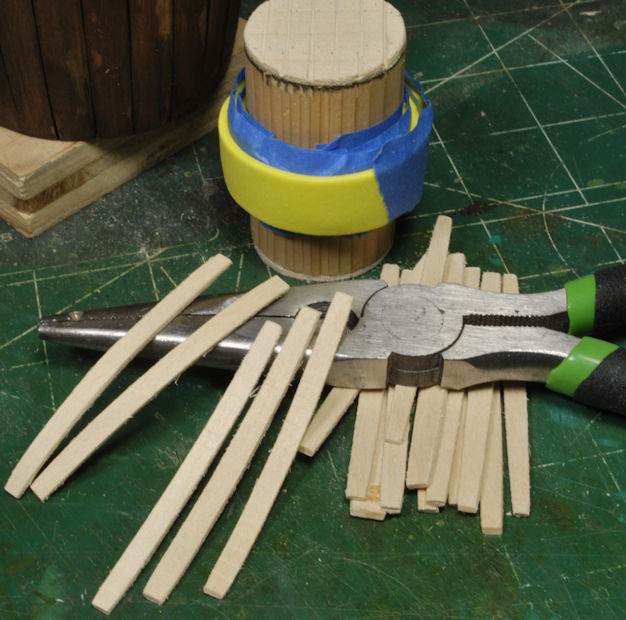

    At first I was thinking of using copper sheet cut to width for the barrel straps, but sheet styrene was much easier to work and manipulate. I followed the wine barrel strap pattern that is present on the ones I have, same for the whiskey barrel. I used oils for the barrel colors and placed pin washes in between the slats before applying the straps. This gave clarity and depth to the overall look.
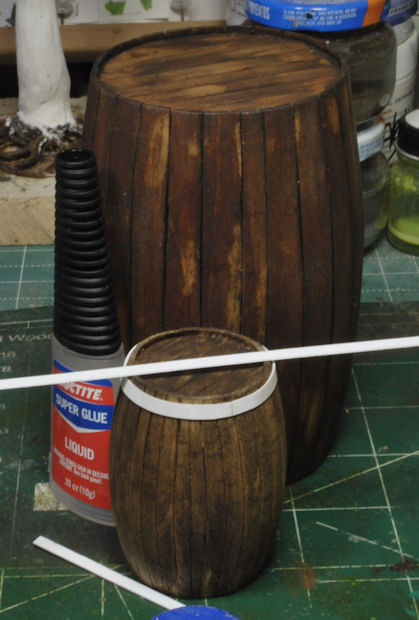
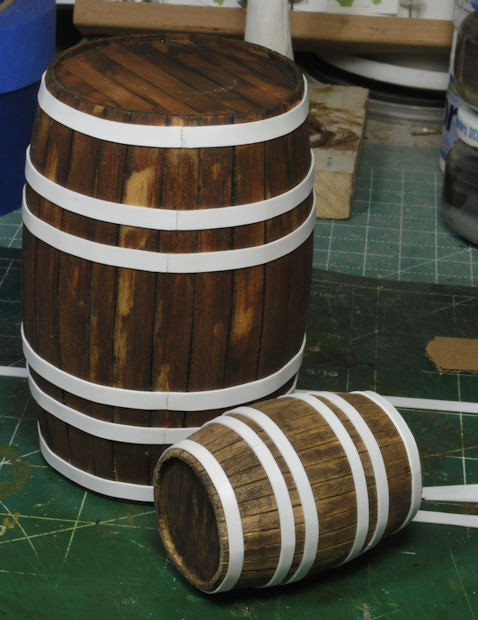

    Once the straps were in place I primed them with Floquil primer and painted them with Tamiya Metallic Grey XF-56. This is very close to the galvanized color tone on my barrel straps, but I have no idea if this is even close to what was used in France in the 40’s. I also made the huge nails, or pegs, that hold the straps at the joints. None of my barrels have any nails on the straps other than at the joints, but I added them here for character and interest to each strap. They are widely spaced, so it won’t look too overdone.
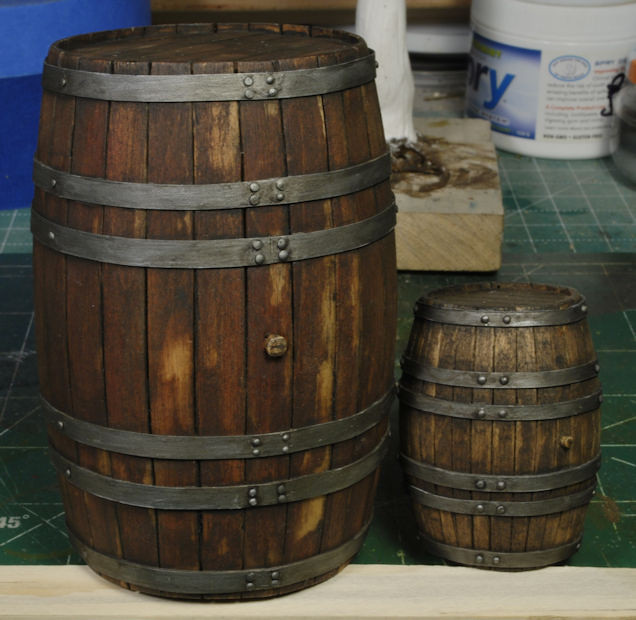
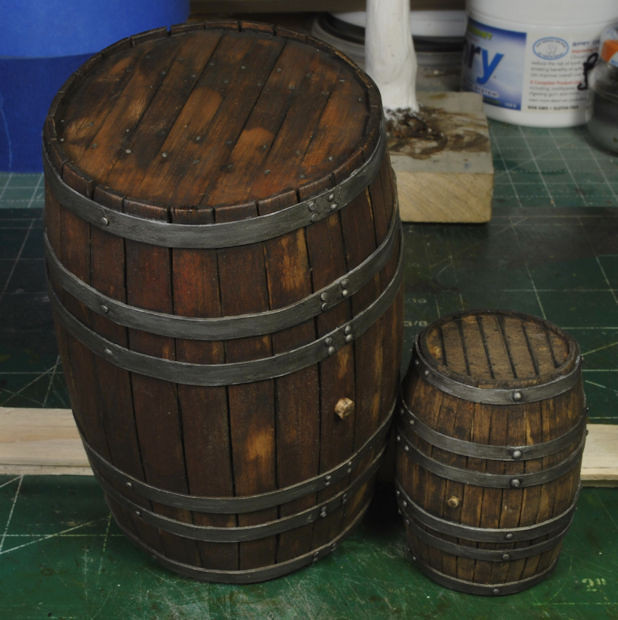

    After the straps were painted the each got a pin wash with oils for depth and to cover any light spots against the barrel. Lastly, the cork, or peg was installed and painted. I plan to make these very dusty as if in storage or neglected for years, but I’m not sure if there will be any old rust anywhere on the straps. I still need to research that. Also, I may add a very small amount of moss build-up at the base of each, using Migs enamels, but I’m still undecided.


    Any comments or questions, holler, and thanks for watchin.

    Cheers, Ski.
    Give Blood, Play Rugby, cause everyone knows football is for whimps!

    Comment

    • scottie3158
      SMF Supporters
      • Apr 2018
      • 14199
      • Paul
      • Holbeach

      #32
      Superb!

      Comment

      • Jack L
        SMF Supporters
        • Jul 2018
        • 1270
        • Cheltenham

        #33
        Originally posted by Steve Ski
        Whiskey and Wine Barrels


        Since I’m not in the mood to work the base ground work yet I’ve worked the tree trunk for more texture and started making barrels. I’m going to make everything that I’ve got listed for the lean-to before doing any of the ground work. I plan on having chains, ropes, metal gears and pulleys, saws, hammers, sledge hammers, axes, shovels, brooms, rakes, etc. This will be a storage lean-to/work shop or open storage shed.

        Trying to find something that was a close size for a wine barrel was a slight challenge until I found an older rattle can that would fit almost perfectly. I’ve got a few wine barrels and an old whiskey barrel here at the Ranchito, so getting the dimensions was no problem. I matched them up against the Ranger figure to get an idea as to whether they would be in scale and they are.

        Before starting on these I watched a few vids on YT to get the basics, and off I went. I used pine strips for the larger barrel lid and body, but the whiskey barrel required a more flexible material, balsa wood. After cutting the strips to a reasonable width I pinched them with needle nose pliers every 3/16ths to ¼ inch to create the subtle curves. The pine was a little dicey at times, but the balsa wood was easy to manipulate. Each strip needs to be tapered top and bottom to account for the barrel width at each end, so they were sanded slightly to accommodate the difference.


        As you can see, I wrapped the rattle can with some flexible yellow foam and blue tape to get the middle width. The same process was used on the wooden dowel used for the whiskey barrel. I applied super glue and got started applying the strips. Once you get a few in place the rest are easy to keep proper alignment. Then cut and sand the ends, you’re done.


        At first I was thinking of using copper sheet cut to width for the barrel straps, but sheet styrene was much easier to work and manipulate. I followed the wine barrel strap pattern that is present on the ones I have, same for the whiskey barrel. I used oils for the barrel colors and placed pin washes in between the slats before applying the straps. This gave clarity and depth to the overall look.


        Once the straps were in place I primed them with Floquil primer and painted them with Tamiya Metallic Grey XF-56. This is very close to the galvanized color tone on my barrel straps, but I have no idea if this is even close to what was used in France in the 40’s. I also made the huge nails, or pegs, that hold the straps at the joints. None of my barrels have any nails on the straps other than at the joints, but I added them here for character and interest to each strap. They are widely spaced, so it won’t look too overdone.


        After the straps were painted the each got a pin wash with oils for depth and to cover any light spots against the barrel. Lastly, the cork, or peg was installed and painted. I plan to make these very dusty as if in storage or neglected for years, but I’m not sure if there will be any old rust anywhere on the straps. I still need to research that. Also, I may add a very small amount of moss build-up at the base of each, using Migs enamels, but I’m still undecided.


        Any comments or questions, holler, and thanks for watchin.

        Cheers, Ski.
        What?!?!?! Next level witchcraft!

        Comment

        • Stefee
          SMF Supporters
          • Feb 2023
          • 780

          #34
          Those barrels are simply sublime, the only disappointment is you didn't tell us what you have filled them with - purely medicinal I'm sure......... :smiling2:
          Seriously though, the skill and believability you diorama makers on this site have is mind boggling.

          Comment

          • Neil Merryweather
            SMF Supporters
            • Dec 2018
            • 5182
            • London

            #35
            Brilliant!

            Comment

            • Mark1
              • Apr 2021
              • 4156

              #36
              Nice work on them barrels

              Comment

              • A_J_Rimmer
                SMF Supporters
                • May 2024
                • 801
                • Arnold
                • North Wales

                #37
                Superb work doesn't even cover it Steve, I love the detailed thinking that's you're putting into this build - little touches like worrying if the Ranger had a line of sight the the four Germans. Excellent stuff.

                I've seen your work before on SPAM, so it's great to see you on these boards as well.
                Arnold Judas Rimmer BSc SSc

                ''Happiness is a Triple Fried Egg Sandwich with Chilli Sauce and Chutney''

                Comment

                • Waspie
                  • Mar 2023
                  • 3488
                  • Doug
                  • Fraggle Rock

                  #38
                  Loving the casks. Now my question. Would that be 15 or 25 year old Whiskey???
                  That is quite some skill you're lucky enough to have there Steve.

                  Comment

                  • JR
                    • May 2015
                    • 18273

                    #39
                    Originally posted by stillp
                    I had to google Caspia. Does it have a common name?
                    Pete
                    Excuse me Steve, Limonium Bellidfolium. Pete. Also known as Sea Lavender.

                    Comment

                    • JR
                      • May 2015
                      • 18273

                      #40
                      Great work with the detailing Steve, colour of those barrels looks spot on.

                      Comment

                      • john hutton
                        • Dec 2020
                        • 211

                        #41
                        Wow Steve,
                        Glad i happened to turn up 10 years down the line, this is right up my street, i do love Z75. plus large scale figures to go with it ( which look damned good, i might add) . Excellent paint jobs , especially like the Camo work on the 2 wearing smocks. Building structure will be a very nice feature. Love the gardening work also, then you produce a stunning finale to this part of the thread with those scratch build barrels. This will be one Hell of a Diorama Matey.

                        Comment

                        • Steve Ski
                          • Jul 2024
                          • 222

                          #42
                          Originally posted by scottie3158
                          Superb!
                          Thanks, Paul!
                          Originally posted by Jack L
                          What?!?!?! Next level witchcraft!
                          Na, no sorcery, just A+B=C, or something like that
                          Originally posted by Neil Merryweather
                          Brilliant!
                          Tanks, Neil!!!
                          Originally posted by Mark1
                          Nice work on them barrels
                          Thank you, Mark.
                          Originally posted by A_J_Rimmer
                          Superb work doesn't even cover it Steve, I love the detailed thinking that's you're putting into this build - little touches like worrying if the Ranger had a line of sight the the four Germans. Excellent stuff.

                          I've seen your work before on SPAM, so it's great to see you on these boards as well.
                          Thanks, Arnold. Ya, a lot goes into making a convincing scene, but therein lies the fun of it.
                          Originally posted by Waspie
                          Loving the casks. Now my question. Would that be 15 or 25 year old Whiskey???
                          That is quite some skill you're lucky enough to have there Steve.
                          Thanks, Doug. Yall know the Irish better than I, but I'm gonna bet it's good 'ol Bushmills! Who else would make such a big barrel for the best?
                          Originally posted by JR
                          Great work with the detailing Steve, colour of those barrels looks spot on.
                          Thanks, John. I recon since these should be old the color should have faded a bit, but I didn't take that into account. T'sall good, I'll dust em up plenty.
                          Originally posted by john hutton
                          Wow Steve,
                          Glad i happened to turn up 10 years down the line, this is right up my street, i do love Z75. plus large scale figures to go with it ( which look damned good, i might add) . Excellent paint jobs , especially like the Camo work on the 2 wearing smocks. Building structure will be a very nice feature. Love the gardening work also, then you produce a stunning finale to this part of the thread with those scratch build barrels. This will be one Hell of a Diorama Matey.
                          Thanks, John. I appreciate the kind words, Amigo. Once this beast is finished every dio from here on out will have a much, much smaller foot print. I love the larger scale figures, but creating a scenario with more than a few is taxing on space and the 'ol cabesa, but it sure is fun. HA!
                          Give Blood, Play Rugby, cause everyone knows football is for whimps!

                          Comment

                          • Steve Ski
                            • Jul 2024
                            • 222

                            #43
                            Building Up Accessories

                            I’ve been busy building accessories that would be commonly found in a work shed/lean-to and I have decided to make this part of a winery. I’m not going full blown-out crazy, there isn’t enough room to add too much, but I can give it that flavor. The Harley will be taking up a lot of space, so I’ll be adding just enough tools to add interest and keep the eyes moving throughout the scene as much as possible.

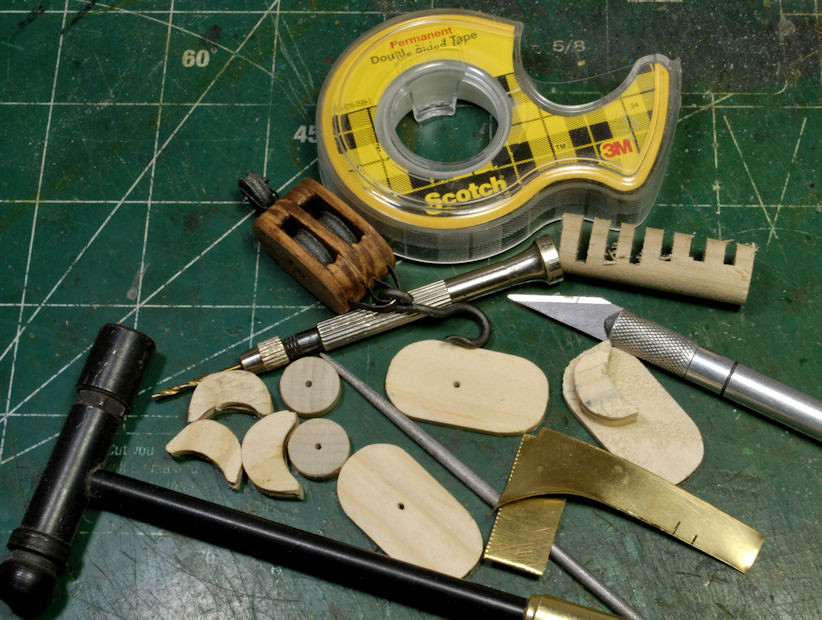
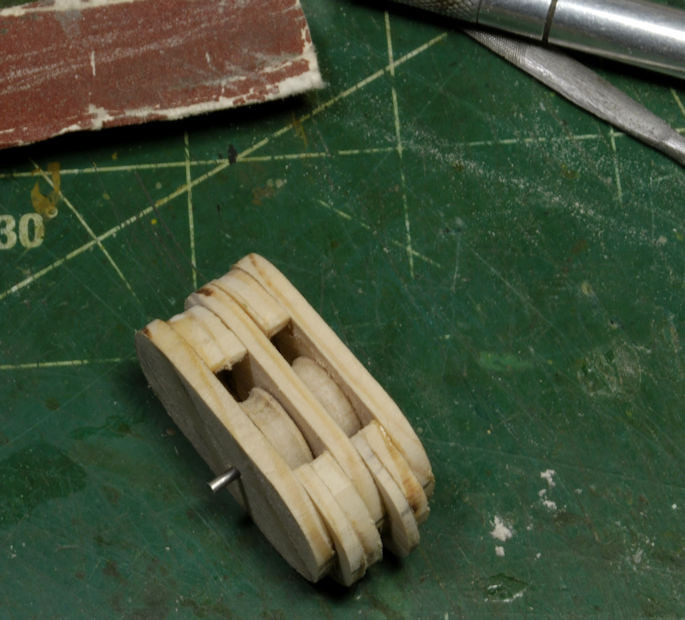
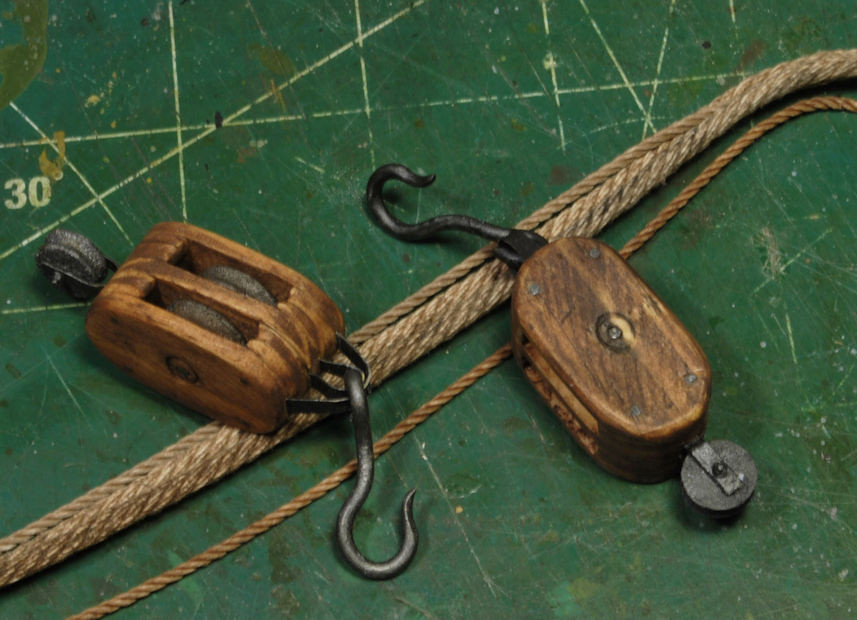
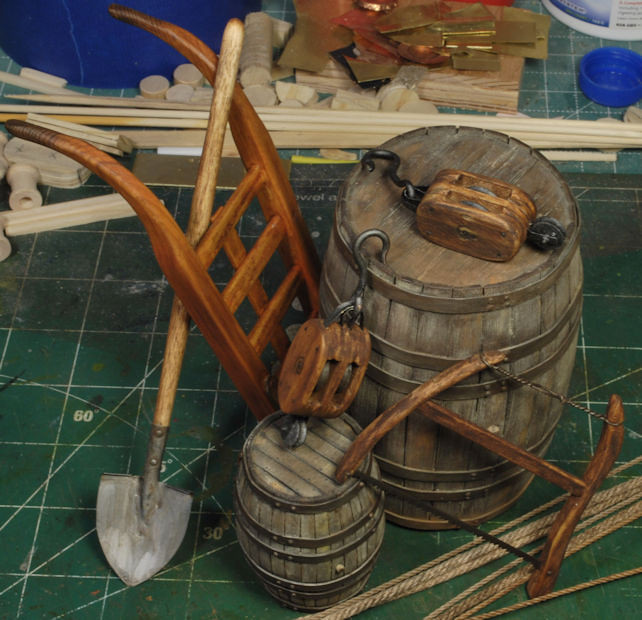
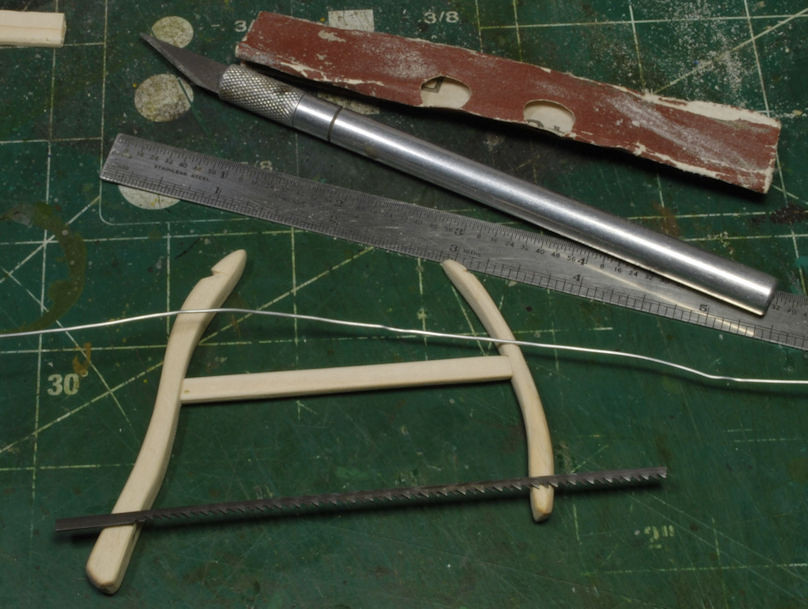
                            I built a buck saw using a broken scroll saw blade and wire with pine scrap as well as a few block and tackles. Looking on line once again at YT was a time saver, great tool. I’m still undecided how I will attach at least one of the B&T’s to the rafters, but the other will be on the deck.


                            Looking over some photos of B&T’s I was able to come up with a simple design that would be practical for my need and easy enough to make using scrap pine and brass sheet strips plus some 12ga copper wire for the hooks.


                            The rope for these B&T’s was first coated with water thinned Elmer’s Carpenter’s glue, then given a Burnt Umber oil wash to give it definition.


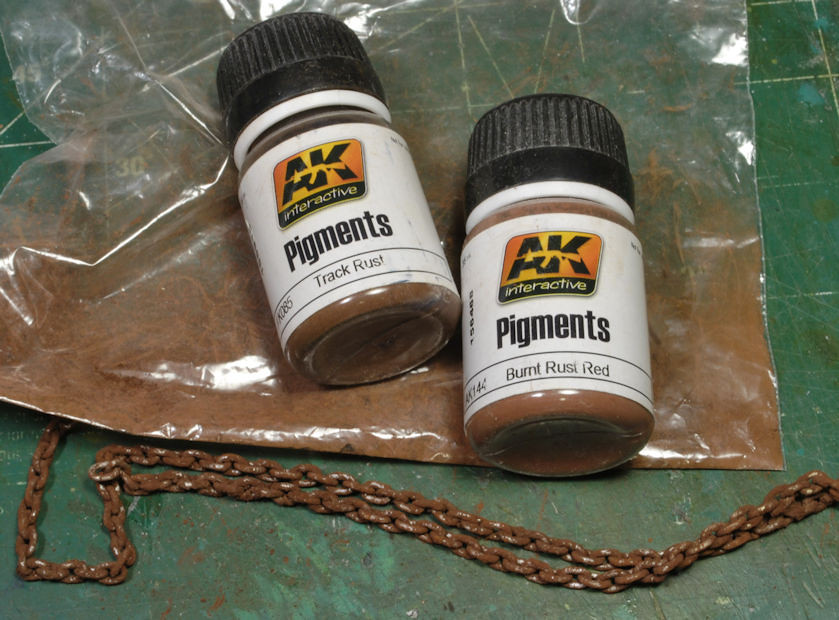
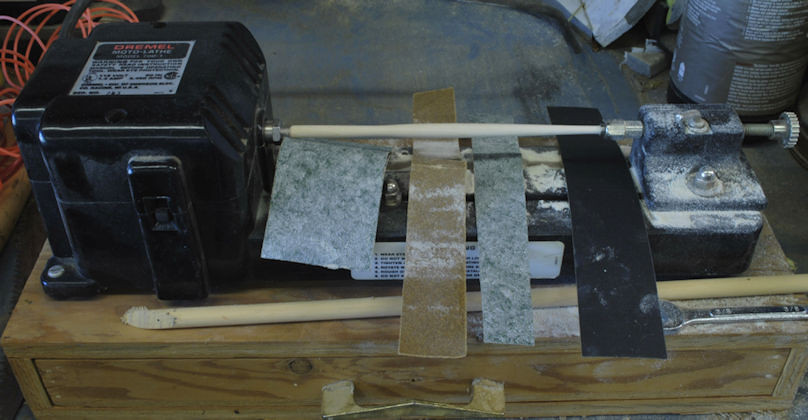
                            For the chain I used the old “shake and bake” method. Wet the cheap chain with black or Burnt Umber oil paints and drop into a sandwich bag with rust tone pigments, then shake it up. Once you pull the chain out of the bag give it a quick snap and most of the excess flies off. I’ll be going back over this chain with an old tooth brush to clean it up, touch up the rust tones, and finish it off. An old Dremel lathe was used to turn the shovel handle out of some dowel chunks. This unit is so weak it was easier to use the sand paper than try to turn it.


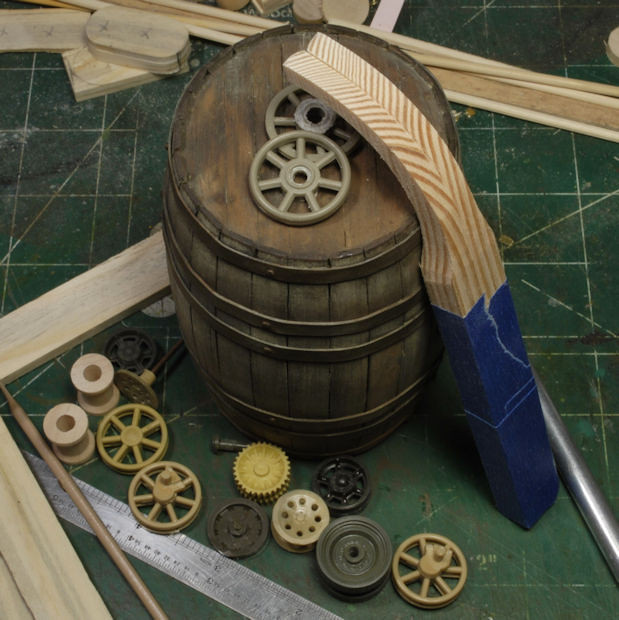
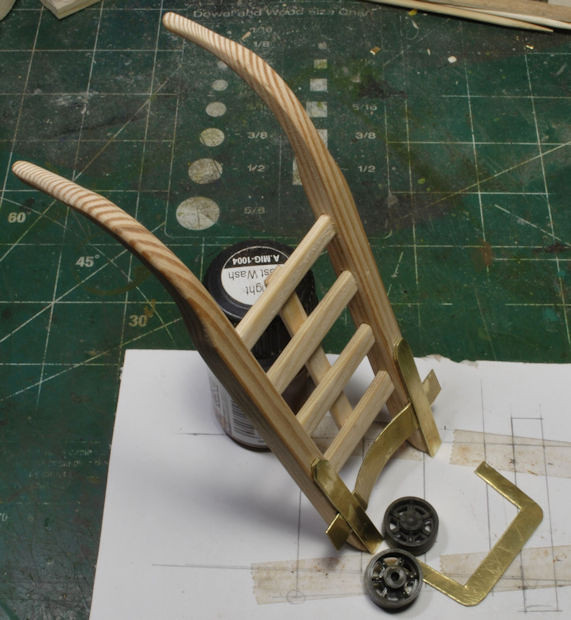
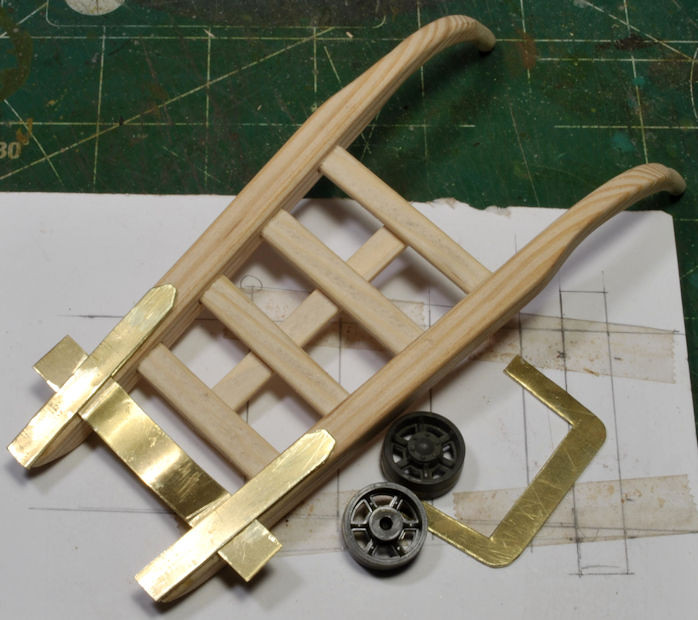
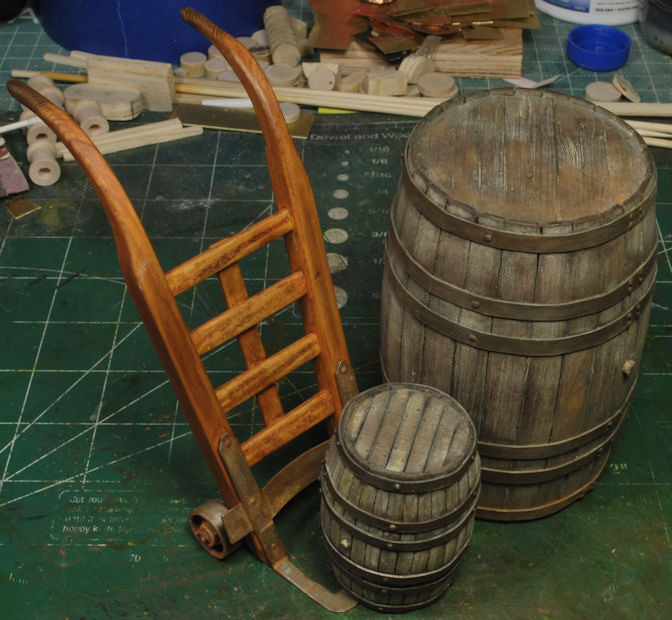
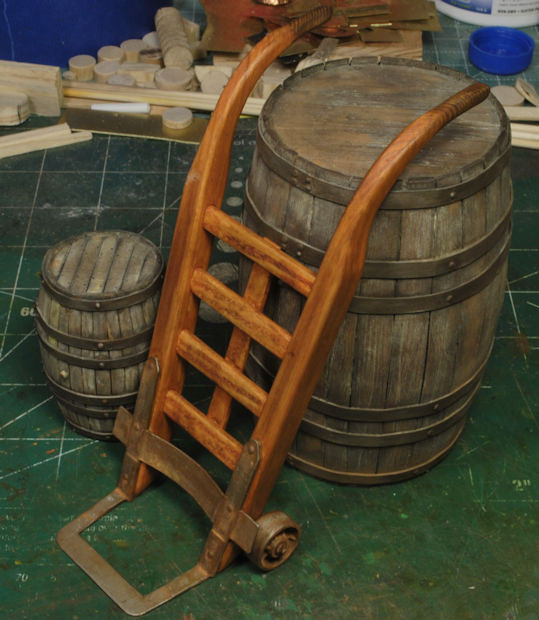
                            Next up, after weathering the wine barrel, I built a barrel dolly from pine scrape and shaped most of it on the belt sander. Cutting thicker sheet brass for the base and supports for the wheels was necessary. The wheels are rollers from a tank long ago scrapped and they were perfect for this purpose.


                            After making a grid pattern for the dolly layout it all went together rather quickly. I Dremel’d out the cross-member slots which made the assembly very sturdy. I soldered the base and support bars together before gluing the unit to the dolly frame. Then I followed up with pins down the supports to retain the brass base assembly.


                            Once the brass was primed I painted the metal parts and wheels with Tamiya’s Metallic Grey XF-56 and then painted the wood using Burnt Sienna oils. The standard rust and weathering applications were used to make the dolly look used and abused and now neglected.


                            So, with the major accessories made I will make a few more tools and give everything a good weathering. The dusting to mesh the accessories to the base will be the last step before securing each item in place.


                            More to follow soon and thanks for watchin. Cheers, Ski.
                            Give Blood, Play Rugby, cause everyone knows football is for whimps!

                            Comment

                            • Stefee
                              SMF Supporters
                              • Feb 2023
                              • 780

                              #44
                              Simply superb.

                              Comment

                              • scottie3158
                                SMF Supporters
                                • Apr 2018
                                • 14199
                                • Paul
                                • Holbeach

                                #45
                                Outstanding work.

                                Comment

                                Working...