
As you can see guys I’m having trouble with Webbing, any advice please

-
-
You mean trouble with getting he webbing neatly painted?
The long-term solution is to develop a steadier hand, which will come with practice.
In the short term, you can touch up the webbing: anywhere the webbing colour has gone over the uniform, paint the uniform’s colour over it again. This will likely be easier than painting the webbing itself, because you have the raised edge of the webbing to guide you — rather than having to try and keep your brush on the raised part, as you do when you’re painting the webbing itself. -
All I can add to Jakkos answer, is when painting it, have the hand holding the brush steadied somehow against the model & a very fine brush (I use a brush that's been 'trimmed' to just 2 bristles & it's like drawing with a fountain pen - plus, of course, magnification).
And to tidy up, do as Jakko says, overpaint with the uniform colour (plus, practice, practice and more practice!)Comment
-
There are several other things you can do Tyron. The first is pick a brush with a good sharp point. This needs to be big enough to do the job. OOOO type brushes simply do not hold enough paint. For a 1/35 figure like this I would use a number 1 sized brush.
The second thing is to dilute the paint until it flows well off the brush. Don’t use your sharp brush to mix the paint......you will quickly wreck the point. Use an older second quality brush.
When you get the paint to the right consistency, check it before painting on the model...... dip your good brush into the paint up to one third of the bristle depth. Once you’ve done this, unload the brush on a sheet of cartridge paper and test the flow. This step is important, it will stop the paint flooding off of the brush onto the model and give you control, only allowing paint to flow when you want it to.
Doing all of this may sound long winded, but it will give you much better brush control. it becomes second nature very quickly.
Once you have this off pat there are other things you can do to make the webbing “pop” off of the figure....outlining and highlighting being two of them. Get the brush control down first though, it is useful in so many ways.Comment
-
Thanks guys great advice as always, I’ll continue tomorrow and updateComment
-
As Tims and my posts portray - we all have differing ways of doing things, so personally, I'd find the way that suits yourself and work on your technique (I started off doing webbing on 1/72 scale, and just carried on into the 1/35 the same way, just bigger!)Comment
-
Hi Gerry, virtually all of my work is in 20mm or 28mm figures these days. I used OO and OOO brushes for years, but when I changed to a size 1 I found it so much easier. You get a much better paint reservour on the brush so the paint stays useably liquid for much longer. I find I can get far sharper results this way. Try it
Comment
-
Hi Tim, might have to try it out at some stage, but at the moment, I am getting reasonable results - heel irons, collar tabs and webbing done with the fountain pen style brush
(Photo for reference only)
Comment
-
I place the ball of my hand. thumb end on the worktop. Large finger next to index finger on the work top. Hand now in prone condition.
You can still roll the hand back & forwards. Keep the object being painted ridged on the work top or on a slight platform. I work with a mini custom built higher worktop on the normal work top.
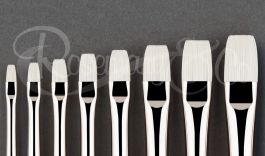
Best I find is a small as possible flat brush (see Rosmary Artist Brushes on line) as you have the option to use the point or flat.
Have a pallett with a spot of thinners that you are using in it. Have a pointed cotton bud which you can dip quickly into thinners (just a smidgeon) to wipe away misjudjments. Make sure the base paint has cured before painting webbing as the cotton bud will wipe that away.
Only have just enough paint on the brush to cover. Best not to flood as paint will go every where.
I use a small light to illuminate. If you have a head magnifier then that is invaluable.
Slow slow with patience drag the brush over the area to be painted.
Depending on scale after brushing webbing try a few areas with a slightly darker of lighter paint to give some realism.
LaurieComment
-
Size 0 or 1
Tip before using a brush dip it in water. this will keep the stock relativley free of paint & assist in cleaning.
Not super science decorators, good ones, have been using this procedure for donkey's years
LaurieComment
-
My aimComment
-
My realityComment
-
You're getting there - keep aiming high, don't knock yourself out if you can't do it within a week.
Word to the wise, with British Army, if you aren't putting the two 'ammo' pouches on the front, then no shoulder webbing straps as you can't fix it at the front - it goes from the two buckles at the back of the belt diagonally across, under the shoulder epatulett to a buckle at the top of the pouch, and the pouches link to the belt using brass wire 'clips' (on the back of the pouch - squeeze the belt to fit) - yes, I've assembled and worn some sets of it!Comment
-
In case you’re confused, this shows what Gerry means:

Comment

Comment