Scale Model Shop

Collapse

Paul's (tricky) Normandy Panthers in 1/35 & 1/16

Collapse
This topic is closed.
X
X
 
  • Time
  • Show
Clear All
new posts
  • tr1ckey66
    SMF Supporters
    • Mar 2009
    • 3592

    #31
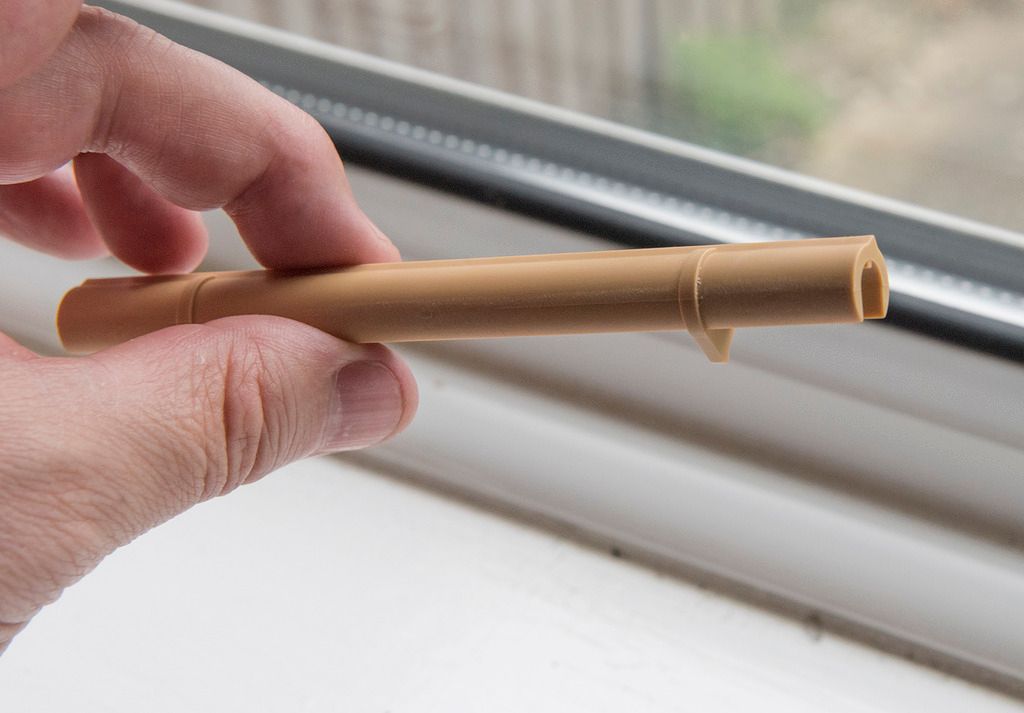
    Tube container for barrel cleaning rods and antenna


    This post was going to be about hull texture and Zimmerit, but the application of this coating requires knowing where the various brackets and clamps will be located. To do this I'll have to finish most of the photo etch first to ensure their positioning is correct.


    So...


    Today I finished the tube container found on the left hand hull side of most Panthers (crews of certain units moved theirs to the back of the rear deck). This tube was used to house the barrel cleaning rods and the antenna.


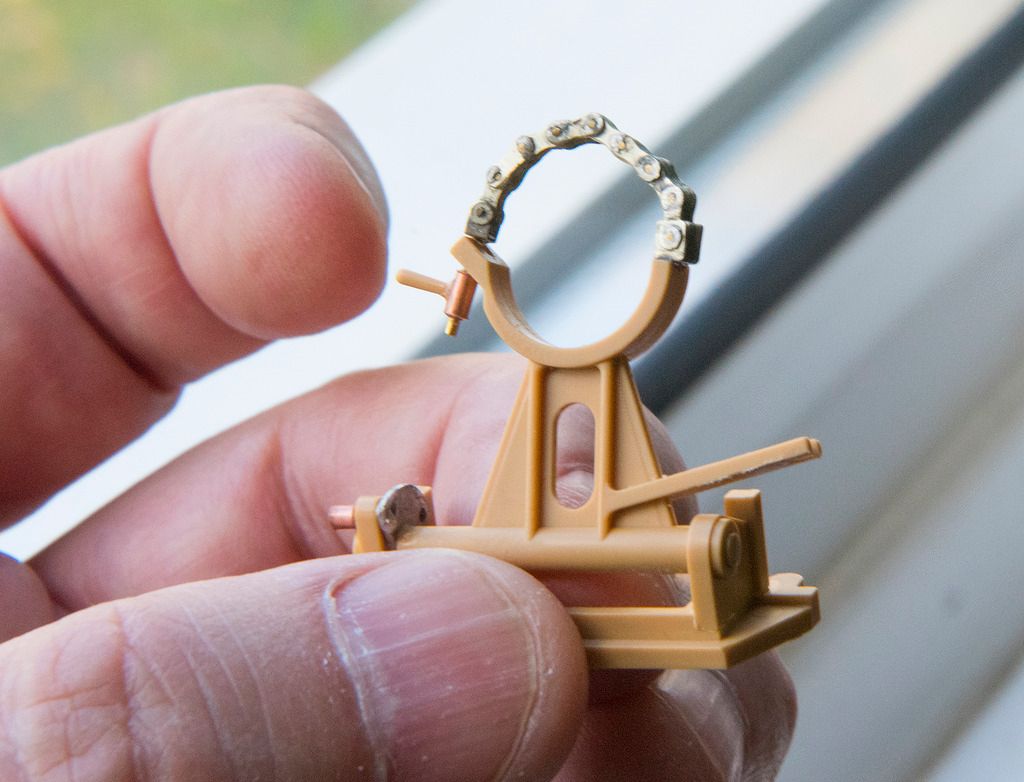
    This Aber photo etch set took another day of soldering but is, I think, infinitely better than the kit part. Again all the clasps work and although occasionally frustrating I think the extra work was really worth it.


    Here's a few pics...


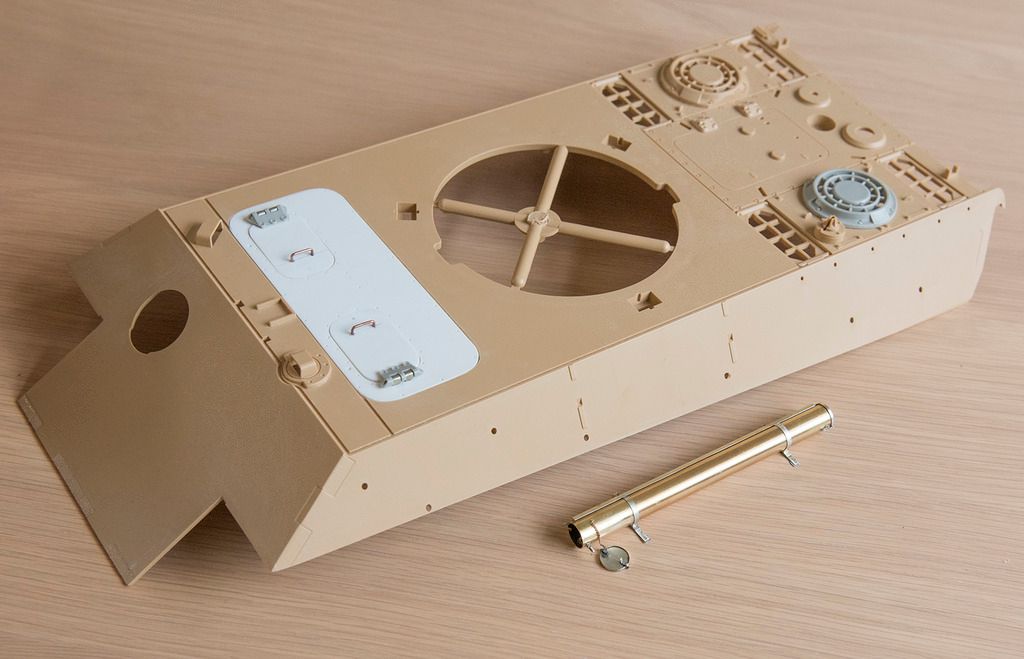
    The kit part for comparison...


    And the part below where it will eventually be positioned on the tank...


    Next...


    More soldering I'm afraid with tool brackets, fire extinguishers, jacks etc on the menu!


    Till next time


    Paul

    Comment

    • Guest

      #32
      That tube container is an absolute work of art Paul! You've got the skills to pay the bills

      Comment

      • tr1ckey66
        SMF Supporters
        • Mar 2009
        • 3592

        #33
        Thanks Patrick.


        The PE will take some weekends to complete but once that is done I think the build will progress rapidly.


        It's a great project.


        Cheers


        P

        Comment

        • tr1ckey66
          SMF Supporters
          • Mar 2009
          • 3592

          #34
          Tool Brackets


          The marathon soldering session continues!


          Finished the left hand hull tool bracket today. Well, almost! There's still a couple of retains pins and connecting chains to assemble. I'm also going to fashion a new shovel handle out of real wood a little later on in the build.


          Anyway here's the progress...


          Cheers


          Paul

          Comment

          • Guest

            #35
            Very neat indeed


            Bob

            Comment

            • Guest

              #36
              Really detailed build post Paul.

              Comment

              • monica
                • Oct 2013
                • 15169

                #37
                real do love the detail on this build,nice to see how it should look,

                Comment

                • tr1ckey66
                  SMF Supporters
                  • Mar 2009
                  • 3592

                  #38
                  Thanks guys


                  Should be an update tomorrow.


                  Paul

                  Comment

                  • Guest

                    #39
                    brilliant work mate, been off forum recently, the prolifereation of PE and AM make this into a stunning build

                    Comment

                    • tr1ckey66
                      SMF Supporters
                      • Mar 2009
                      • 3592

                      #40
                      Thanks John


                      I'm thinking that I'll build the majority of the PE before posting next as I think this could become really repetitive.


                      Thanks all for the support


                      P

                      Comment

                      • grumpa
                        • Jan 2015
                        • 6142

                        #41
                        WOW!

                        Comment

                        • Guest

                          #42
                          Cracking work and detail, looking forward to the next update.

                          Comment

                          • tr1ckey66
                            SMF Supporters
                            • Mar 2009
                            • 3592

                            #43
                            Small update on the Panther photo etch


                            Hi everyone, thought I'd post the progress on the RC Panther build. It doesn't look like much but the photographs really don't convey the amount of work and time that went into constructing these PE parts.


                            As always all the parts were soldered for strength including the chain for the gun crutch (which is comprised of over 60 parts all of which have to articulate!). Anyway, here's some shots...


                            General PE overview (note some parts have been partially primed).


                            Right hand tool bracket with photo etch fire extinguisher and scratch built crank starter handle.


                            Gun crutch with working chain...


                            URL=http://s1109.photobucket.com/user/tr1ckey66/media/Normandy%20Panther%20Builds/Gun%20Crutch%2002.jpg.html][/URL]


                            Another example with tiny split pin


                            It's slow but enjoyable progress and hopefully the final result will be worth the wait.


                            Thanks


                            P

                            Comment

                            • Guest

                              #44
                              Out freaking standing Paul some great PE work going on.

                              Comment

                              • monica
                                • Oct 2013
                                • 15169

                                #45
                                real well done with the PE,tool work Paul,do real like the detail they have,well done so far,

                                Comment

                                Working...