Just caught up on this one Bob and some great work going on. I really like the light you've added.

-
-
I am really enjoying this build. Like the idea with the light. Might have to try that on one of mine some day.
Isn't it a pain when after all that pre-shade work it does not show through. You might be able to save it by post shading. Add a tiny amount of yellow to the paint and gently spray the center of the panels. If it gets to over done, you can tie it back in with a mist coat of the green colour.
A very nice and tidy build.
btw: I use the same clips, but have attached them to bits of sprue. Still free but not a big risk of splinters
Comment
-
for my clip holders I use BBQ,sticks,
as Ian said,it is a shame that most of your per-shading is not pickup by the camera,or shows on the pics,
very nice job with the,over all spraying,and with that if I was doing some fading on it,I tend to use a aged white,1/2
that lightens it only by a shade or two,and use in the middle of the panels,and on the leading edges,where the sun
would hit most,so a little different that Ian,s way, 9_9Comment
-
Thanks Ian!
Thanks Ian and Monica,
Ill try out spruces with my clips, but the branches are very soft so those splinters dont really hurt for now.
As for post shading, well I wish I had read this earlier as I have already put in all the windows, and really dont want to mask them over now and airbrush over them. I have seen a few pics of this vehicle and know that it is usually kept in a clean condition, so I will try to reflect that.
My main goal for this one is to try out that light.
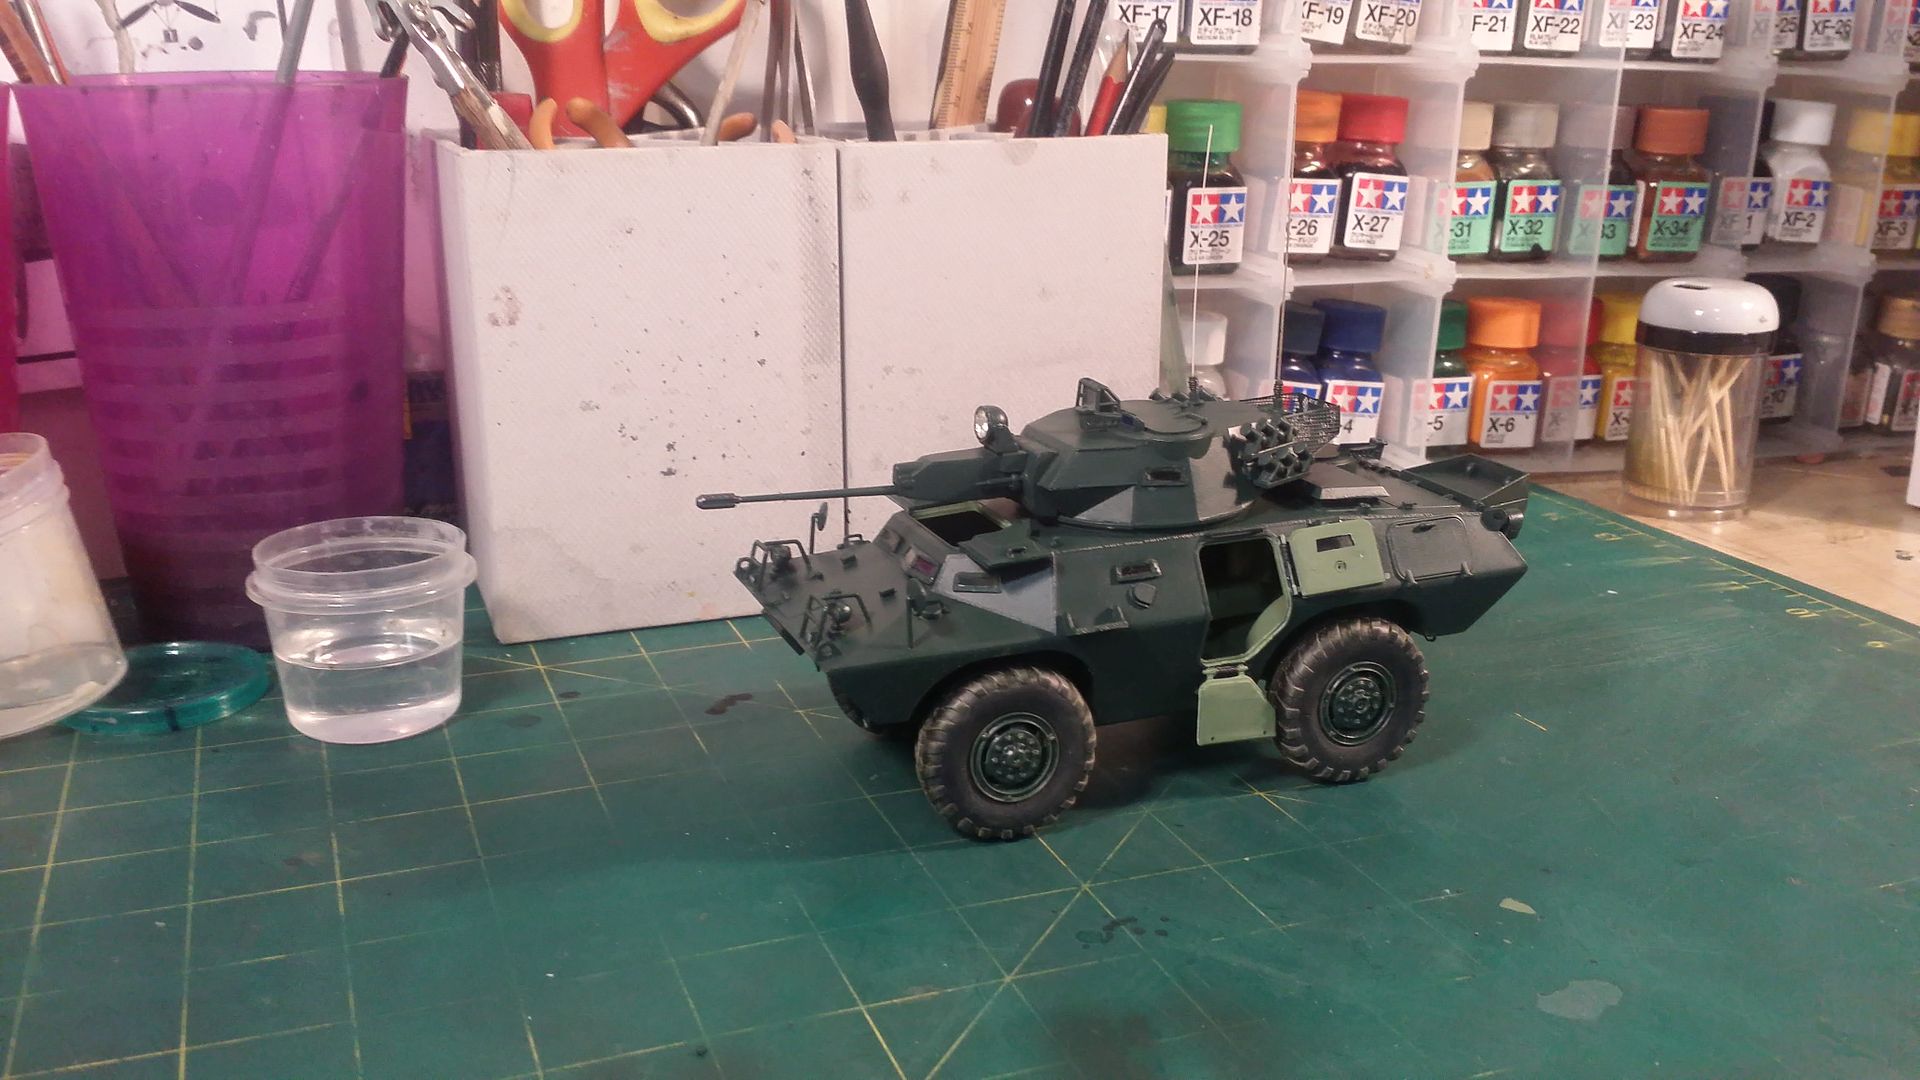
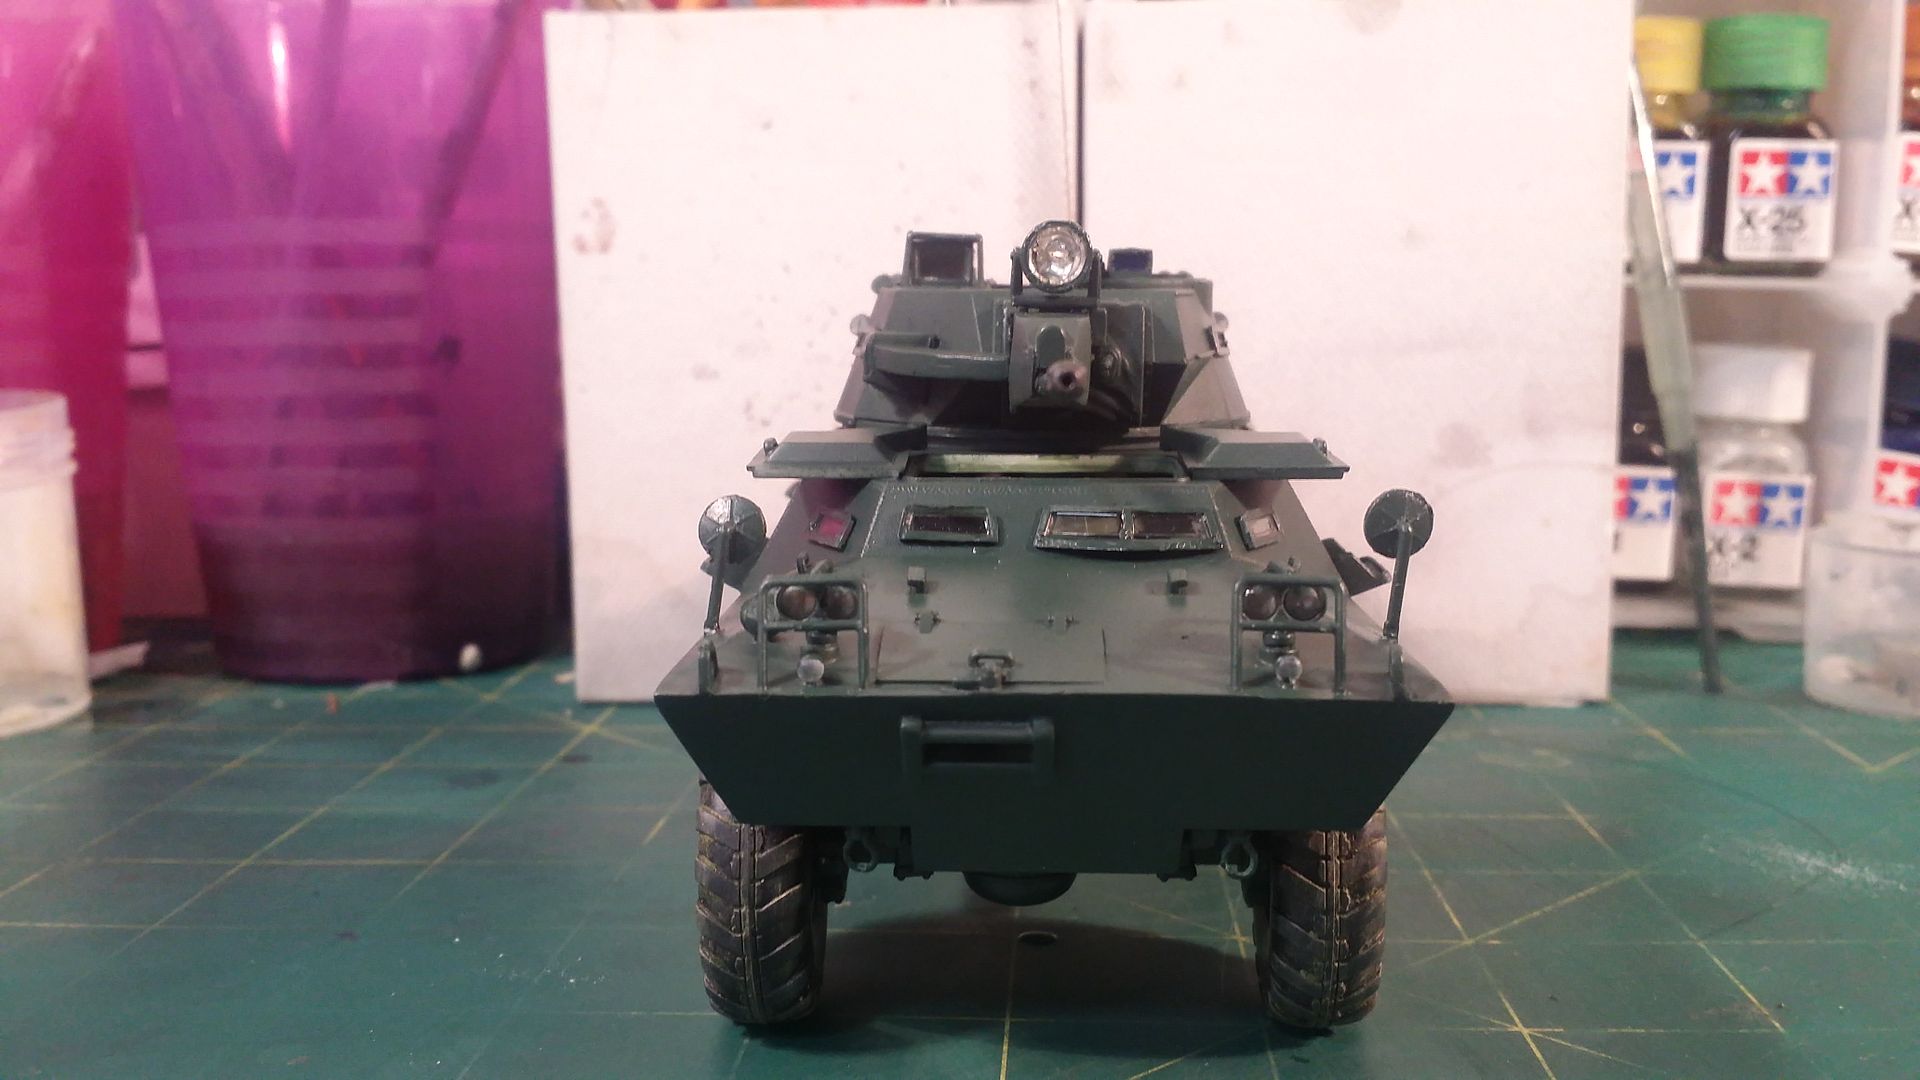
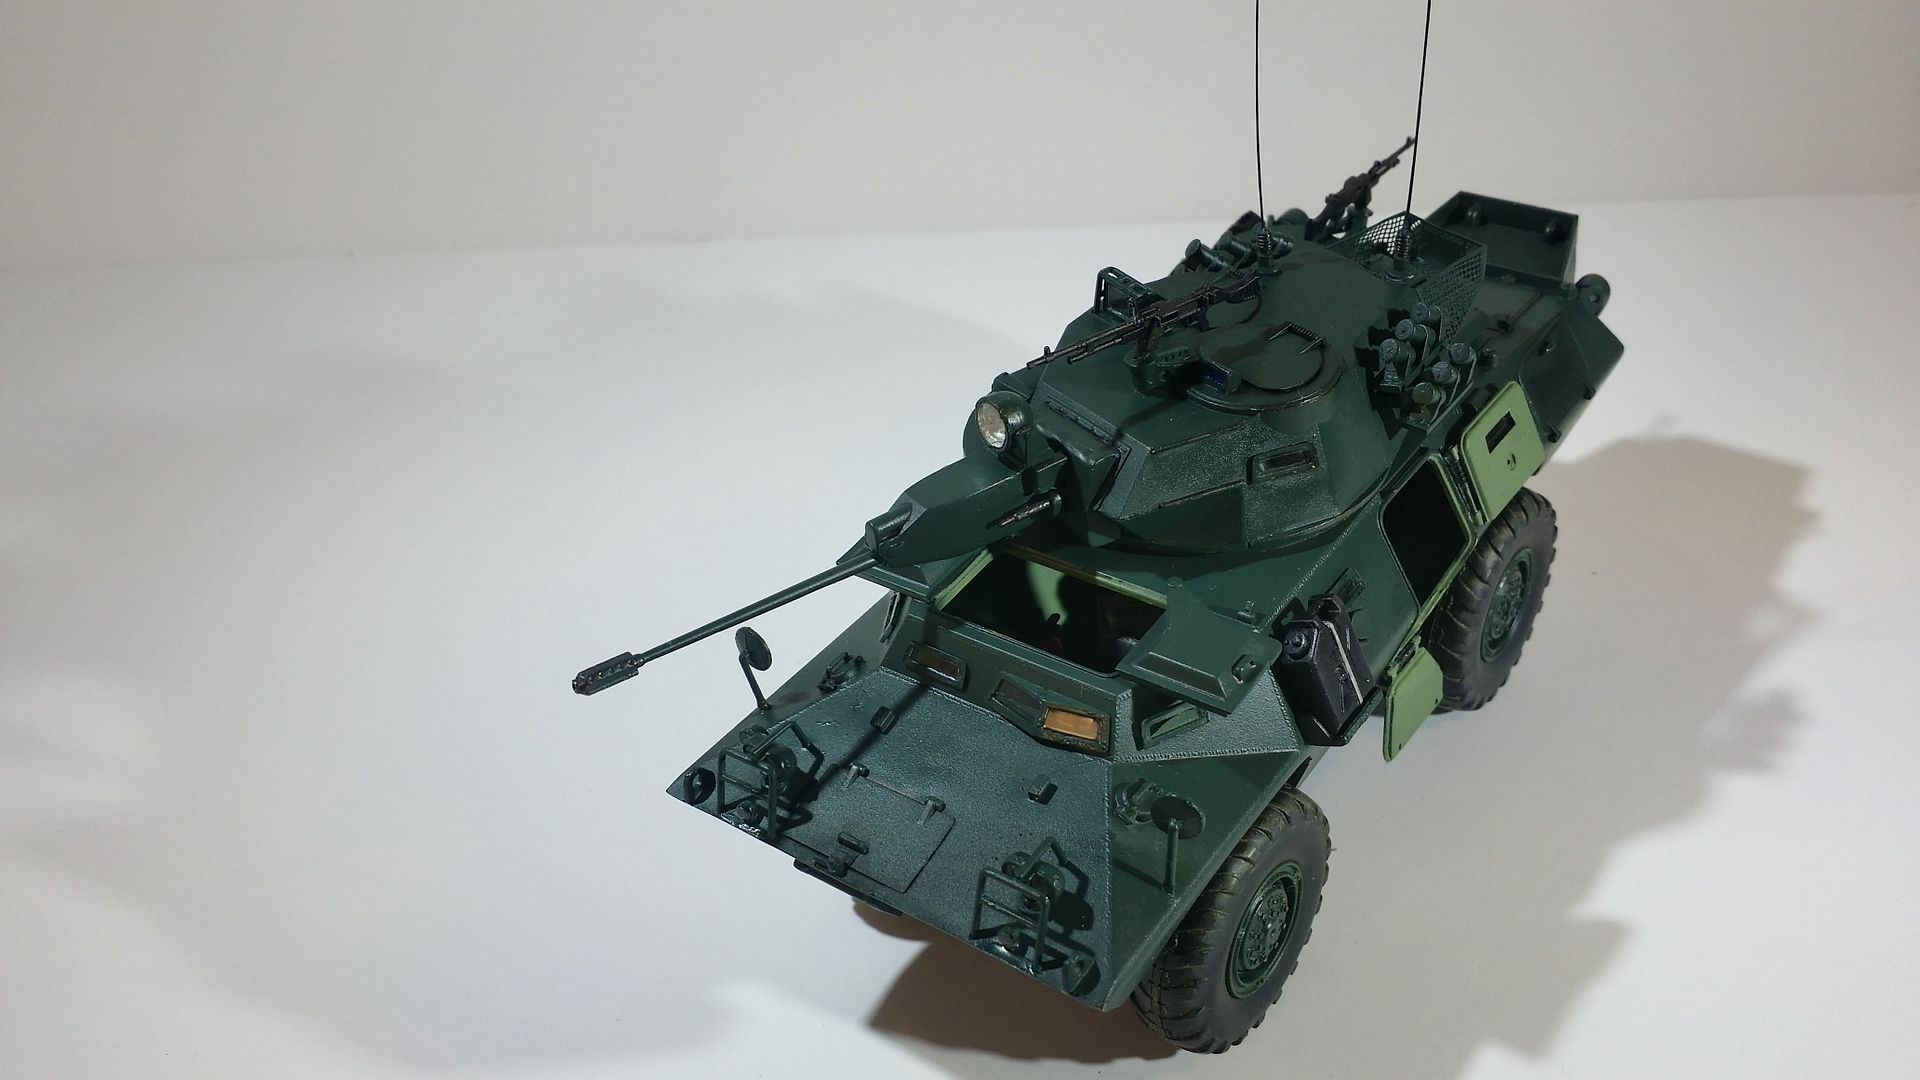
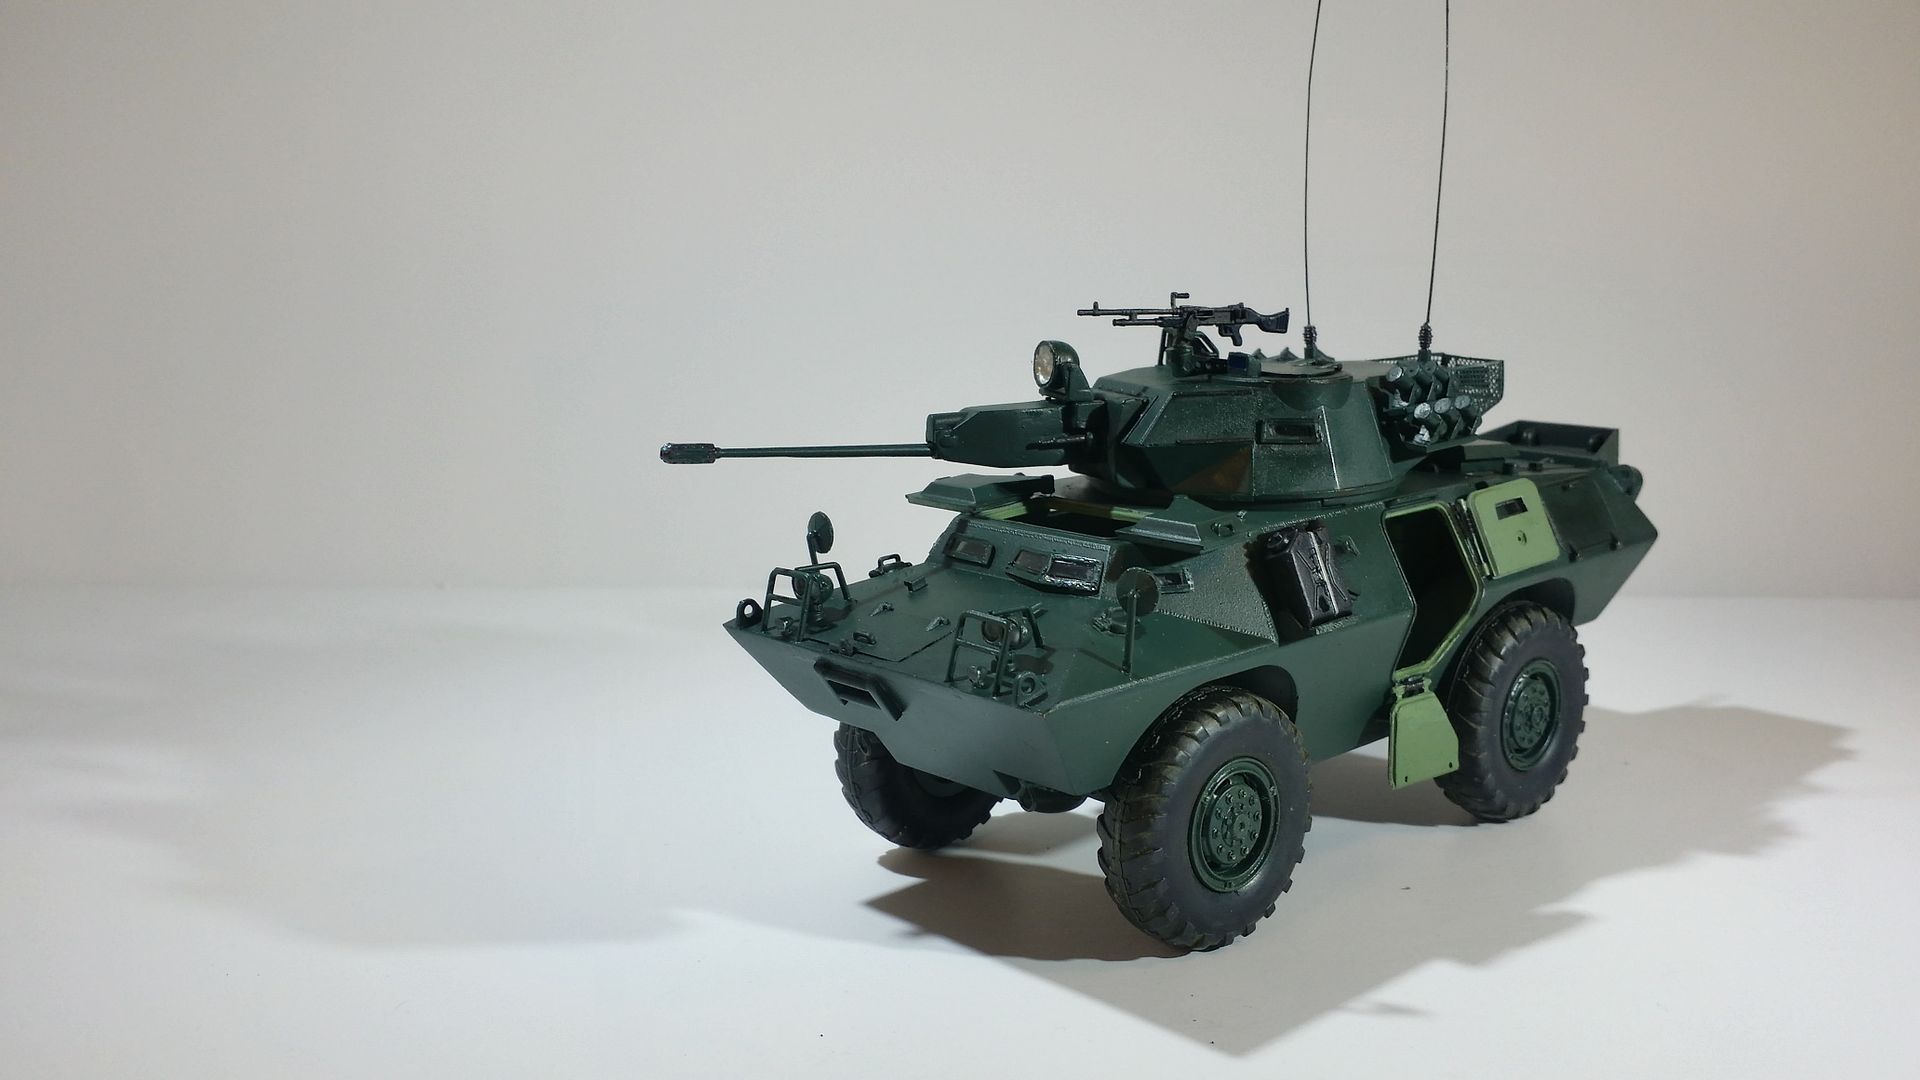
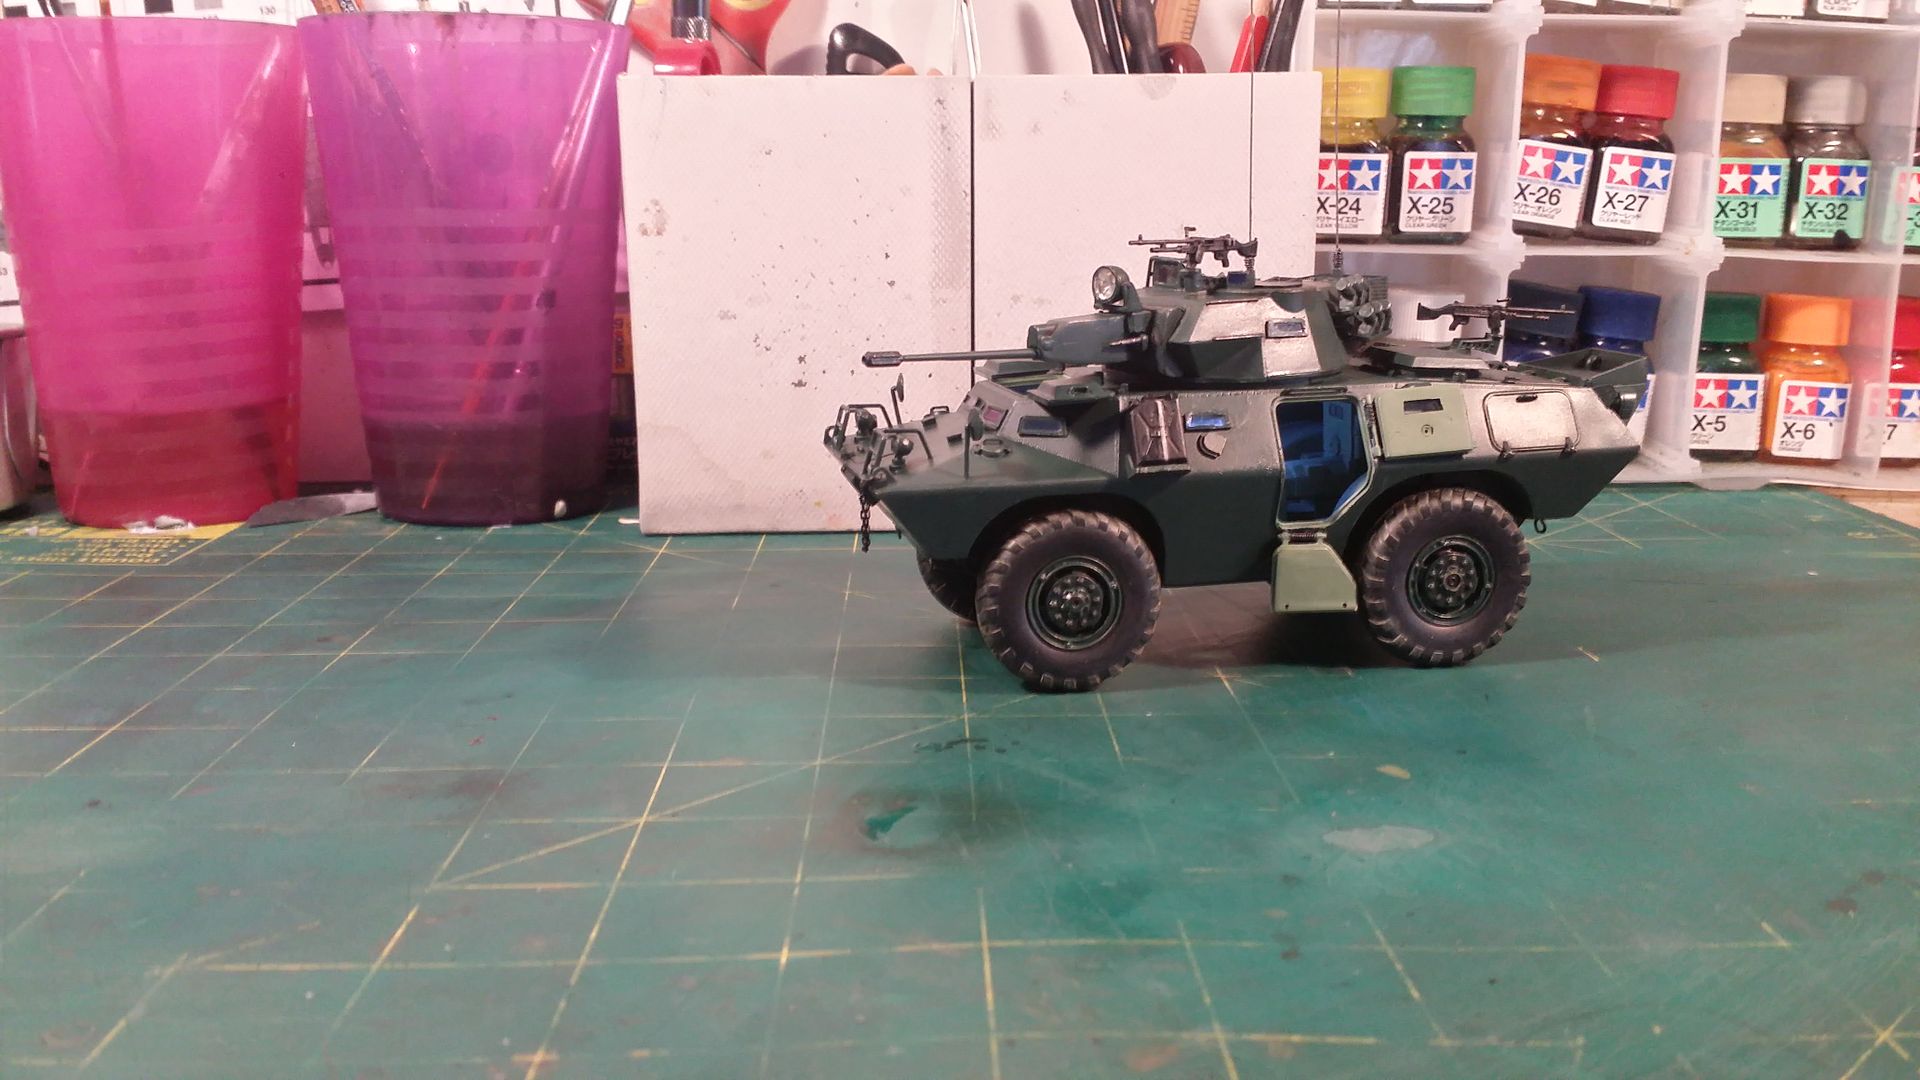
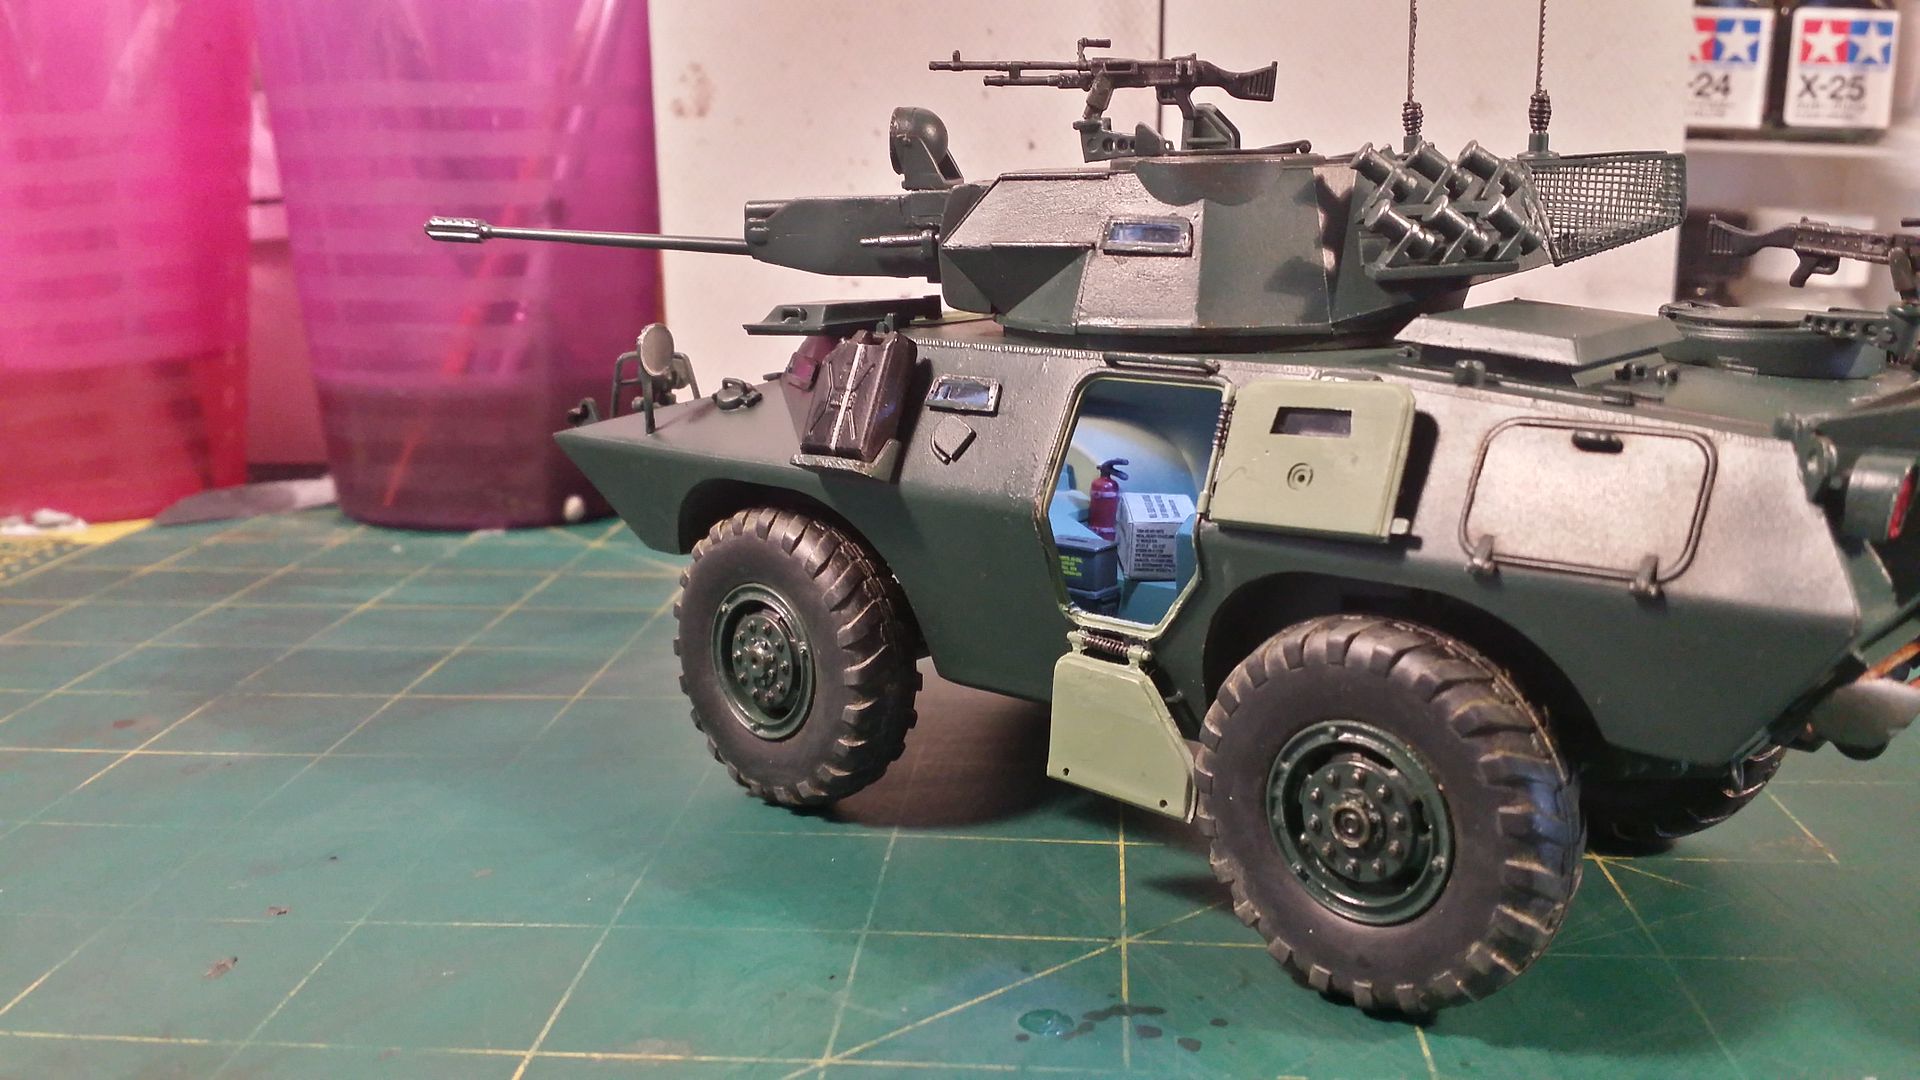
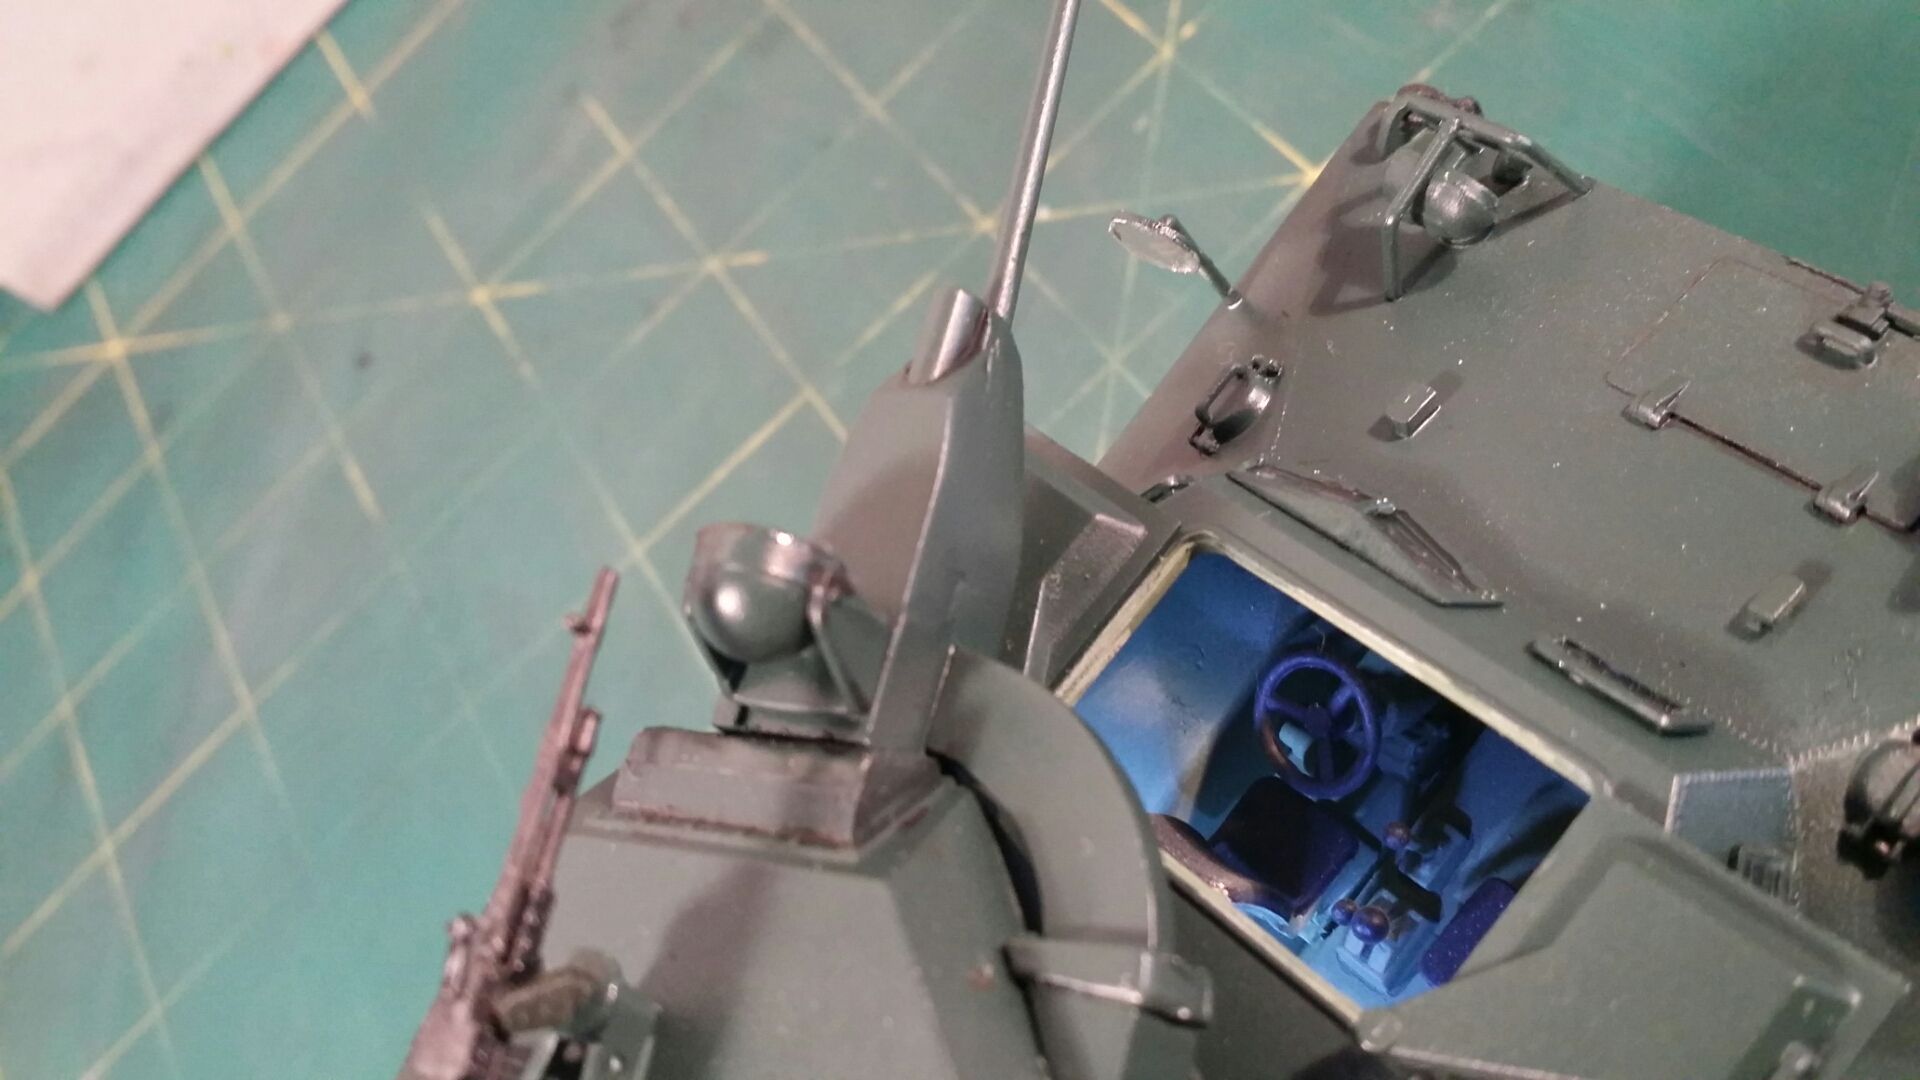
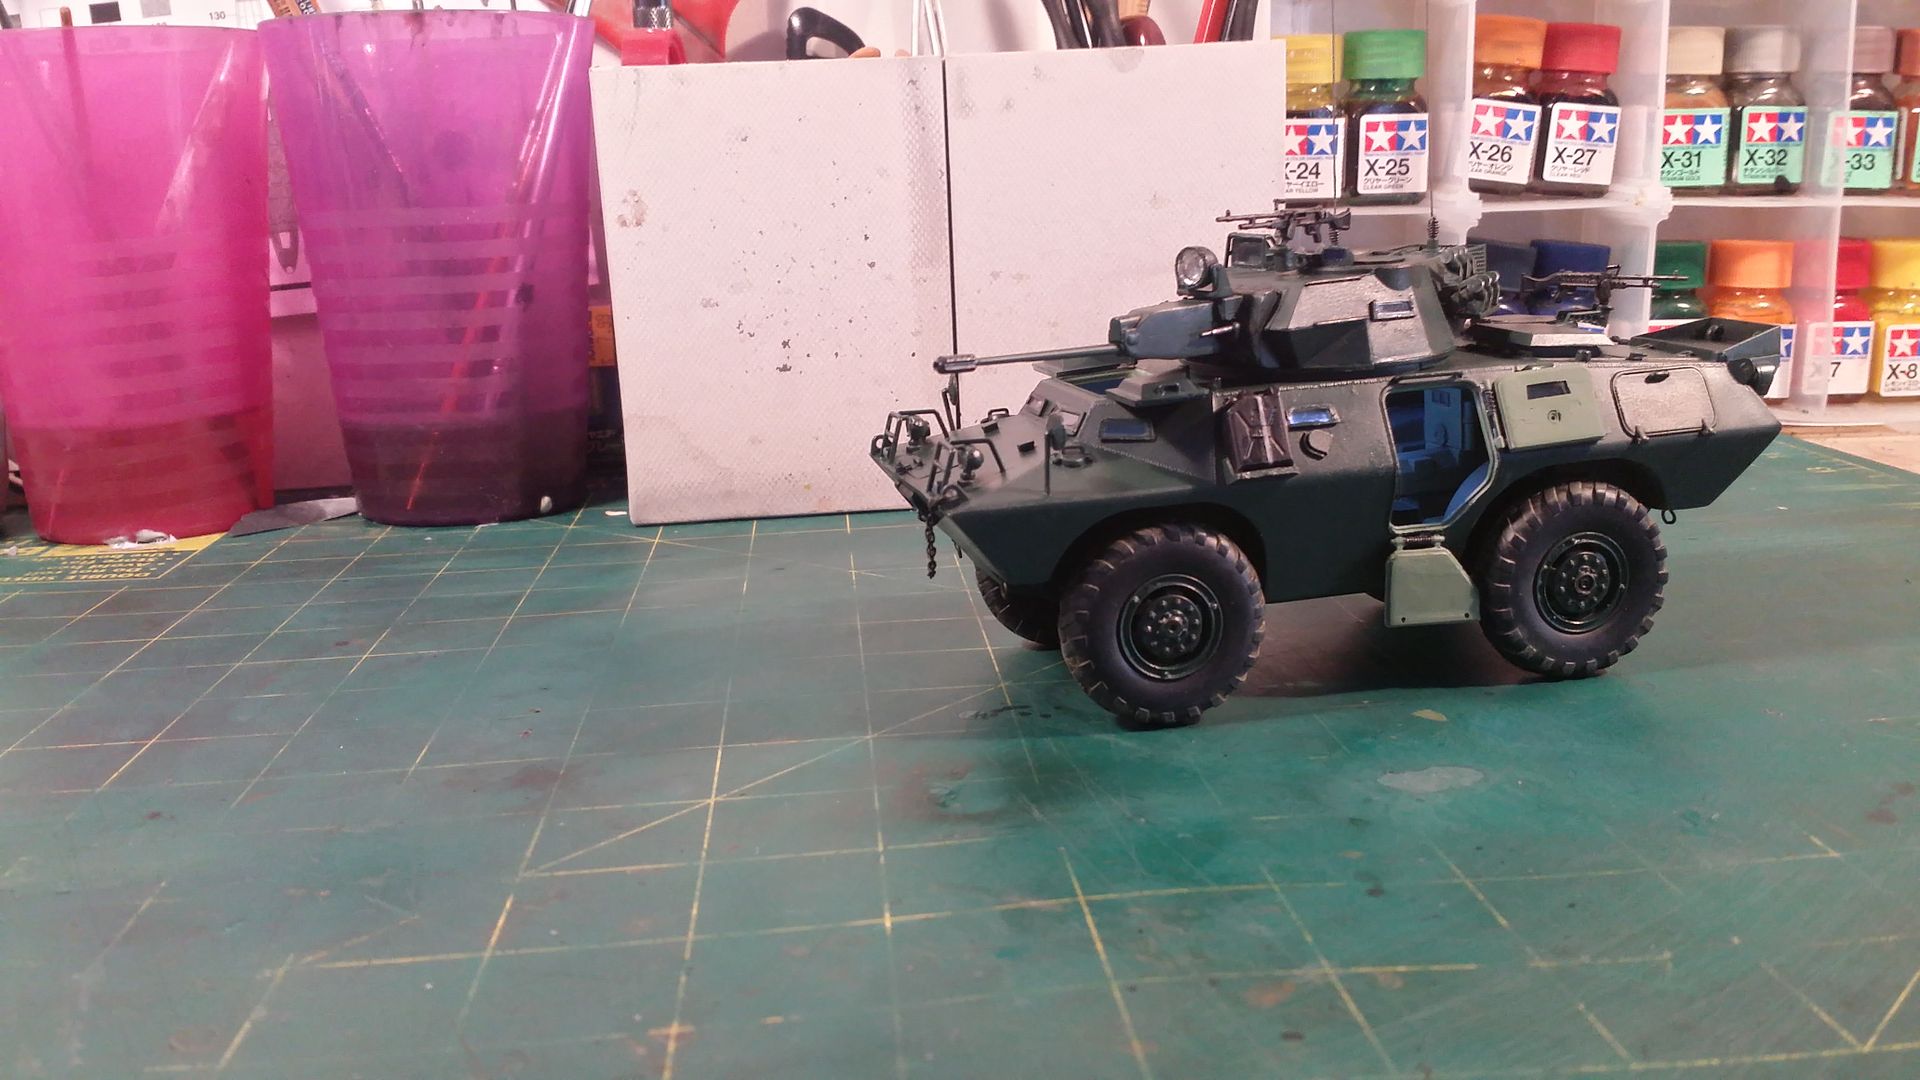
Here is the latest build update. So the windows are done, it took a long time to paint the sides of each window very carefully. I added a light to the turret, and some arials (which are being glued in as I write this - so I havn't painted them yet). I also weathered the tyres with Tamiya Weathering Master - Sand.Not too much but enough to look like they were used, but then cleaned - if it makes sense.
Here it is - almost done.... almost
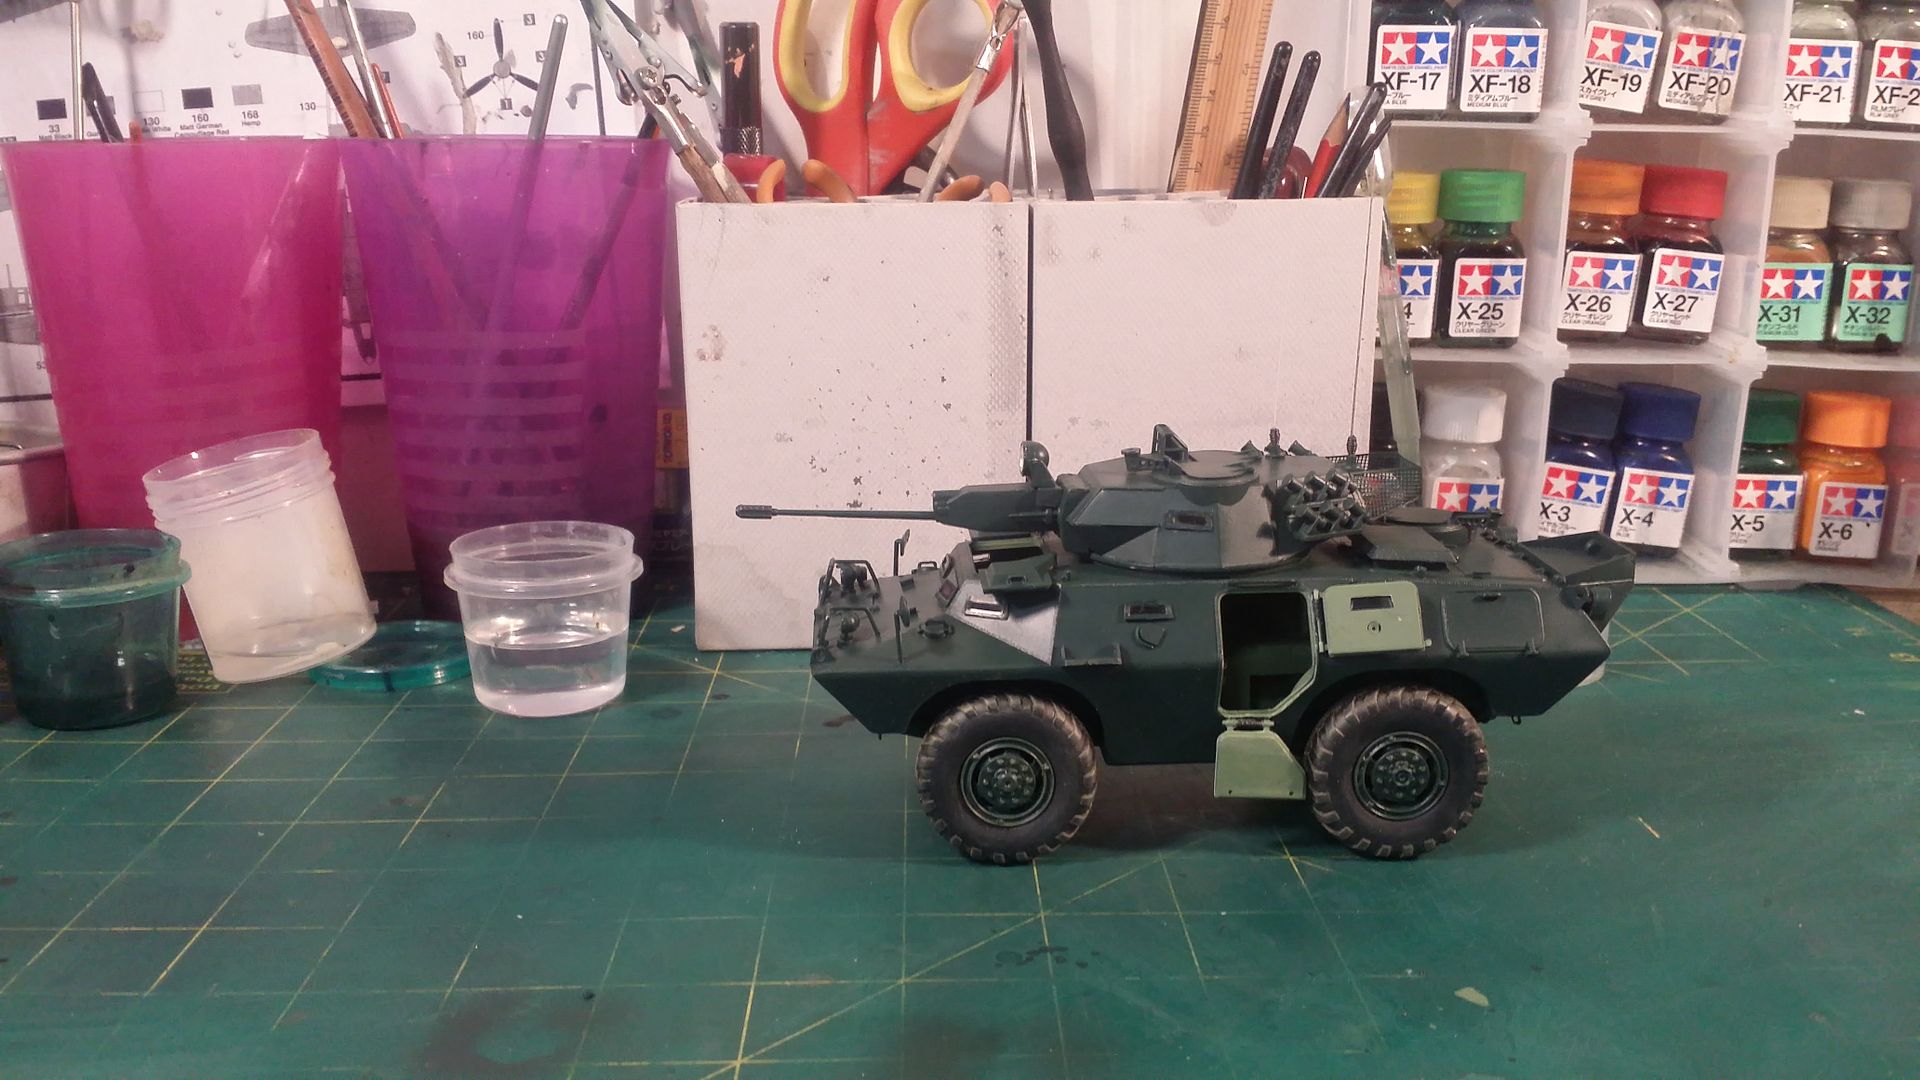
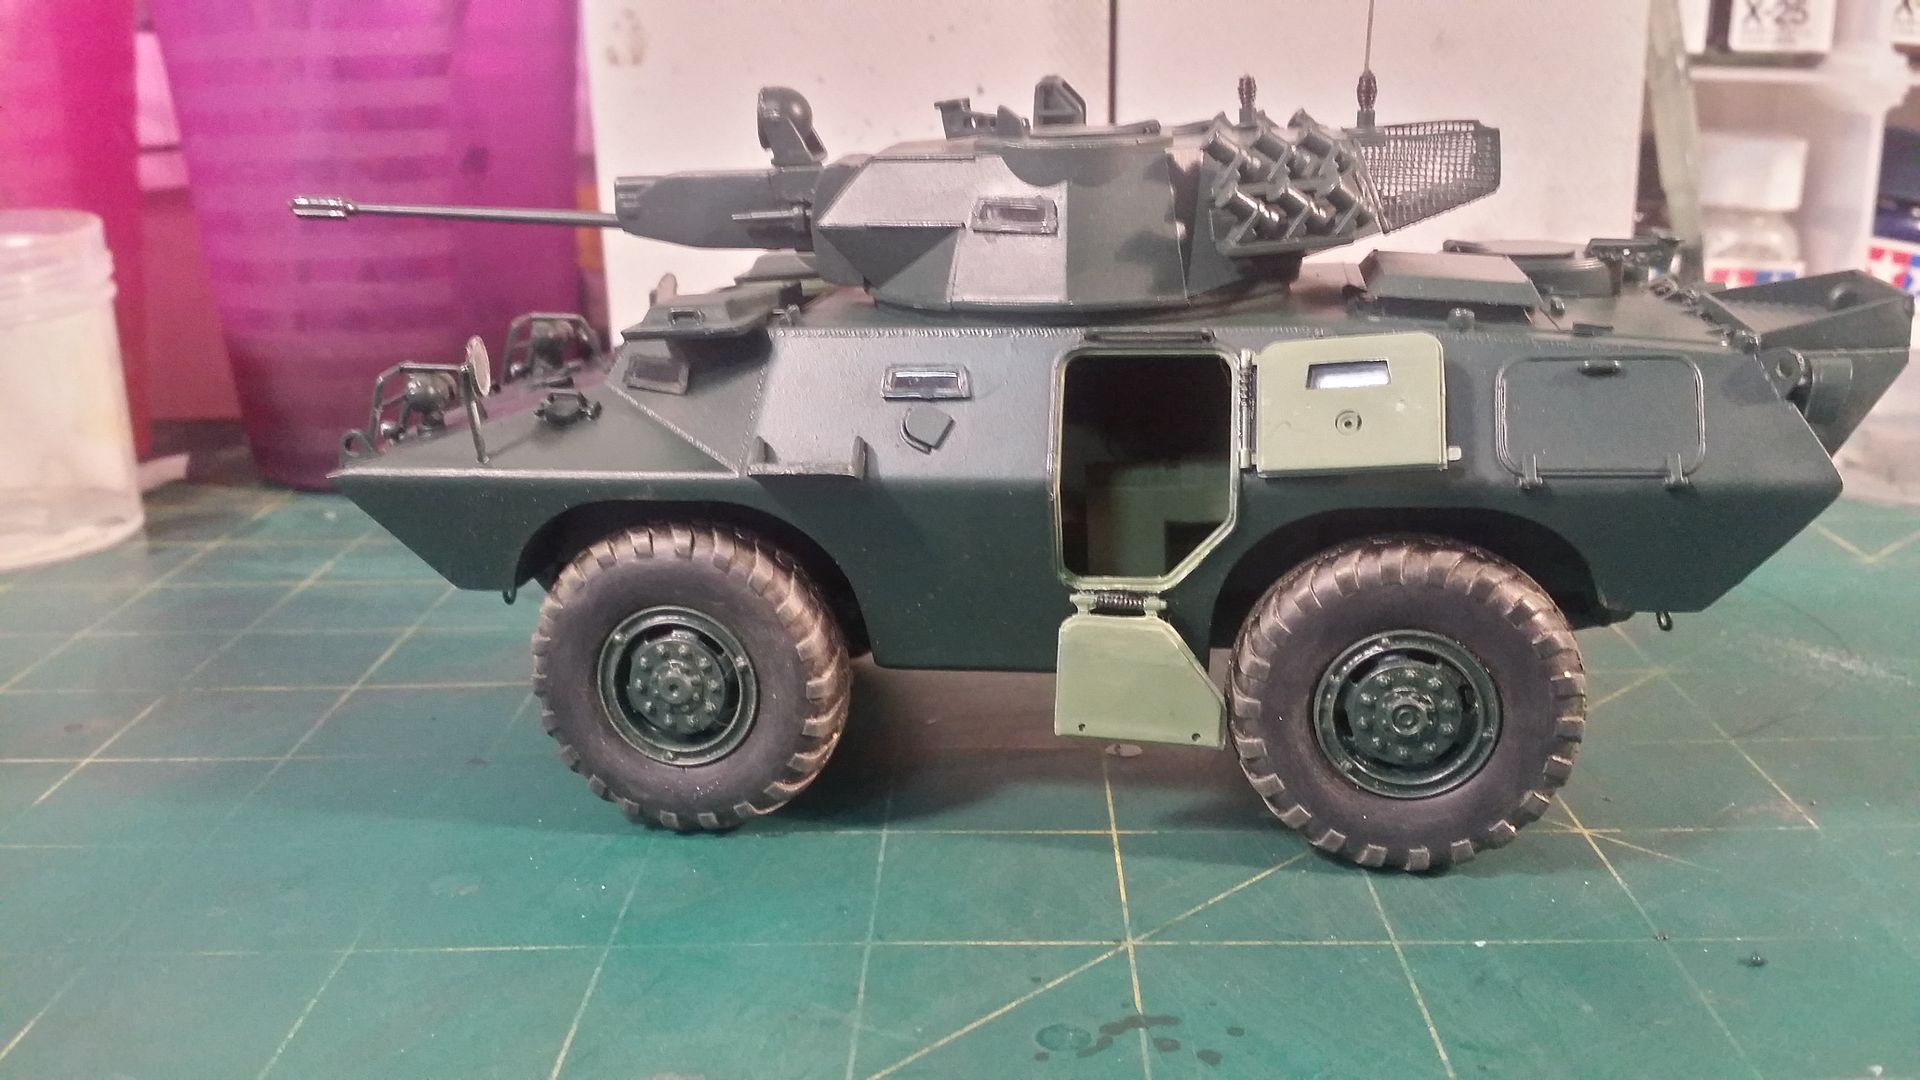
So now I have to do up the rifles, and the Jerry cans, and finally give it a pin wash to finish it off. As there are no decals on this, I will not seal it with a varnish or coat, enamel paint dries to a very hard finish and wont really need a protective coat.
Oh and the LED will go on at the end.
I hope you all liked the build update and the photos, time for me to sleep! All comments welcome.Comment
-
Cracking work Bob, really like what you've done with the interior light and the headlights.Comment
-
real nice work hear Bob,looks great so far ,well done,
Comment
-
Thanks Tommy and Monica
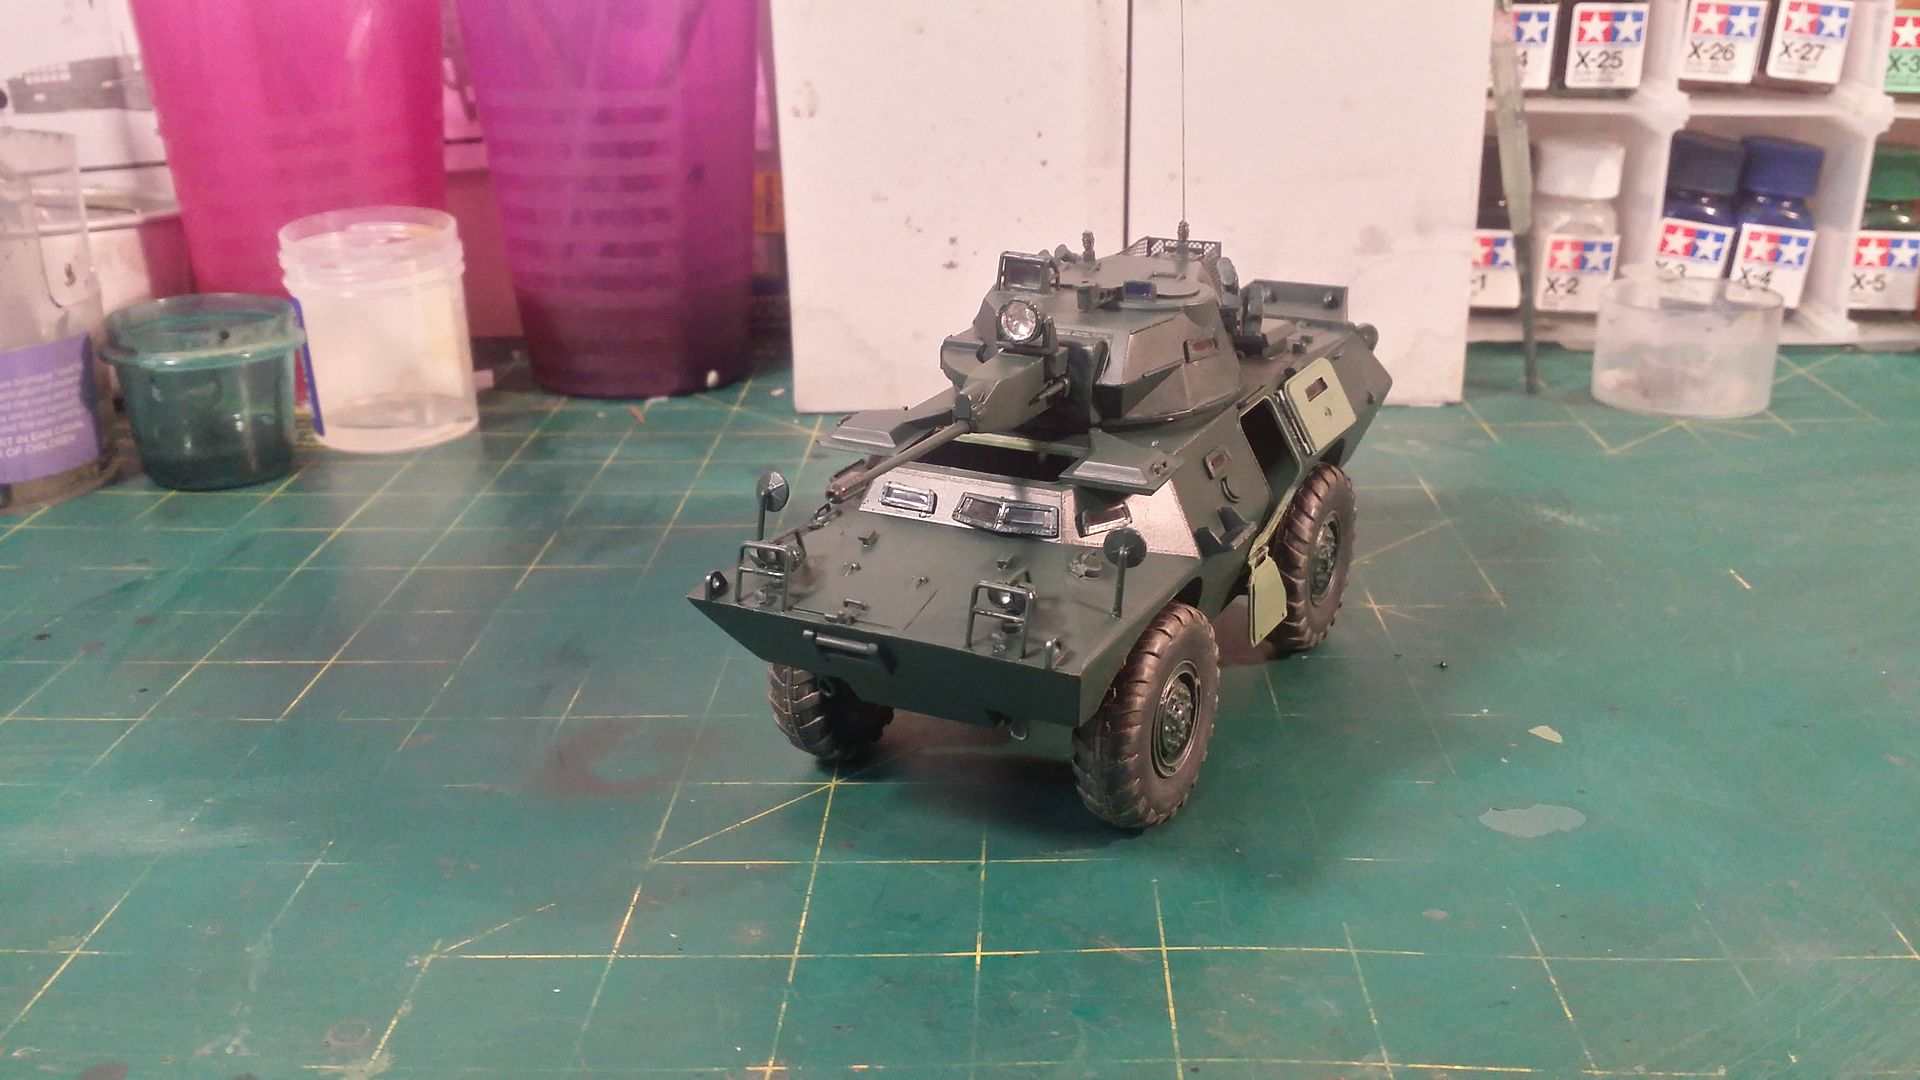
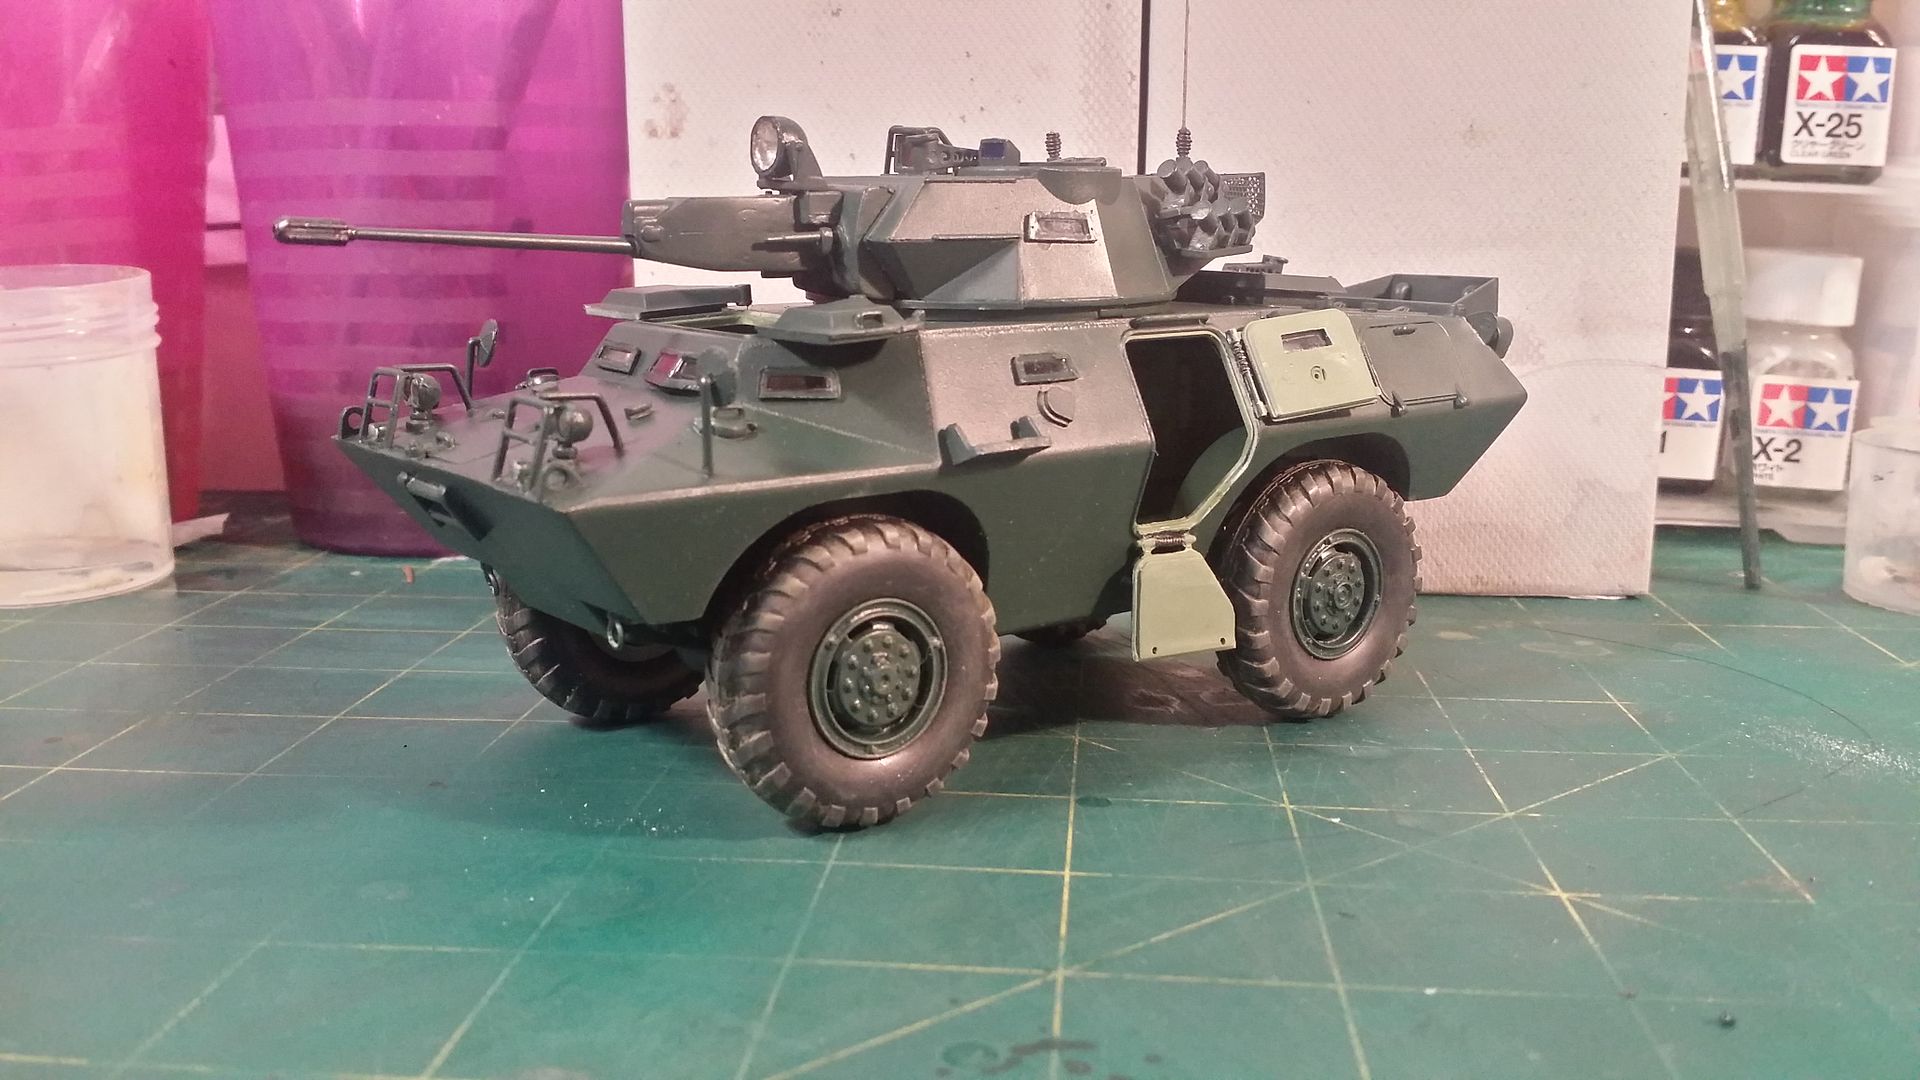
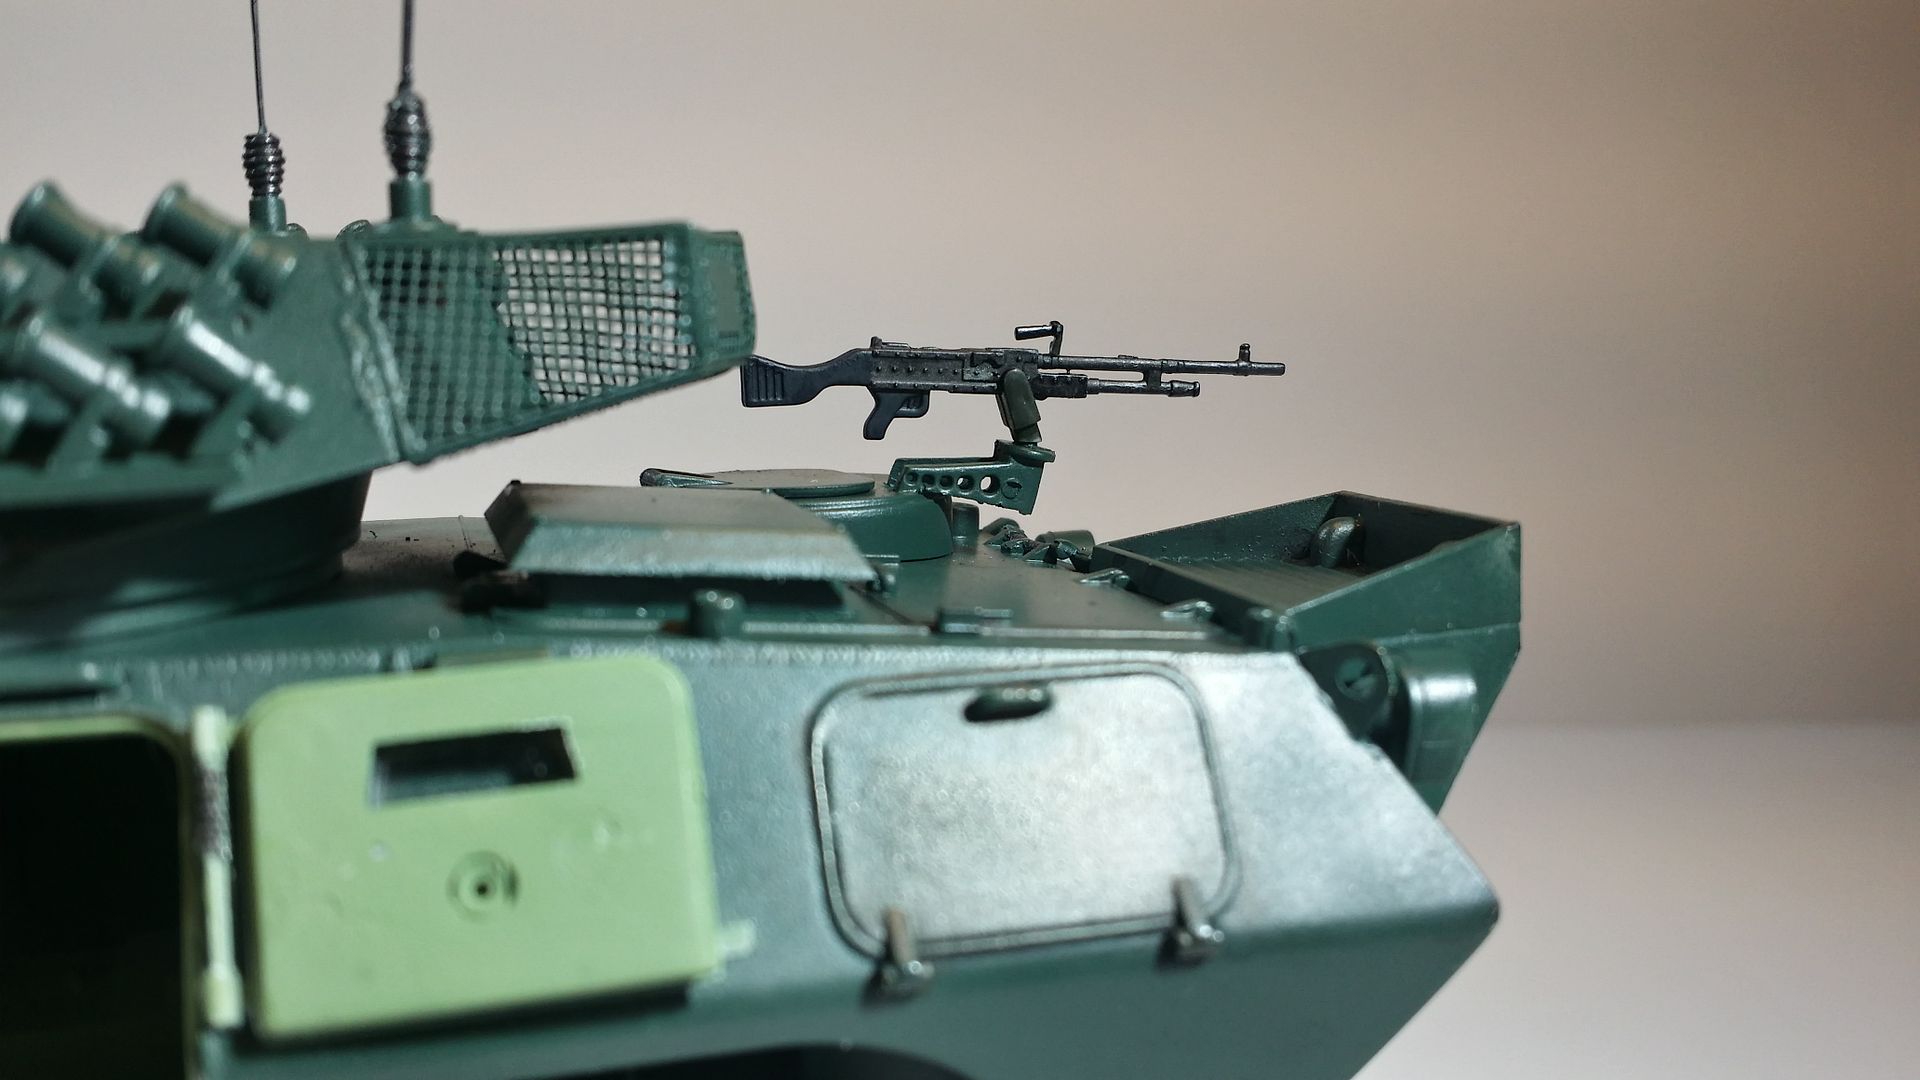
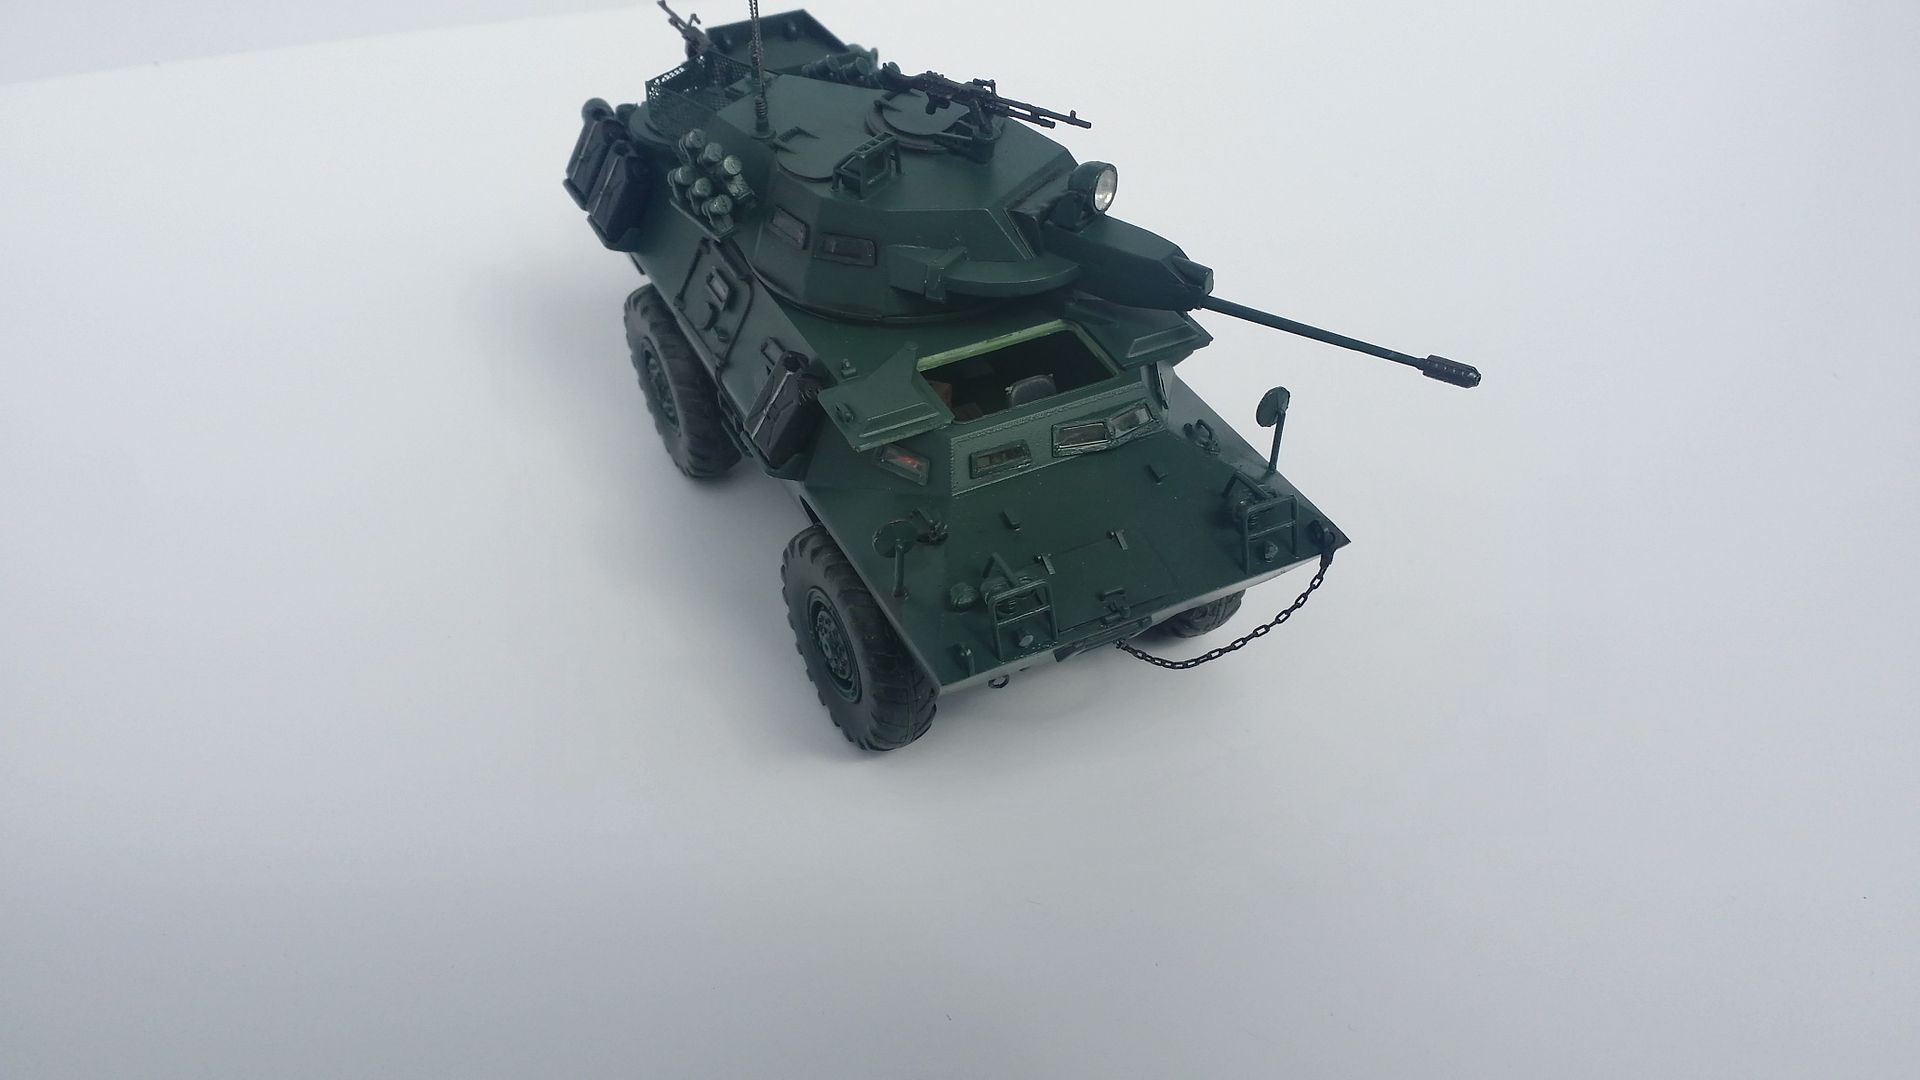
This should be the final update before the final reveal. I have finished the machine guns, the jerry cans, and some tools
I also gave the model a wash with Vallejo Model Black Wash to highlight some details. I also did some slight weathering with Tamiya Weathering Master sets
I only have to fix up the paint in certain areas and add a chain to the kit. Once thats done the final touch is adding the LED.
Here it is in its nearly finished condition
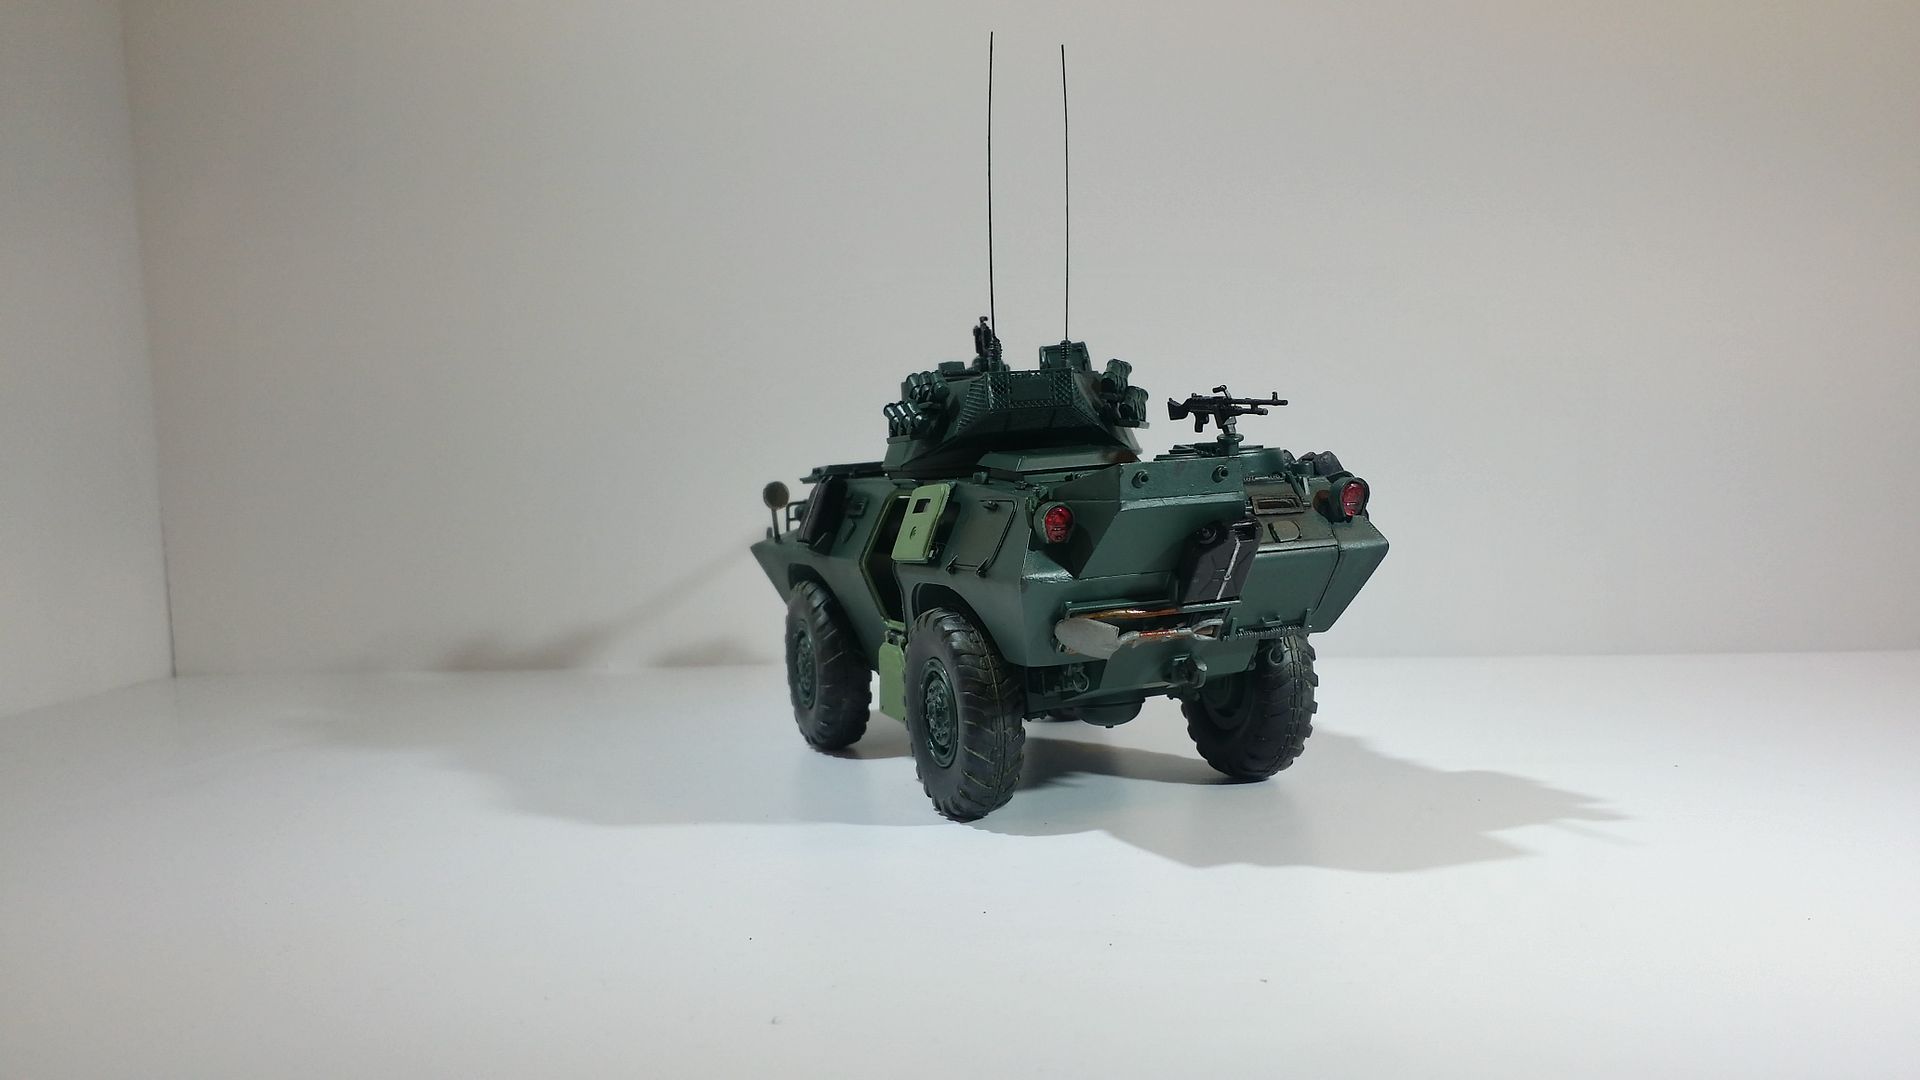


I might decide to fix up the antennas, as one of them looks bent, now that I look at the photos here.
In anycase I will probably add the LED tomorrow and finish this one off.
I hope you all liked the build update. All comments are welcome.Comment
-
Just caught up with this again Bob & I'm very impressed with your excellent work.Comment
-
real nice work on this one Bob,looks great,your done such a good job of it,
Comment
-
Thanks Patrick and Monica
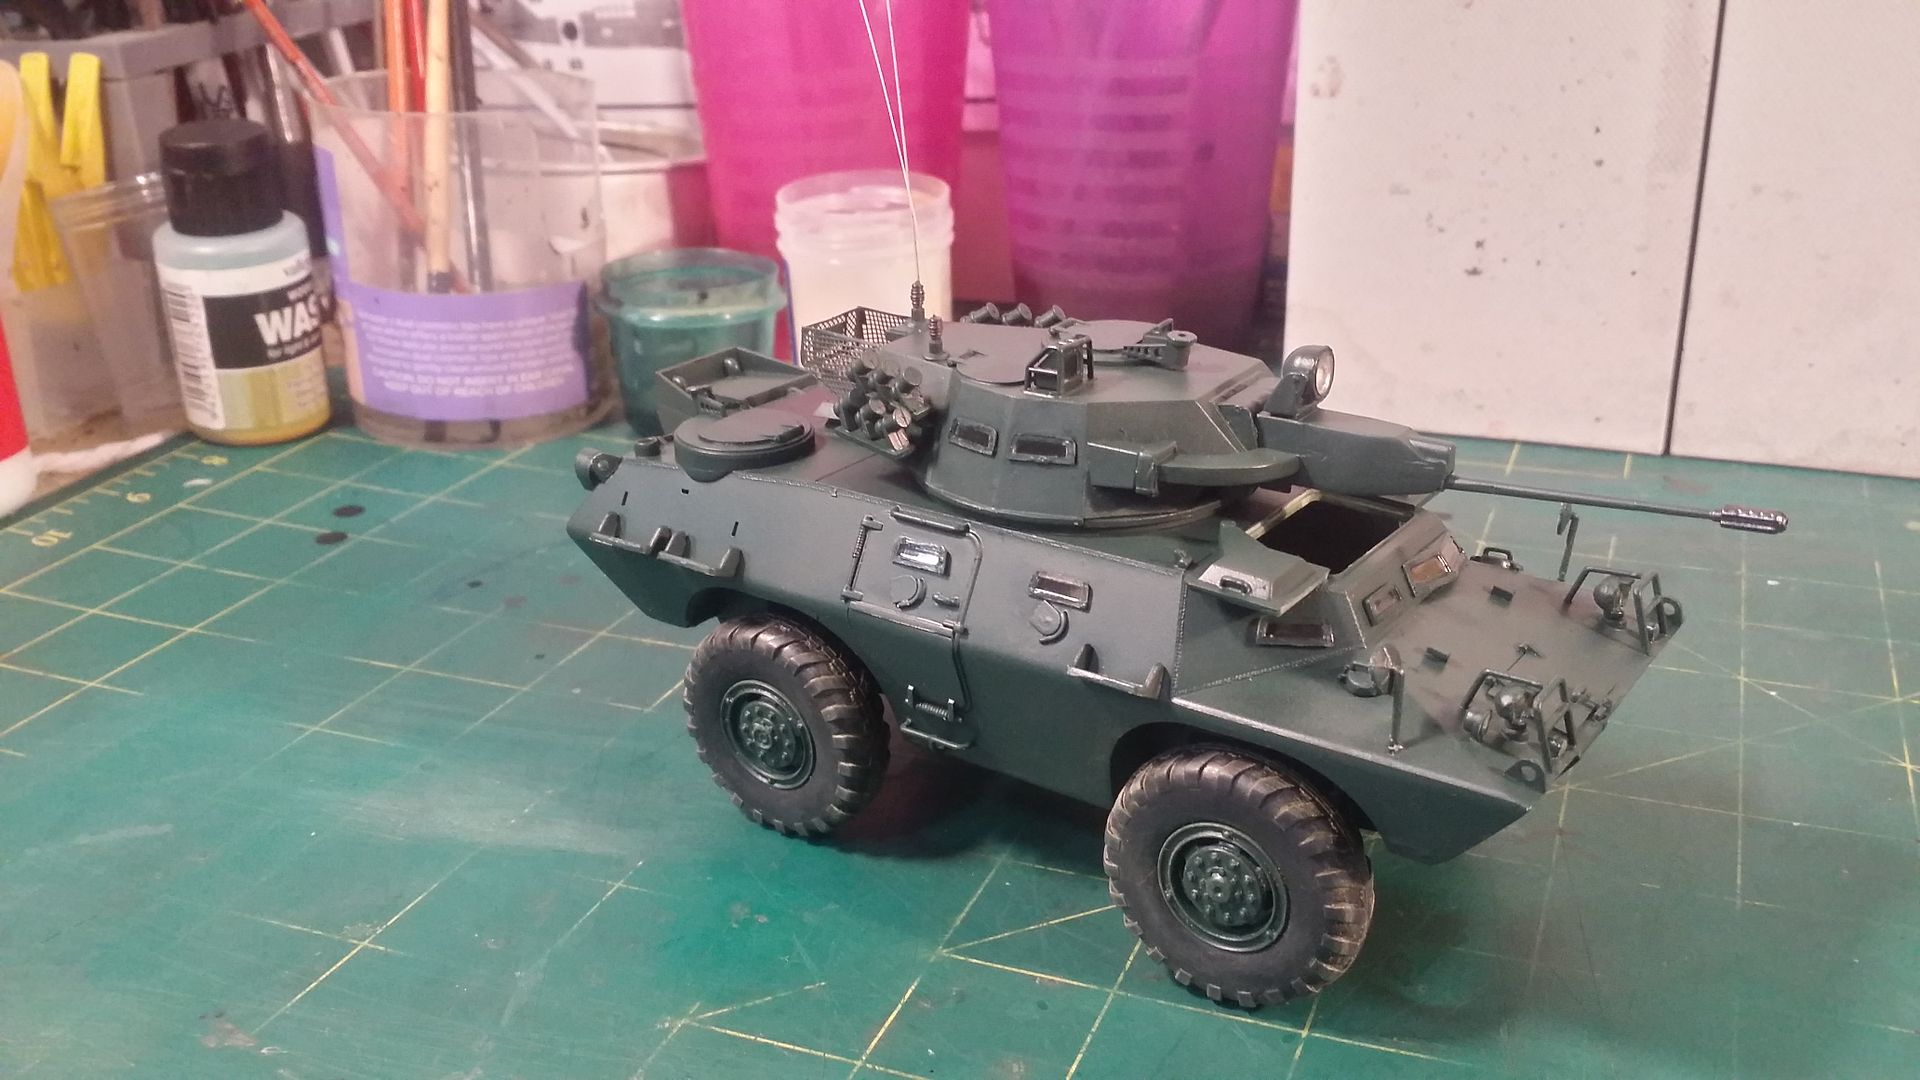
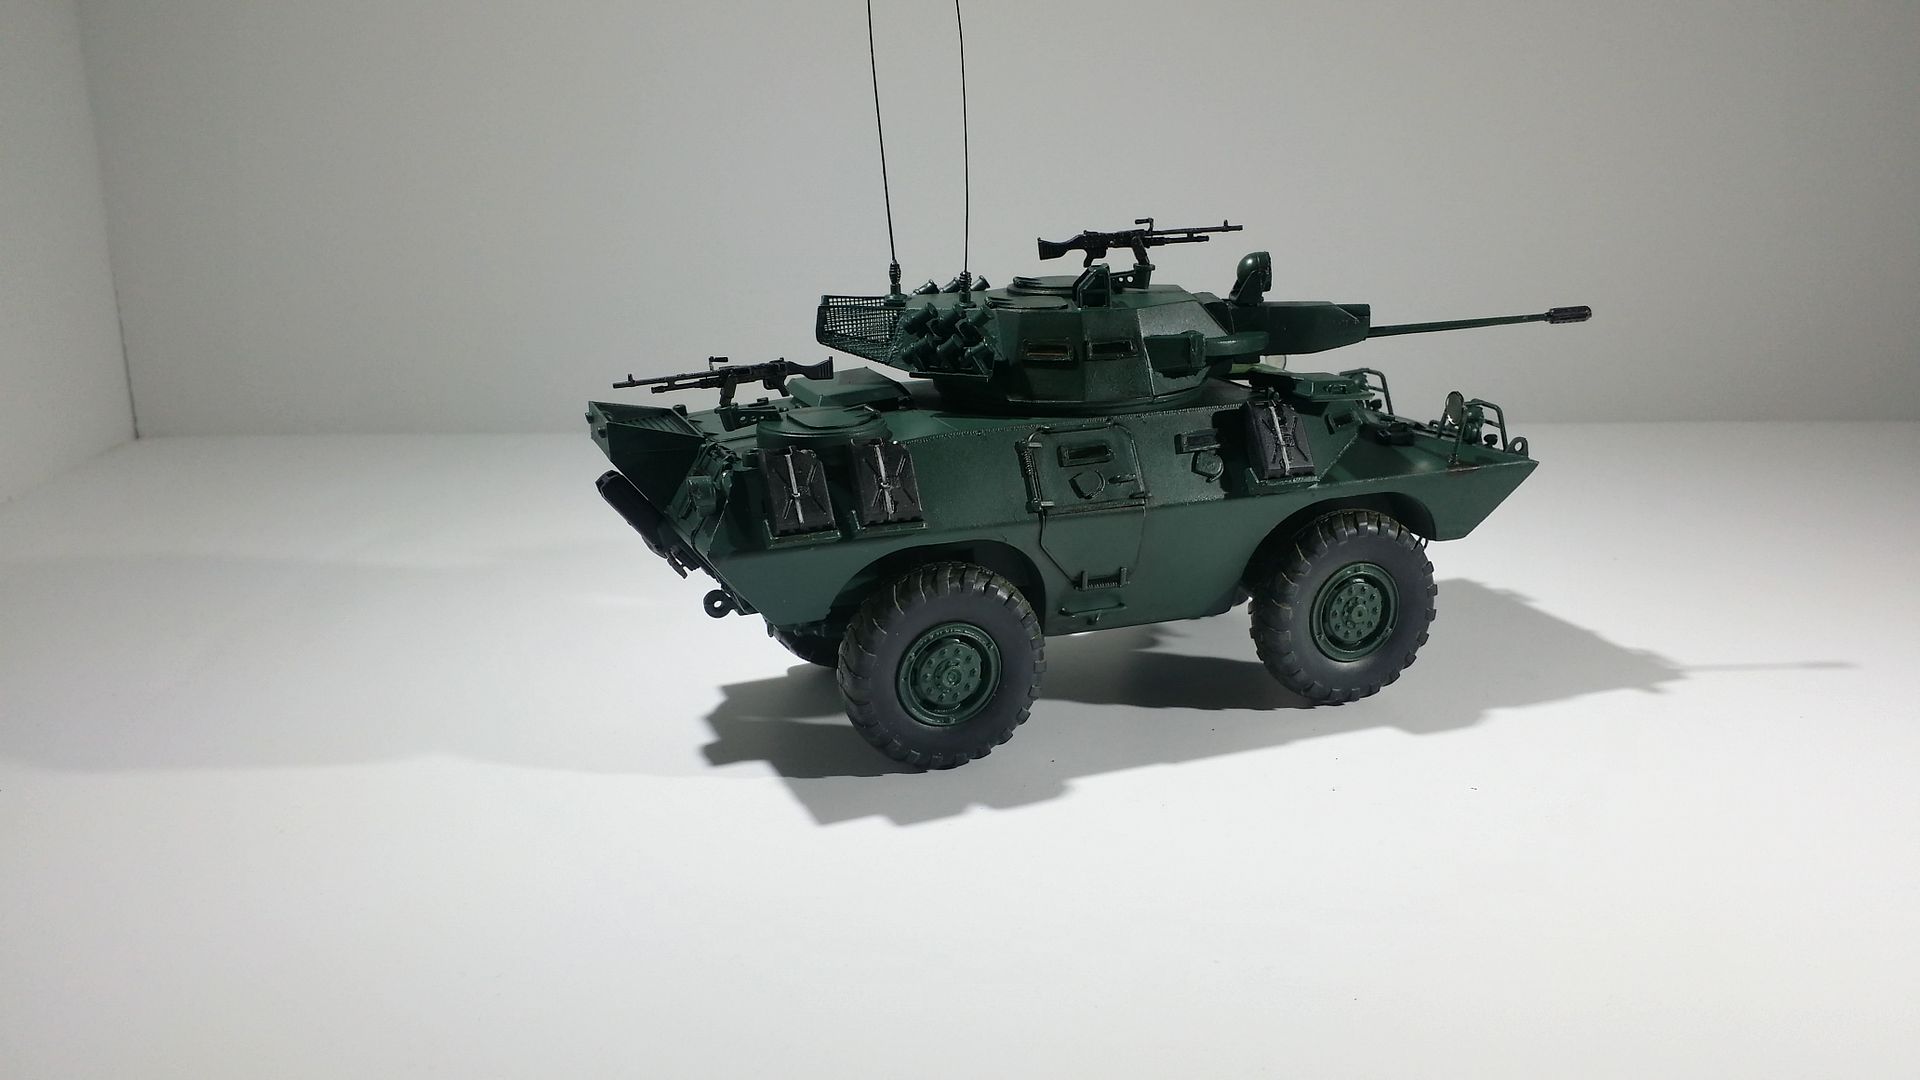
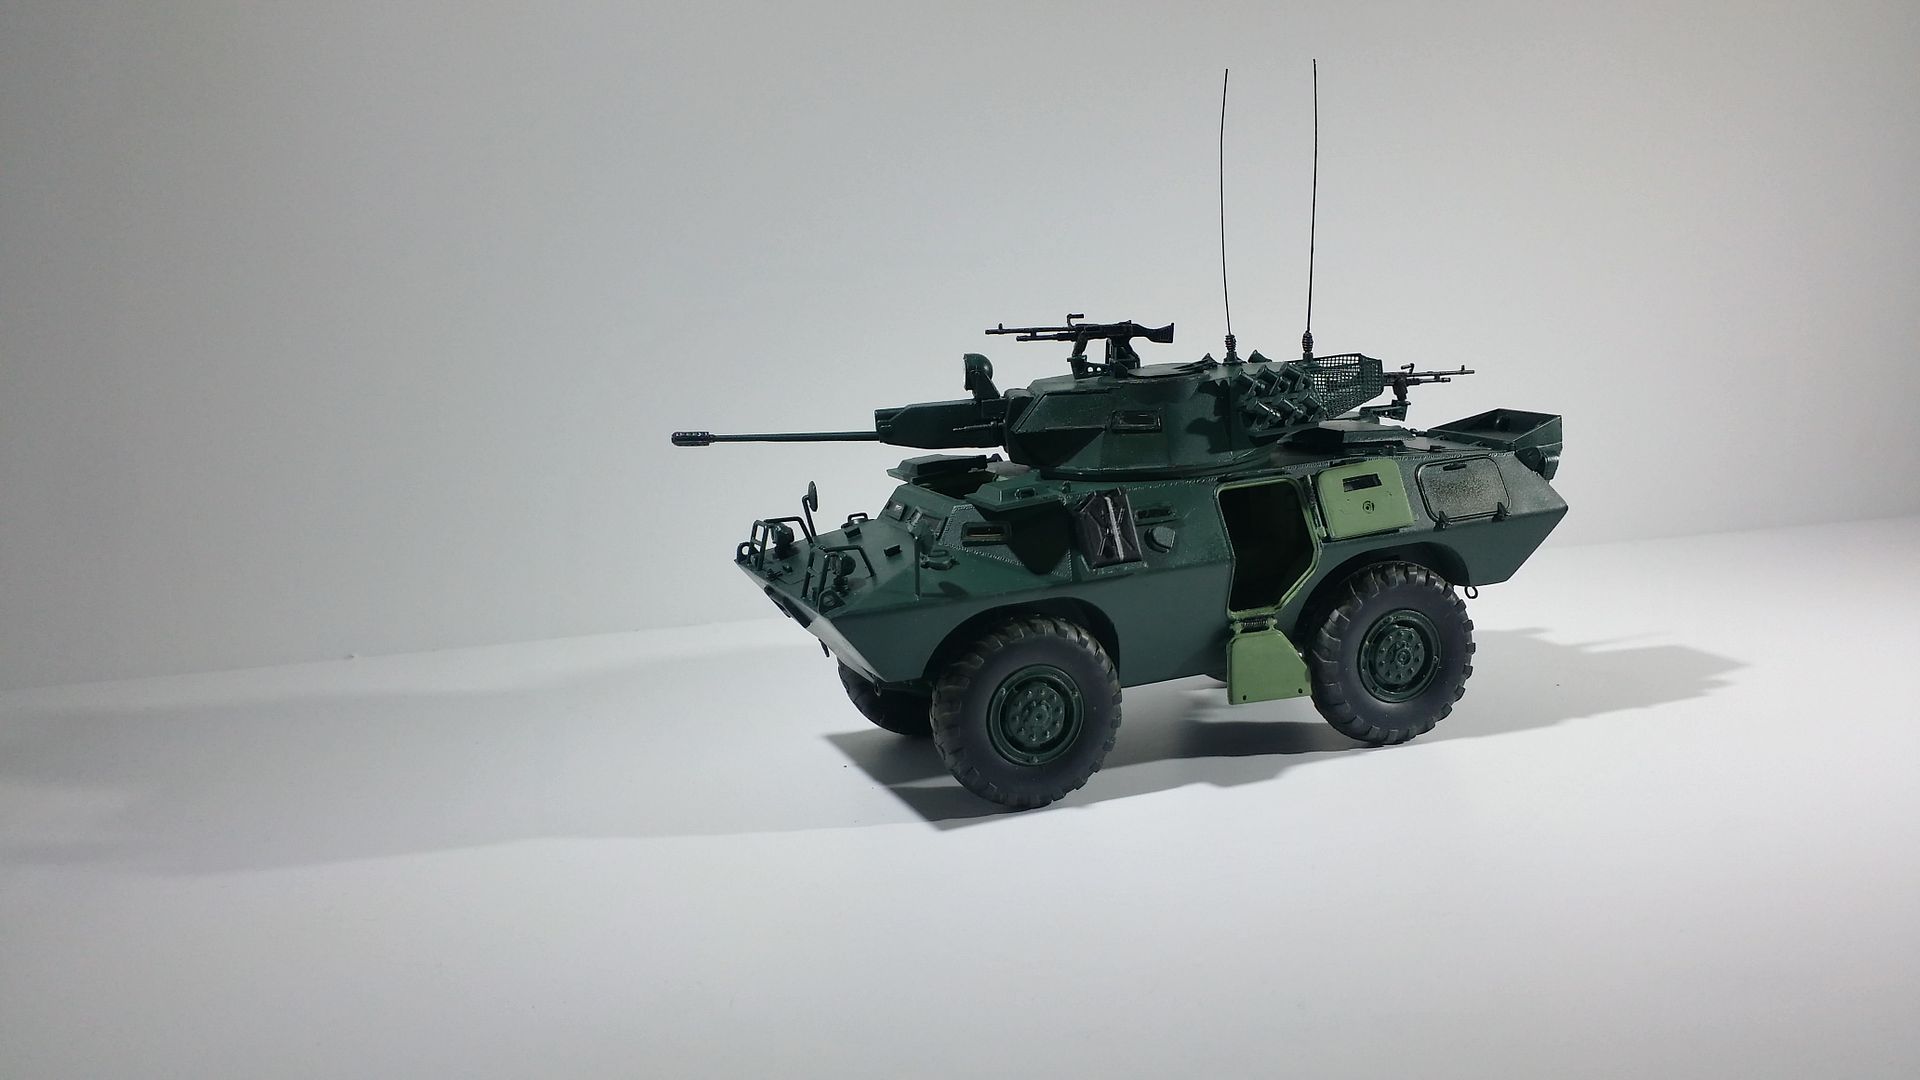
Well I did up the chain, and changed the arials, as I didnt like them, Finally the LED was added, the link to the final reveal is also at the end of this post.
Final Reveal
It was a great build, I hope you all enjoyed the build post as much as I enjoyed the build! All comments are welcome.Comment
-
I do reallike thatlight,just adds some think else to it,looks great ,very well done,
Comment
-
Lovely work, just seen the completed post, a proper corker!Comment

Comment