Scale Model Shop

Collapse

DaveCov's "Goldfinger" Doyusha 1/24 Aston Martin DB5 007 (07-1-2800)

Collapse
X
 
  • Time
  • Show
Clear All
new posts
  • davecov
    SMF Supporters
    • Jul 2014
    • 831
    • Dave
    • Stow, Scottish Borders

    #1

    DaveCov's "Goldfinger" Doyusha 1/24 Aston Martin DB5 007 (07-1-2800)

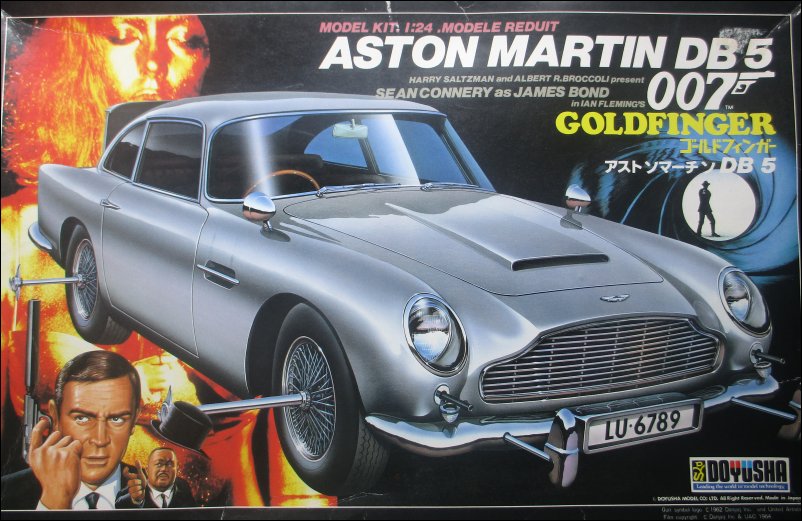
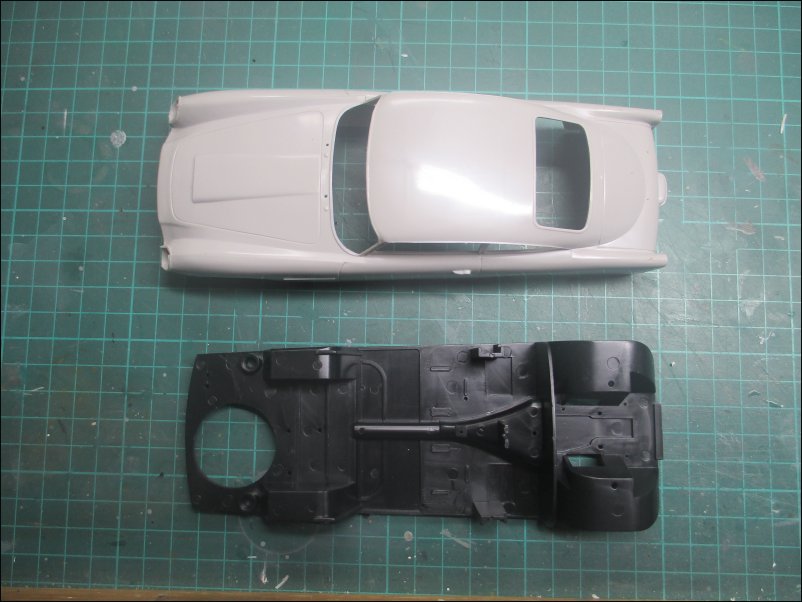
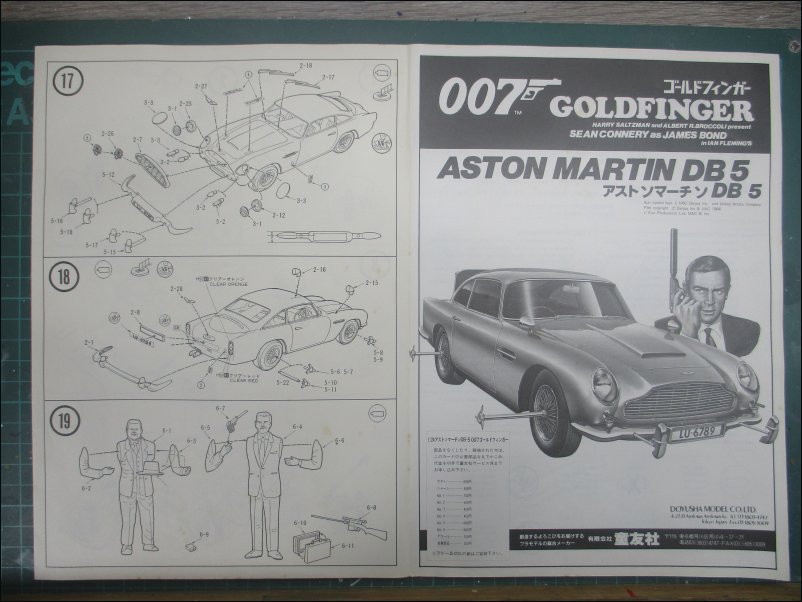
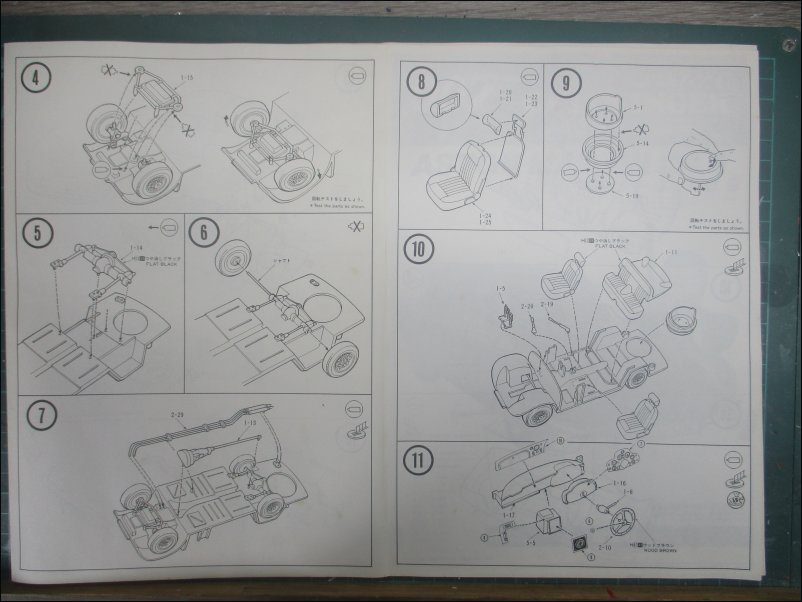
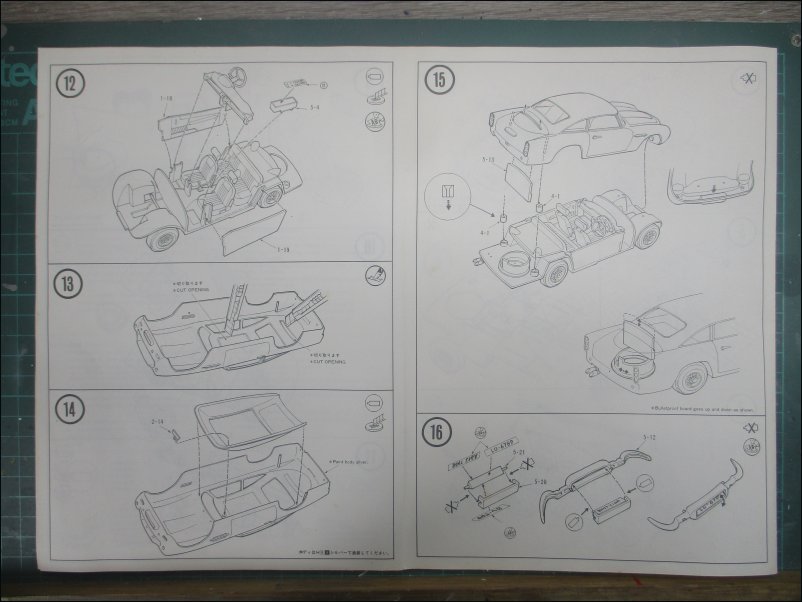
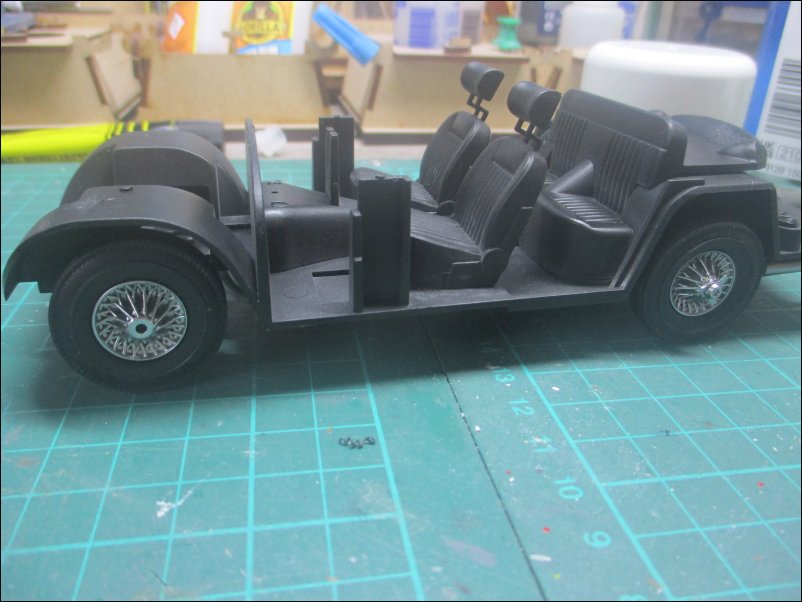
    Having completed one iconic car for this GB already, I will be building one more - the Doyusha 1/24 Aston Martin DB5 007 Goldfinger (07-1-2800):


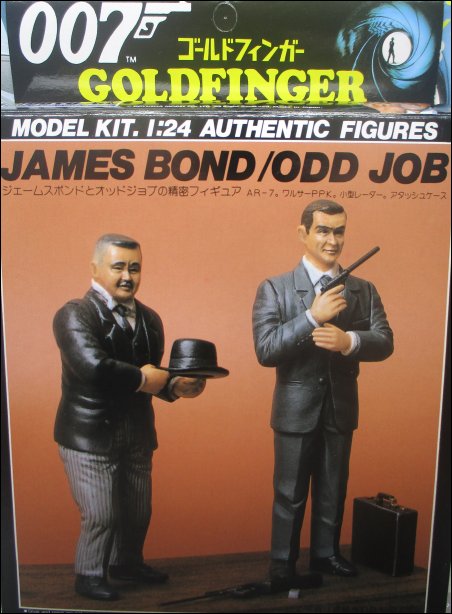
    This boxing comes with two familiar figures:


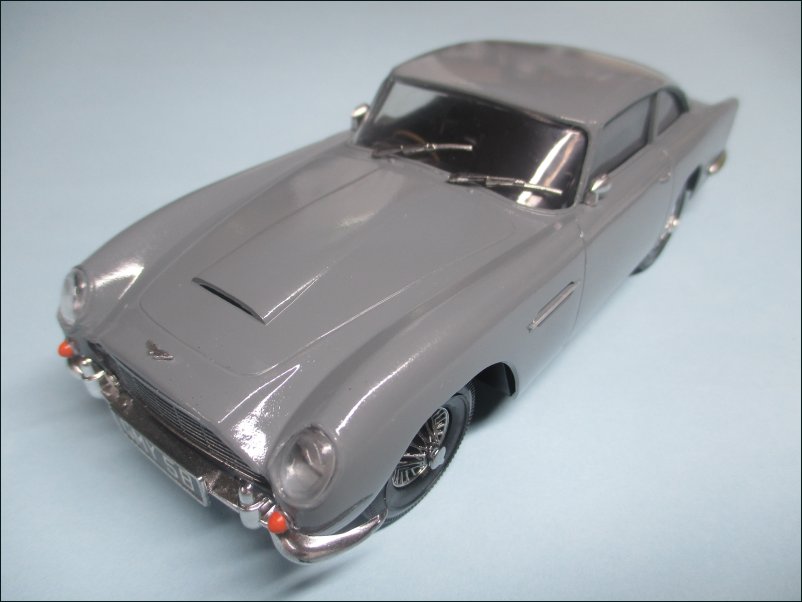
    A couple of years ago, I built a 1/24 Doyusha Aston Martin DB5 but that boxing didn't come with the "Goldfinger" bells and whistles so this build should make for an interesting comparison to that:


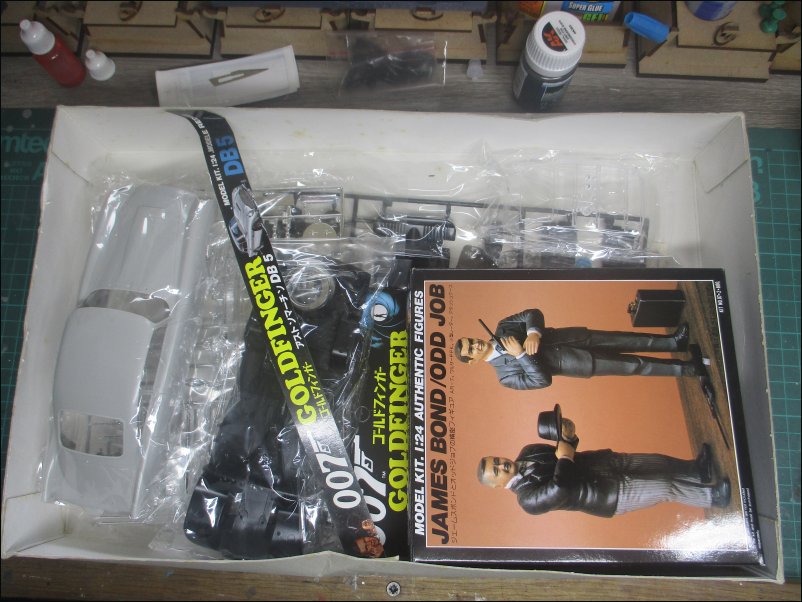
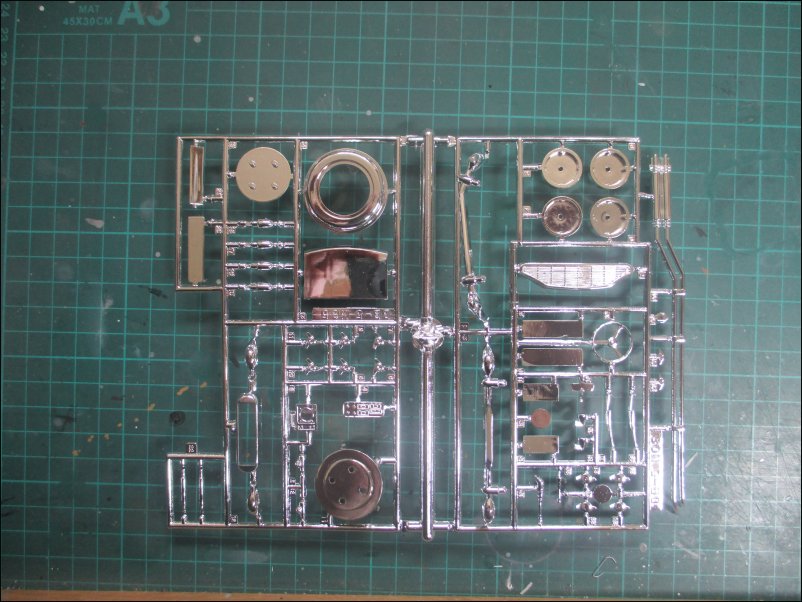
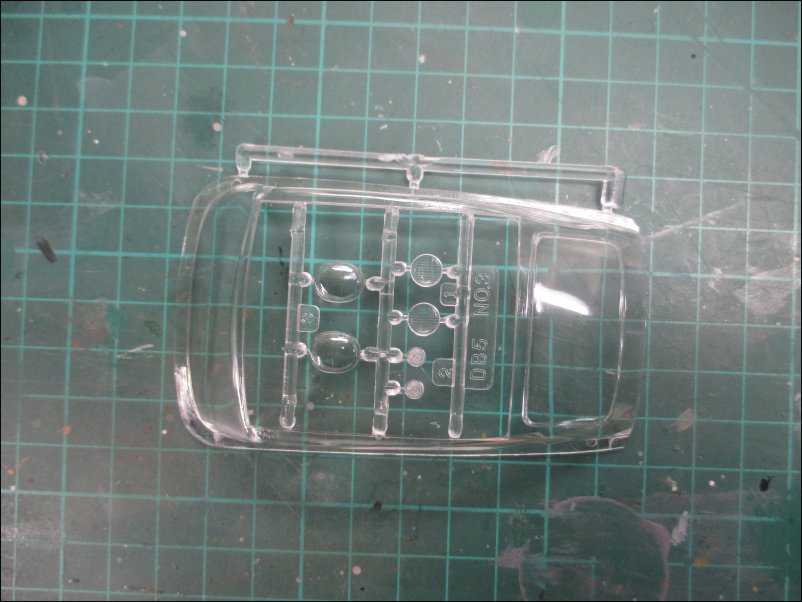
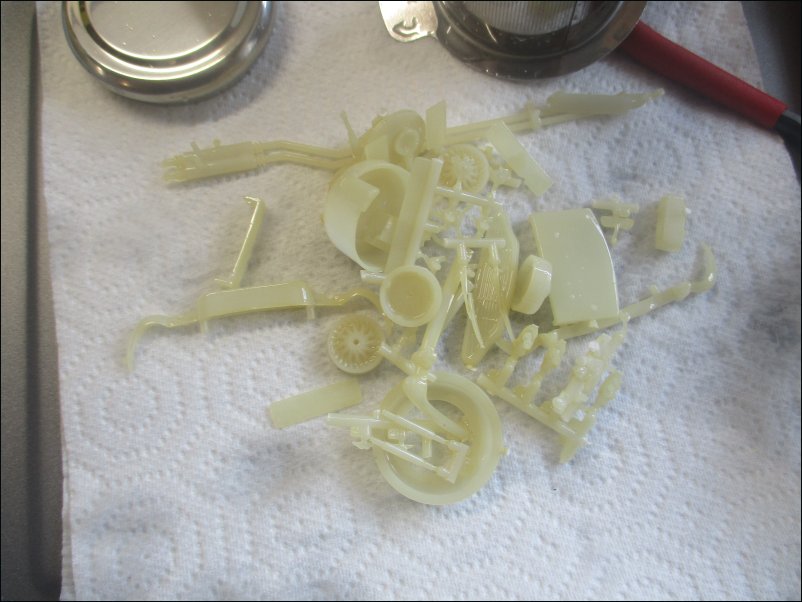
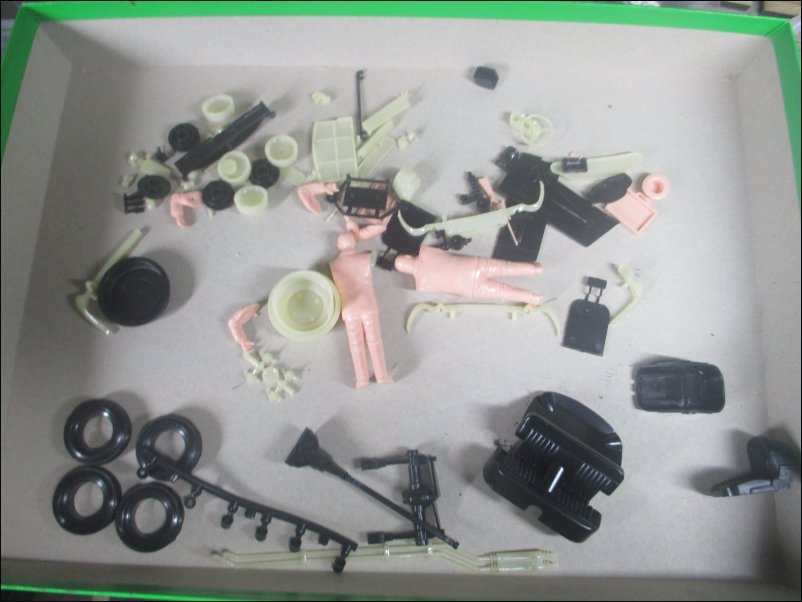
    My next post will detail the contents of the box.

    Dave
    DaveCov - Founder of The Airfix Tribute Forum 2006
  • davecov
    SMF Supporters
    • Jul 2014
    • 831
    • Dave
    • Stow, Scottish Borders

    #2
    As promised, a look at the contents of the Doyusha 1/24 Aston Martin DB5 007 Goldfinger (07-1-2800) boxing.

    The box has a special "007 Goldfinger" band stapled across the box. All parts are sealed in plastic bags and the figures are contained within their own box:


    The bodyshell is moulded in a light grey plastic and has some seams that need attention. The floorpan is moulded in brittle black plastic:


    The majority of parts are moulded in brittle black plastic:


    There are a lot of chrome parts but it is a bit too thick and hides some of the detail. I will be removing the chrome by soaking them in Domestos bleach for two minutes and will repaint with Alclad 2 Chrome:


    Transparencies are very clear:


    Tyres are moulded in black plastic. Metal pins and a rod will be used to attach the wheels:


    Decals are crisply printed and in register:


    Instructions are spread over eight pages. Pages 1 & 8 - Cover and Assembly Sections 17-19. Section 19 refers to the James Bond and Odd Job figures:


    Instructions Pages 2 & 3 - Safety notes and Assembly Sections 1-3:


    Instructions Pages 4 & 5 - Assembly Sections 4-11:


    Instructions Pages 6 & 7 - Assembly Sections 12-16:


    The front of the box containing the James Bond and Odd Job figures:


    The reverse of the figure box showing assembly instructions (replicated in section 19 of main instructions):


    The contents of the figure box has two runners moulded in pink plastic along with a black plastic base:


    That's all for now.

    Dave
    DaveCov - Founder of The Airfix Tribute Forum 2006

    Comment

    • Guest

      #3
      It always surprises me how uncomplicated car kits tend to be, compared to what I usually build 
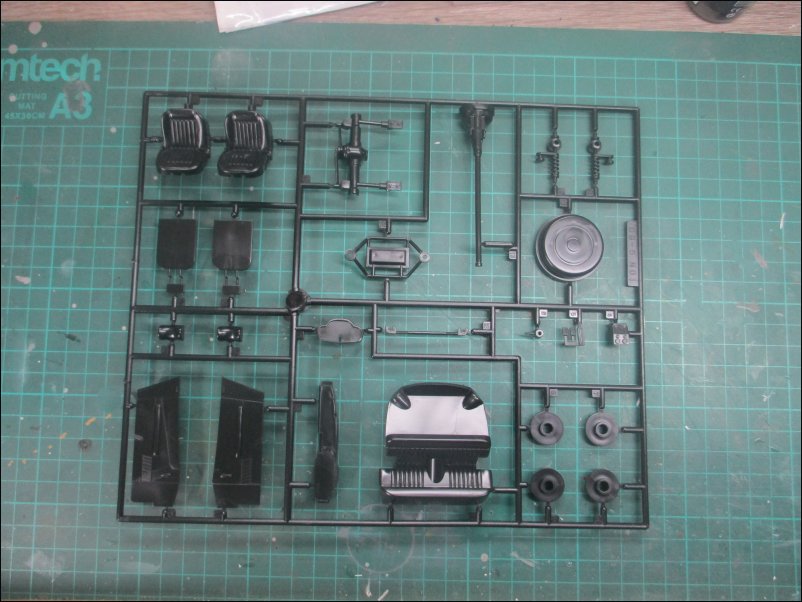
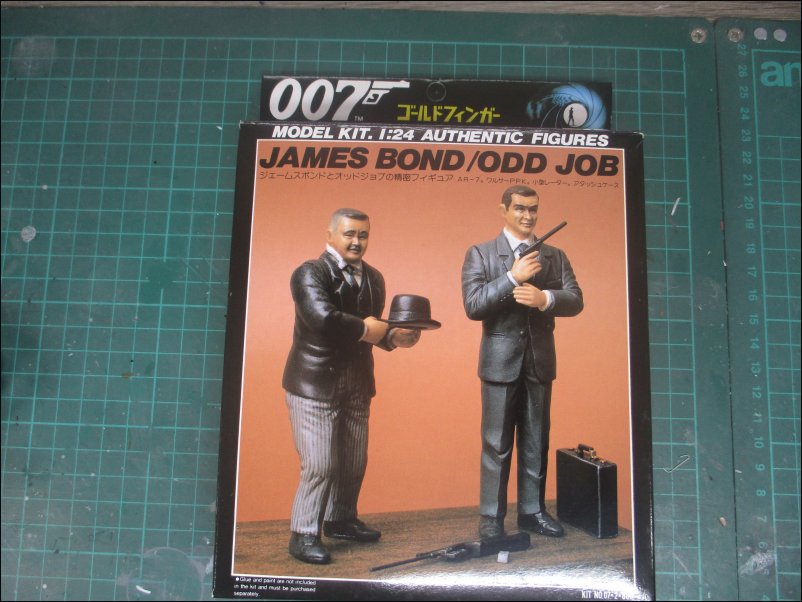
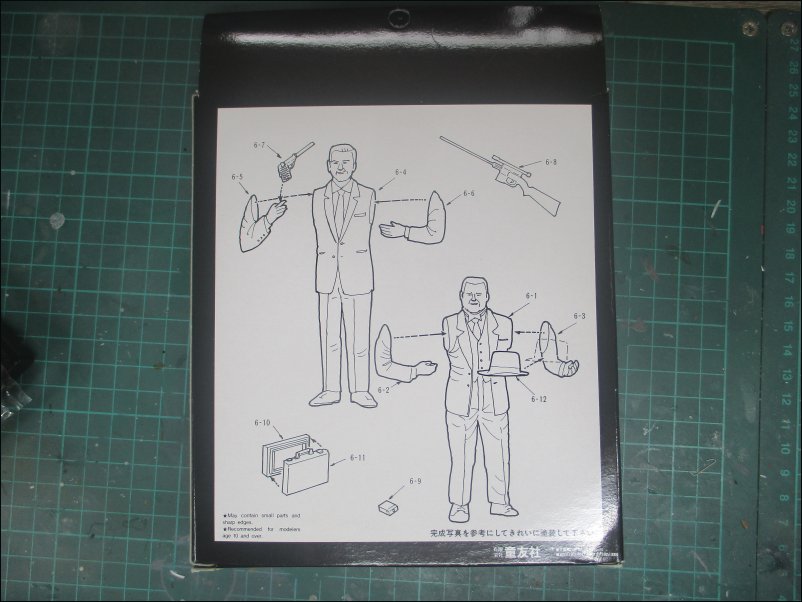
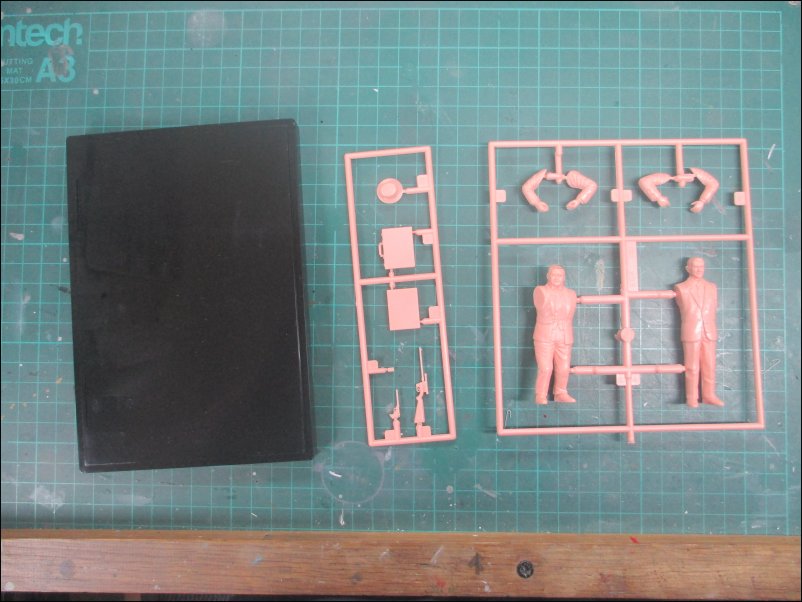
Odd choice of colour for the figures, and are they moulded in one piece, solid?

      Comment

      • davecov
        SMF Supporters
        • Jul 2014
        • 831
        • Dave
        • Stow, Scottish Borders

        #4
        @Jakko I like to knock out a car every now and then for that reason - not many parts to muck about with. The figure colour is a bit strange, I agree, but the figures are solid which is a relief. Nothing worse than glueing figure halves together and trying to get the joins cleaned up.

        Dave
        DaveCov - Founder of The Airfix Tribute Forum 2006

        Comment

        • PaulinKendal
          SMF Supporters
          • Jul 2021
          • 1608
          • Paul
          • Kendal

          #5
          Looking at your non-Bond Aston, this should be ace!

          As a little lad I lived on a hill where, halfway up, there was an Aston Martin specialist garage. When working on an engine they'd often take the bonnet off completely (for better access, I guess), and then drive them under load (i.e. full gas) up the hill. I used to love that sound!

          Comment

          • davecov
            SMF Supporters
            • Jul 2014
            • 831
            • Dave
            • Stow, Scottish Borders

            #6
            I got the build underway yesterday.

            First step was to soak the chrome parts in Domestos bleach and remove the chrome. Once that was done, the parts were well-rinsed in water and left to dry:


            All parts were removed from the runners:


            A fault with the Doyusha DB5 is that the rear bumper is not wide enough to wrap around the rear of the bodyshell. I cut the rear bumper and inserted a piece of plastic card to extend the bumper:


            Here is the rear bumper after sanding the plastic card insert to shape:


            Front and rear bumpers are ready for painting now. Filler has been applied to the front bumper parts and the rear of the seats:


            The rear seat was fitted to the floorpan. The mechanism for raising the rear shield was also glued in place:


            Turning over the floorpan, I fitted the front and rear suspension parts and the driveshaft/gearbox:


            Some of the parts cleaned up and ready for painting:


            All parts were sprayed with a coat of black primer:


            That's all for now.

            Dave
            DaveCov - Founder of The Airfix Tribute Forum 2006

            Comment

            • Guest

              #7
              That looks like quite a wide plug to have to add to the rear bumper … you’d almost think someone misread a ruler when drawing the original.

              Comment

              • davecov
                SMF Supporters
                • Jul 2014
                • 831
                • Dave
                • Stow, Scottish Borders

                #8
                @Jakko The rear bumper had been broken into two bits before I started but the break was at an angle. I cut both edges straight with a knife to make it easier to add a piece of plastic card, hence the large gap.

                I had the same problem with my other DB5 build but in that case I cut the rear bumper in the middle and was able to insert a narrower piece of plastic card:


                Dave
                DaveCov - Founder of The Airfix Tribute Forum 2006

                Comment

                • davecov
                  SMF Supporters
                  • Jul 2014
                  • 831
                  • Dave
                  • Stow, Scottish Borders

                  #9
                  More painting this morning.

                  The wheels, wipers and other parts were given two coats of Alcad 2 Chrome (ALC-107):


                  Bumpers were also done:


                  As was the grille, lights, mirrors and machine guns:


                  The bodyshell was primed and then given a coat of Alcad 2 Dark Aluminium (ALC-103):


                  Having looked at these photos again, I realised that I put the wrong black undercoat on the chrome parts (I used primer/filler) which has caused the chrome to look a bit flat. I have since applied Alclad 2 Gloss Black Base over the chrome and will re-do the chrome later on. That should make it come out nice and shiny.

                  That's all for now.

                  Dave
                  DaveCov - Founder of The Airfix Tribute Forum 2006

                  Comment

                  • Guest

                    #10
                    Originally posted by davecov
                    @Jakko The rear bumper had been broken into two bits before I started but the break was at an angle. I cut both edges straight with a knife to make it easier to add a piece of plastic card, hence the large gap.
                    Ah, nice fix, then — and it also explains why you put it at the side instead of in the middle (like you did with the other one).

                    Comment

                    • Mickc1440
                      SMF Supporters
                      • Apr 2018
                      • 4779

                      #11
                      Flying along Dave

                      Comment

                      • Graeme C.
                        SMF Supporters
                        • Apr 2018
                        • 1605
                        • Graeme
                        • UK

                        #12
                        Looking good Dave, the bumper fix is well done.

                        Comment

                        • davecov
                          SMF Supporters
                          • Jul 2014
                          • 831
                          • Dave
                          • Stow, Scottish Borders

                          #13
                          Thanks lads.

                          Another update now.

                          I resprayed the chrome again and it looks much better now:


                          The front bumper is really shiny:


                          The exhaust pipe was fitted to the underside:


                          Tyres were fitted to wheels which were then fitted to the suspension:


                          Decals were fitted to centre console and dashboard and both fitted. The centre console was a really tight fit between the seats:


                          The side panels, gear stick and handbrake were glued in place:


                          Number plate decals were applied to the number plates. The front plate is a revolving one and has three different registrations:


                          Masking time again in readiness for applying Alcad 2 Gloss Black Base:


                          The Alcad 2 Gloss Black Base has been applied:


                          The rear light clusters and number plate light were also painted:


                          Unfortunately, I have run out of Alcad 2 Chrome because of the respraying that was necessary and now have to wait for an order of chrome paint to arrive.

                          That's all for now.

                          Dave
                          DaveCov - Founder of The Airfix Tribute Forum 2006

                          Comment

                          • Allen Dewire
                            SMF Supporters
                            • Apr 2018
                            • 4741
                            • Allen
                            • Bamberg

                            #14
                            Super Job Dave!!! It even has a couple of figs to go with it. Are you going to do them too? I was at a show over the weekend and I looked for a figure of Huggy Bear for your Torino. Sorry, No luck finding one...

                            Prost
                            Allen
                            Life's to short to be a sheep...

                            Comment

                            • davecov
                              SMF Supporters
                              • Jul 2014
                              • 831
                              • Dave
                              • Stow, Scottish Borders

                              #15
                              Thanks Allen.:thumb2:

                              I am painting the figures and have primed them already. I hope to do more work on them tomorrow.

                              Dave
                              DaveCov - Founder of The Airfix Tribute Forum 2006

                              Comment

                              Working...