Scale Model Shop

Collapse

1/16 Centurion Tank in Paper

Collapse
This topic is closed.
X
X
 
  • Time
  • Show
Clear All
new posts
  • Guest

    #46
    Looking good.

    A question if I may.

    Will this model take paint when it is built?

    Comment

    • Guest

      #47
      will it take paint? do you mean does it require paint?...no

      one of the advantages to card models is the finish, textures, artwork, markings, etc are all part of the printed parts.

      in this case, this is an early 60s Canadian Tank regiment based in Germany and the Centurions were solid dk. green.

      So this particular colour doesn't lend itself to much in the way of texture.

      I will be adding a little more surface texture to the cast metal Turret and weathered side panels.

      But I try to include as much realistic texturing and detail as possible and depending on the printout quality, some models

      can look quite real. There are limits to what most home printers can do, but I try to use high resolution artwork...and

      many builders go to print and copy shops to print their model parts on different papers with higher quality printing.


      Once I have the Tank finished, I will be able to recolour it into other versions...I plan on releasing an Aussie Centurion,

      an Israeli one and most likely a British one.

      I haven't decided if I will produce a "camo" since it is tricky to get the camo paintjob to line up across the parts.

      It would be easier to airbrush the camo on after building the model.

      So, I thought about producing a base colour model, with a full painting pattern for the camo.

      Are you asking if a "paper" model is paintable?...of course it is. Its just paper. Most paints stick to paper.

      Only thing to be wary of is using a water based product (or any liquid really) and oversaturating the papers

      so that they become soft and will deform.

      A common method of "paper model" building in Europe, is to build with blank or printed parts...and then

      putty, smooth and reshape everything with fillers...and then hand paint everything.

      To me this is not a card model...this is a mixed media scale model.

      While this is perfectly acceptable as a scale model building method, it isn't purely paper or card modeling.

      I think using printed parts, with the minimum of additional materials (eg clear plastic for canopies, small lengths

      of wire for landing gear support, etc) is much closer to a true "paper" model...and thats what I like.

      The models I design, are generally complete kits, requiring only some paper and card and glue (to complete).

      Comment

      • Guest

        #48
        I must admit, I got a bit excited tonight!

        To finally see the Centurion in this state...

        Some of the Road Wheels are not permanently glued yet.

        I'll finish that up this weekend.

        And, I am now anxious to sort out some Tracks!

        (but, I have a B-24 Liberator kit to finish first)

        and, note to Rememal...

        I leveled up the front adjusters (like you suggested)

        and I also shortened the adjusting bolts.

        The first design was way too long, they wouldn't even clear the Wheels!

        Comment

        • Centurion3RTR
          • Jan 2009
          • 2093

          #49
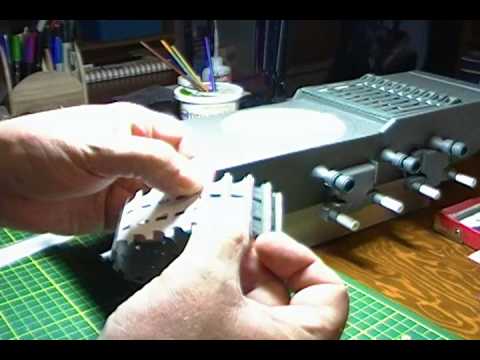
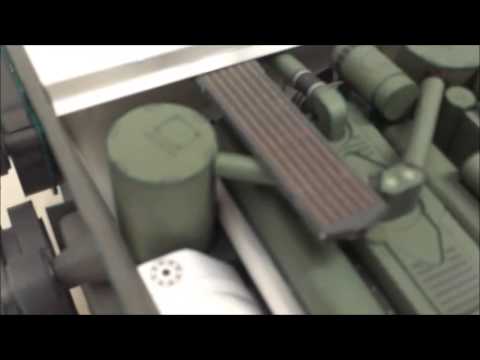
          Been following this build from the start and wasn't going to say anything until near the end, but I can't keep quiet any longer. Awesome, just awesome. My father would love this in his collection. Great build of a great tank bud, can't wait to see more.

          Have fun, John

          Comment

          • Guest

            #50
            hahaha thanks John!!

            I too, was thinking of staying quiet until the end...but that would have been fairly boring. lol

            My next update should be another video update.

            I did one of these a couple of weeks back, for the guys over at the papermodelers forum.

            Photos are better...but the video gives you a better sense of the 3D and the scale.

            Unfortunately I am not a "Radio Voice", so please mute the volume if you can't handle it! lol

            This is my first attempt at a video update:

            [video=youtube;3vMR_Juo8g8]

            Comment

            • Guest

              #51
              hell in a half pipe!!!!!!!lol,this is truly stunning,and watching the video,jeez man!!!!!!!,if i could shake your hand i would,it`s amazing

              mobear

              Comment

              • Guest

                #52
                This looks better every time I look at it.

                The reason I asked about paint is because if I did one of these I would want to do British Deep Bronze Green one.

                As a big Centurion fan I would love to have a 1/16 one to add to the others.

                I have 14 1/35th Cents in the display cabinet and 7 more in the man cave in various states of build.

                Malc.

                Comment

                • takeslousyphotos
                  • Apr 2013
                  • 3900

                  #53
                  Amazing............. There isn't much else to say. I only wish I had that sort of talent and patience.

                  Peter

                  Comment

                  • Guest

                    #54
                    This model IS British Deep Bronze Green.

                    (according to RGB values)

                    Only difference is the lack of gloss.

                    The paint is a low gloss enamel.

                    However, this particular colour/paper does seem to constantly change visible colour

                    in various lighting. It has a real blue tone sometimes...and then a real bright green tone

                    Do an image search for British Deep Bronze Green and look at the varied colours that come up.

                    If you look at the paint swatches for the colour, it has a more blue gray slate look to it.

                    (Looks nothing like the painted Tanks I have seen!)

                    But it really varies in the photos.

                    Its obviously a great camouflage colour!

                    If you printed this kit on glossy paper it would look more like what you are thinking.

                    (However building paper models with glossy photopapers is a talent in itself...I prefer

                    adding a spray clearcoat finish after assembly)

                    That is the same paint used by Canadian Forces (other than the camouflaged versions)

                    Comment

                    • Guest

                      #55
                      Bear with me guys...working on a couple of B-24 kits and haven't done any more work on the tank yet.

                      I am ready to sort out the Tracks.

                      I have also been waiting for a new HD camcorder to be delivered, before I do any more video updates.

                      Hopefully I can provide some better pictures!

                      Comment

                      • Guest

                        #56
                        Centurion latest update...

                        still working away on the Tank.

                        I finished all the Wheels and Track drive components.

                        And I think I have the Tracks sorted out!

                        I will be creating and posting a new Video update real soon!

                        Got a nifty new HD Camcorder.

                        So watch for that.

                        A while back, when I first started talking about a Track and Link design, I got some

                        great input from members...including two Track Link design ideas from two members

                        in particular (Thorsten and Michal).

                        Before I say any more, I'd like to say thanks guys!...you gave me some usable ideas.

                        Michal and Thorst had similar ideas, using a rolled part, creating a hinged Track Link.

                        They even provided me with 3D mockups of their designs.

                        I can't believe how good these designs look!

                        But unfortunately I still have some small issues with different aspects of the designs, like;

                        - too many small parts to cut out

                        - too many holes to cut out

                        - very small and narrow areas that might not survive cutting and handling

                        and, the idea of using a wire hinge pin.

                        Plus...the Tread is still too small and will still require more parts added on.

                        I liked my idea of all paper strip Track, with a folding seam hinge, etc

                        But I just couldn't get the weight and thickness I wanted, without adding

                        multiple layered parts...too many layers.

                        So, I kept going back to Michal's and Thorst's designs and eventually gave in

                        to the small part size...but I simplified the overall design to reduce the holes

                        and the narrow areas. I also reduced the number of connecting links (3+2)

                        instead of (4+5).

                        The entire Link is only 4 parts (one of those parts just a simple layer addition).

                        But it uses the rolled and layer technique for the hinge parts.

                        The Track Links still require a "pin" (which is the part I don't like)

                        and I have used 1.5mm Florist Wire.

                        Its a green coated wire used by Florists to support Flower arrangements.

                        Its pretty common in Craft stores and Florists.

                        Its the thinnest thing I could find that was easy to cut and available to most.

                        Wooden dowels would require at least 2.5mm, making the part to big.

                        I'm still looking for a way to cut the wire lengths smoother and cleaner

                        and not sure about how to "lock" the pins in place.

                        Based on the dimensions of the Track Links, I am estimating somewhere close to 100 Links

                        for each Track. So...about 200 Links, each with 4 parts and a hinge pin...should take about

                        six months to assemble. No problem. Shoot me now.

                        Comment

                        • Guest

                          #57
                          a New video report!


                          Dave's Card Creations YouTube Channel

                          dave's card creations - YouTube

                          Comment

                          • Centurion3RTR
                            • Jan 2009
                            • 2093

                            #58
                            Looking good there Dave, should be fun making 216 links :lala:. Keep up the great work bud.

                            Have fun, John

                            Comment

                            • Guest

                              #59
                              So, I had no problem laying out the parts for the Track covers

                              but fitting them to the tank was a bit trickier.

                              First problem is the covers have a very narrow mounting strip.

                              Not a lot to work with when trying to glue the cover to the Hull side.

                              And then theres the lack of hanger brackets.

                              Two brackets at the rear (awkward to attach to the Hull

                              ...one at the very front (doesn't do much at all!)

                              ... and one storage box (the one closest to the rear).

                              Sounds like plenty...but that leaves a long section unsupported

                              and the cover width and weight is a lot more than these "paper" brackets can handle.

                              (I'm sure on the real thing, metal rigidity and the strength of the steel brackets is enough to support things.)

                              I may tweak a few things, maybe separate the mounting strip from the covers.

                              This would allow you to position the mounting strip to the Hull as a small shelf.

                              And then sit the cover on top of it...using the upper supporting brackets to hold it up?

                              lol just thinking out loud...

                              anyway, with a little effort I have got the first cover in place...and the storage boxes.

                              I'll sort out the other side before I look at the Mufflers and exhaust pipes.

                              Comment

                              • Guest

                                #60
                                Track Covers update #2....

                                and the frustration continued.

                                lol

                                actually, things didn't go that bad, once I had a few things figured out.

                                I made a number of changes to improve the assembly and installation of the Track Covers.

                                Unfortunately, I was not able to implement them all in my own build.

                                So my build was still a little slow.

                                In real life the light weight and rigidity of the Track Cover sheet metal would allow them to be

                                suspended much better on the heavy steel brackets...even though the brackets are few

                                and oddly spaced.

                                In paper, its not so easy. I can't transfer the strength of angle iron brackets into small paper parts.

                                But with some extra glue here and there, and a little bit of twist and bend and sag...

                                I finally got it all together.

                                Not perfect, but its together.

                                For the kit itself, I have enlarged the mounting edge of the Cover plates and added some little gussets.

                                I've also adjusted some sizes and lengths to improve the fit and angles of the parts.

                                I also got caught up on a couple of other areas (for which I already had parts made)...

                                Track Covers are completed with the installation of the storage containers.

                                The two rear smallest containers are also supporting brackets.

                                And I have installed the front glacis storage container, along with the Tow hooks

                                and a few little surface features...fuel tank caps, stops for the Hatch covers, etc.

                                And you may also notice the ring spacer for the turret. Basically just an extension on the Hull

                                to lift the Turret slightly. It allows clearance for the Turret over a few objects that are higher

                                than the top of the Hull.

                                Next...another 3 inches of Track! That should take a week. LOL

                                Comment

                                Working...