If this is your first visit, be sure to
check out the FAQ by clicking the
link above. You may have to register
before you can post: click the register link above to proceed. To start viewing messages,
select the forum that you want to visit from the selection below.
Hi Neal and welcome to the forum. You can get Revell Contacta from Sprue Brothers and the 25 gram bottle costs $4,99 plus postage from Missouri. HTHs......
It "seams" many have an issue with joints. Lots of remedies suggested that will work. I usually use a light source, patience and light wet sanding to rid the awful depression.
Hah, wouldn't you know it. I put the Ohio aside and started an Akula, really worked on the hull seam of this model and was really happy with it after I primed it. Then I realized that the paint line between the red and black... runs along the seam, which means it would not have been a big deal to have a seam visible. Being the border between two colors would have hid it. :tears-of-joy:
And wouldn't you know it, after I masked off the top half to paint the red lower hull, the tape took off a bunch of primer.
Oh dear, that normally doesn't happen to primer unless fine dust or finger oils remained on that section of priming. If the lifted layer isn't thick just lightly wet sand and repaint. These things happen...not the end of the world but only tests your patience. :smiling2:
Here's how I deal with joining large parts, and their seams -
Dry fit; if necessary, which in practice means almost always; sand the mating surfaces to remove any flash, remains of sprue gates, and to ensure good mating surfaces & edges
Glue the parts together with tube glue, hold them together with tape, clamps, or elastic bands.
If necessary reinforce the joint by flooding in liquid glue
A basic sand or clean up with sandpaper, file, or sanding stick
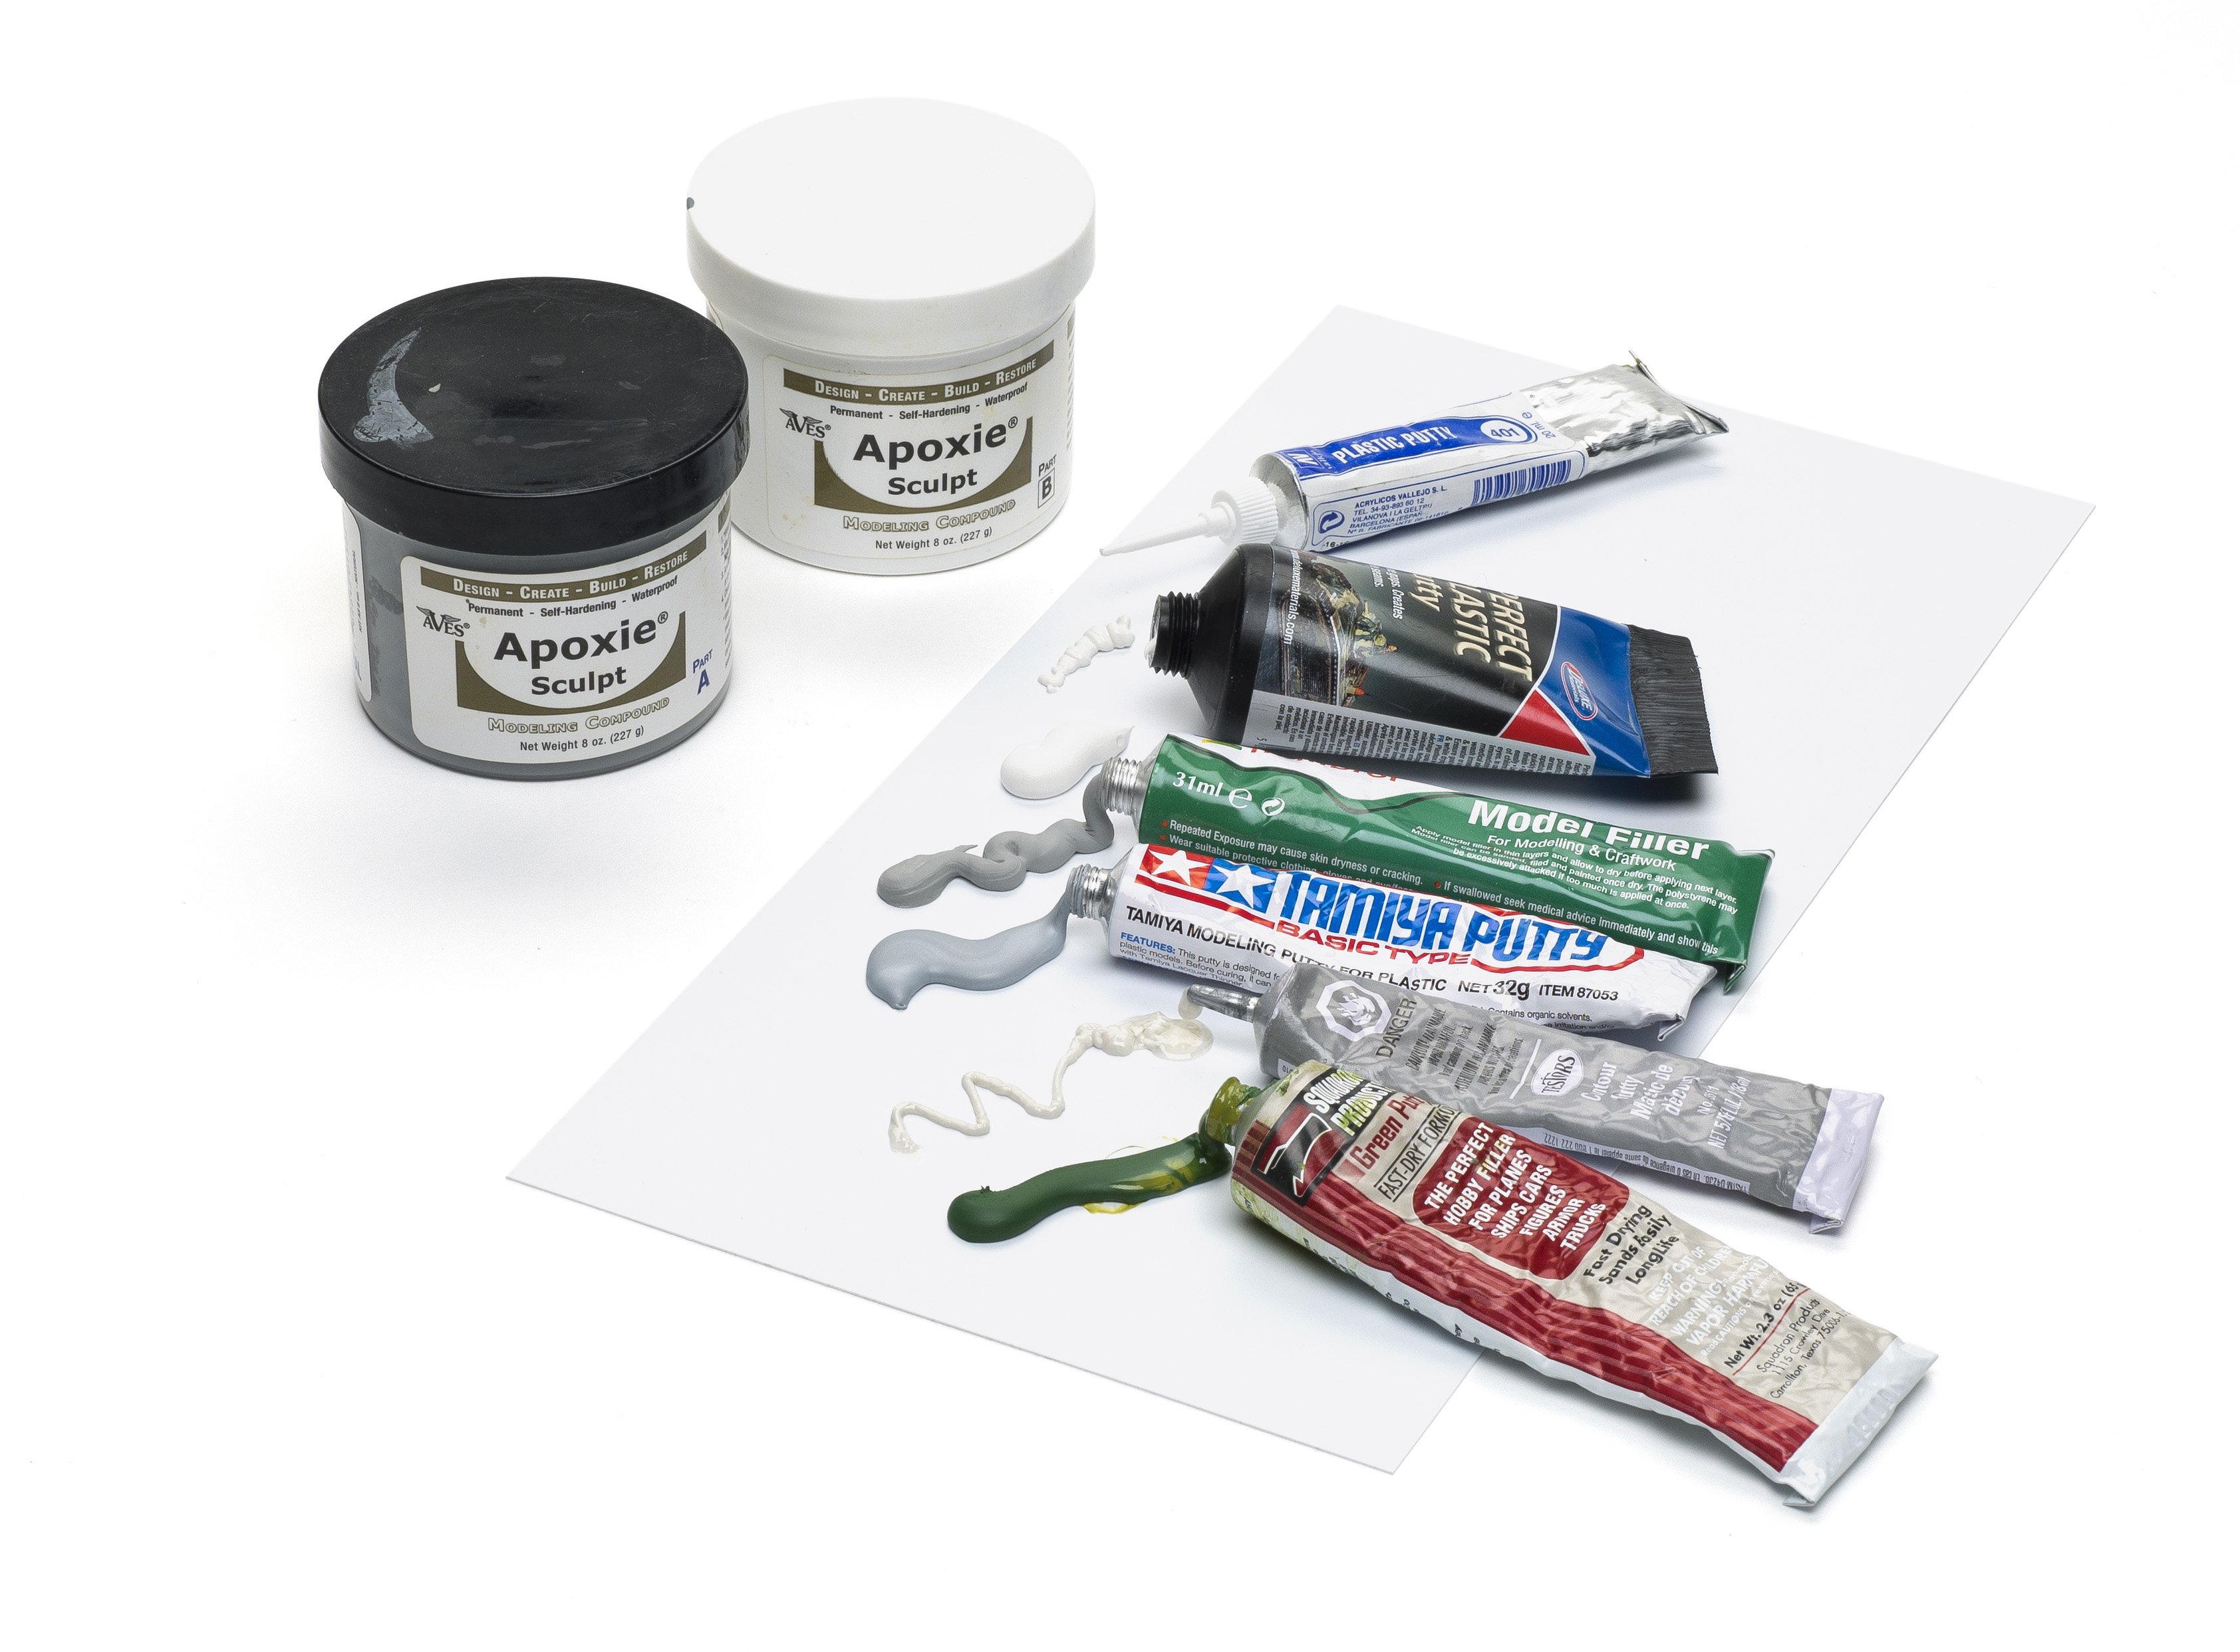
Apply tube filler putty as required. I'm still using Squadron Green Putty; not sure what I'll use when it runs out
Sand with file, sandpaper, or sanding sticks - actually manicure boards
Apply liquid filler - Mr Surfacer 500 or Mr Dissolved Putty, they both seem to do the same job
Sand again; obviously with any sanding, work down to fine grades; and follow curves & contours so there aren't any flat spots - easier said than done!
Paint with primer, usually just matt pale grey, then sand again
Try sticking the masking tape to the back of your hand a couple of times. This removes or masks some of the adhesive making it less sticky and less likely to pull up your earlier paint.
There are quite a few really good suggestions above but there will often be the odd ‘difficult’ area that you get left with.
If you think about it, after a bit of sanding any issues will relate to very fine small imperfections. Often they might be what we call ‘ghost seams’.
To resolve these you do need a very fine filler and, ideally, one that self levels with the ‘hard material’ sinking into any tiny gap as the carrier evaporates.
The ideal product for this is Mr Dissolved Putty.
MDP is amazing used the right way, not really for any significant gaps, but for smoothing over a rough surface it is perfect when combined with light sanding. It puts filler material into dips while sanding takes care of raised areas. The qualities that makes it perfect for getting rid of, perhaps, finger impressions, are also good for the really fine imperfections in seams.
First make sure your MDP is well thinned and mixed. A pot can thicken relatively quickly so I frequently thin it with Mr Levelling Thinner.
It can be applied to the seam areas with a cocktail stick or a disposable brush.
It is important to allow it to fully cure and harden and not be impatient. It is during that hardening process that it sinks into the ‘dips’. I usually leave it overnight before sanding.
In awkward areas you can also ‘sand it’ by wiping it with a cotton bud dipped in Mr Levelling Thinner or i.p.a. to preserve detail.
Well, my touch up job is not a great match but it's good enough. Let's just say Let's just say this Akula had some repairs done in Bucharest, call this "weathering effects". I know if I try to fix it any more there's a very likely chance it will get worse, not better. That's what I get for not keeping a bit of the original mix for touch ups, I forgot.
The other side will be the "show side", no one will ever see this side.
As you can see, the colors on the test sprue are the HobbyBoss recommended paints, tire black and hull red. The Mr Hobby hull red just doesn't appear to be very "red".
Can I ask, do the Micro Set and Sol decal solution affect the paint? I was using them for the first time and it looked like it was smearing the paint!
Well, my touch up job is not a great match but it's good enough. Let's just say Let's just say this Akula had some repairs done in Bucharest, call this "weathering effects". I know if I try to fix it any more there's a very likely chance it will get worse, not better. That's what I get for not keeping a bit of the original mix for touch ups, I forgot.
The other side will be the "show side", no one will ever see this side.
[ATTACH=CONFIG]n1175140[/ATTACH]
As you can see, the colors on the test sprue are the HobbyBoss recommended paints, tire black and hull red. The Mr Hobby hull red just doesn't appear to be very "red". [ATTACH=CONFIG]n1175142[/ATTACH]
Can I ask, do the Micro Set and Sol decal solution affect the paint? I was using them for the first time and it looked like it was smearing the paint!
[ATTACH=CONFIG]n1175141[/ATTACH]
Looks nice and sharp to me Neal. Great stuff.
I’ve had one of the solutions leave white marks on gloss varnish, but they dissapeared when i put the second coat on to seal the transfers. Never had one make paint run before though?
Back on the Ohio, I went around the whole sub and sanded on the seam between the vertical scribed lines, hoping to diminish the seam without marring the lines too much.
Reprimed the model last night, the seam still seems pretty evident
Sigh. Any suggestions? Should I add filler along the entire line and sand? Wet sand?
As Barry said i would use Mr Dissovled Putty all the way along and after hardening for 24 hours sand the whole seam, although this does mean you will need to rescribe the vertical lines.
Definitely wet sand, and use the sanding pad/paper on a hard backing to ensure it only takes off the high spots.
I would say yes to the filler along the join. Personally I would use a cellulose type filler rather than an acrylic one because it bonds to the plastic better, and, in my experience, sands smoother without crumbling back out of the join.
Another option is to stretch some kit sprue really thinly and cement that into the crack. Once it has dried completely (couple of days) you can sand it back. The advantage of that approach is that the sprue will bond the hull parts and stop movement of the join causing ghost crack lines to appear as it dries.
Can’t tell from the images, but are the plate lines incised? If so, don’t wait until you have finished sanding before re-scribing them. If you gradually deepen them as you sand it’s much easier because the existing lines act as guides for the scribing. If you wait until you have finished you may have to scribe completely new lines, which isn’t that easy.
As Barry said i would use Mr Dissovled Putty all the way along and after hardening for 24 hours sand the whole seam, although this does mean you will need to rescribe the vertical lines.
Ok, I will try that. Ordered via Amazon, so hopefully I can start again Monday. That Ohio, quietly taunting me....
Originally posted by Tim Marlow
Definitely wet sand, and use the sanding pad/paper on a hard backing to ensure it only takes off the high spots.
I would say yes to the filler along the join. Personally I would use a cellulose type filler rather than an acrylic one because it bonds to the plastic better, and, in my experience, sands smoother without crumbling back out of the join.
Another option is to stretch some kit sprue really thinly and cement that into the crack. Once it has dried completely (couple of days) you can sand it back. The advantage of that approach is that the sprue will bond the hull parts and stop movement of the join causing ghost crack lines to appear as it dries.
Can’t tell from the images, but are the plate lines incised? If so, don’t wait until you have finished sanding before re-scribing them. If you gradually deepen them as you sand it’s much easier because the existing lines act as guides for the scribing. If you wait until you have finished you may have to scribe completely new lines, which isn’t that easy.
I don't think the seam is deep enough to be called a crack, it's not really fingernail detectable. But it is visible after priming so I have to think it will be visible after painting.
Which cellulose type filler ? I have Tamiyo Liquid Surface Primer, Tamiyo White Putty, AK Modeling Grey putty and several older Testor putties.
but are the plate lines incised? What exactly do you mean? The vertical lines are etched into the surface, barely detectable by fingernail.
Gap fillers and how to use them. Obviously kits consist of individual parts. But the object of finishing them is to make them look like a solid object. The best way to do that is to eliminate gaps between the pieces. Sanding will take care of minor problems. However, if the parts don’t quite meet or are mismatched, filler may be needed.
Putties remain the go-to for this kind of work. But there are several types and they can be useful in different ways. Let’s look at three main types and how to use them.
Comment