Scale Model Shop

Collapse

What's on the Bench 2024

Collapse
X
 
  • Time
  • Show
Clear All
new posts
  • Andy T
    SMF Supporters
    • Apr 2021
    • 3239
    • Sheffield

    #91
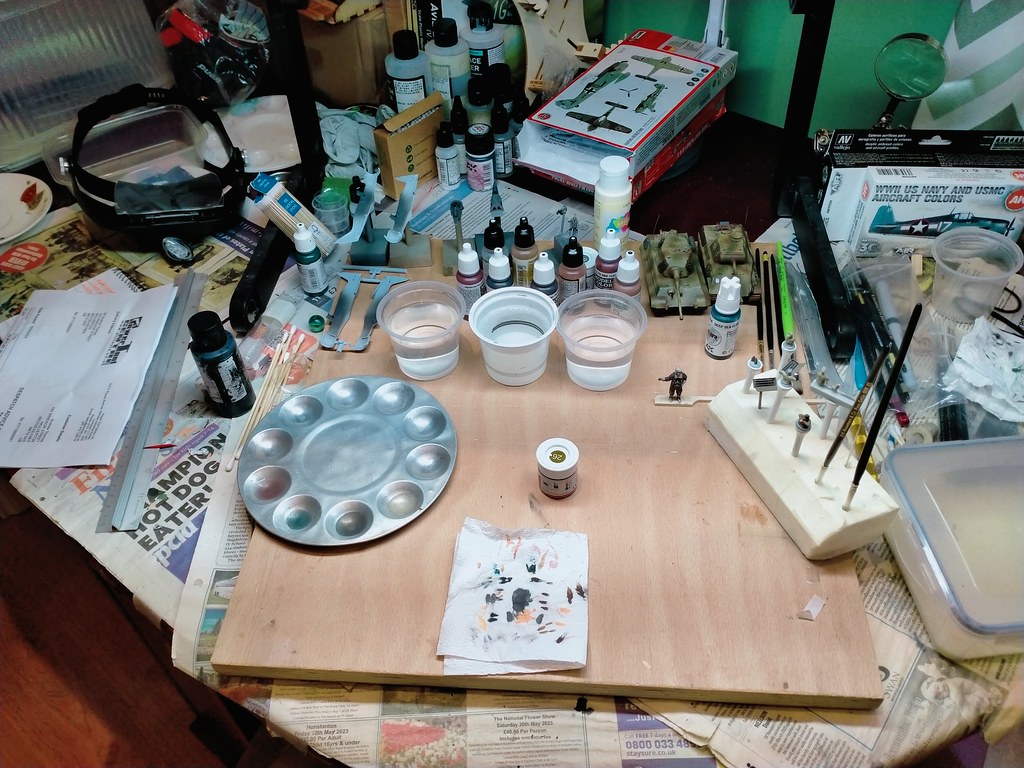
    Something else I started today. He came free with some figures I ordered so I've no idea who/what he is.

    I'm only a couple of hours in so there's plenty left to do but I'm happy with how it's going so far.

    Click image for larger version

Name:	1000007311.jpg
Views:	5
Size:	4.8 KB
ID:	1222010

    Click image for larger version

Name:	1000007310.jpg
Views:	5
Size:	4.6 KB
ID:	1222011

    Comment

    • stillp
      SMF Supporters
      • Nov 2016
      • 8093
      • Pete
      • Rugby

      #92
      Why's he carrying a big bunch of bananas? :tongue-out:
      Pete

      Comment

      • JR
        • May 2015
        • 18273

        #93
        Originally posted by stillp
        You're both in the right general area.
        My TR4A (the A is important!) is what's generally referred to as a 'Surrey Top' model, so it has fixed windscreens front and rear, with a removable hardtop that fits (or should...) between the two screens, and a soft vinyl centre section, the Surrey Top, which is quicker to put up than the hardtop, and can be carried in the car.
        My Surrey is probably as old as the car - I bought it second-hand in 1983. Most of it is in fairly good condition, but there are 4 elastic straps that hook onto the A and B posts and hold the sides of the Surrey against the side windows. On my example they've lost their elasticity and two of the hooks have disappeared (hence the twisted stainless steel wire on the end) so they need replacement.
        Now I could just buy a new Surrey top from one of the Triumph specialists, but a) they're about £250 or more, and b) the new tops are pathetically thin compared to my old one, so I thought I'd have a go at replacing the straps. The manufacturing process starts with an 8 inch length of 3/4 inch wide elastic, doubled over and the two ends glued together. The doubled ends are reinforced with a strip of vinyl leathercloth glued on. The next stage will be to stitch a square into that vinyl reinforcement, punch a hole in the centre of that square for a rivet to hold a new hook. I've already made 4 new SS hooks.
        The middle of the folded length of elastic will have to be poked down between two layers of vinyl that form the side flaps of the Surrey. This will be tricky, but as the original straps are no longer elastic I have no idea how long they should be so I'll have to stretch them until I think the tension is about right, punch a hole through the existing holes in the Surrey, then rivet them in place.
        Sorry if some of that is hard to follow - let me know if you want to see how I get on!
        Pete
        Yes Pete, seems an interesting project.

        Comment

        • JR
          • May 2015
          • 18273

          #94
          Originally posted by Andy T
          Another full scratch build job for my mate that's obsessed with 1/50 circus & fairground vehicles. He wanted to add an equipment and generator box on the back of a chassis cab and had a go himself but was unhappy with the results. It was his first time working with styrene, but at least he had a go:

          [ATTACH=CONFIG]n1221714[/ATTACH]

          So he brought it to me. I deconstructed it, squared up the panels and glued them together as a base. To that I added a "skin" of more precisely cut panels and then some door / vent / locker details.

          [ATTACH=CONFIG]n1221715[/ATTACH]

          [ATTACH=CONFIG]n1221716[/ATTACH]
          Worth Andy , brilliant work. Be he's over the moon .
          Attached Files

          Comment

          • Nicko
            SMF Supporters
            • Apr 2019
            • 1403
            • Nick
            • East Anglia

            #95
            I've been tinkering with some spoked wheels. This is off an Italeri (Protar rebox) 1/9 scale Yamaha - first attempt and quite pleased with how its turned out. If I can get a decent result with the rear wheel then I'll have to think about building the kit! I've spent several weeks on and off just doing this one wheel.

            Before:

            Click image for larger version

Name:	20240330_091309.jpg
Views:	5
Size:	5.0 KB
ID:	1222062
            Click image for larger version

Name:	20240330_091336.jpg
Views:	5
Size:	4.8 KB
ID:	1222063

            After:

            Click image for larger version

Name:	20240407_131141.jpg
Views:	5
Size:	4.7 KB
ID:	1222064

            Click image for larger version

Name:	20240407_131204.jpg
Views:	5
Size:	4.6 KB
ID:	1222065

            Nick.

            Comment

            • minitnkr
              Charter Rabble member
              • Apr 2018
              • 7539
              • Paul
              • Dayton, OH USA

              #96
              Looks way tedious.

              Comment

              • Tim Marlow
                SMF Supporters
                • Apr 2018
                • 18907
                • Tim
                • Somerset UK

                #97
                Looks superb though Paul. Top stuff.

                Comment

                • Nicko
                  SMF Supporters
                  • Apr 2019
                  • 1403
                  • Nick
                  • East Anglia

                  #98
                  Originally posted by minitnkr
                  Looks way tedious.
                  Yes indeed, hence doing it over a long period. I suspect the rear wheel will be more difficult as the spokes are shorter...

                  Nick

                  Comment

                  • Guest

                    #99
                    Good progress on the Sherman I was given. There was nothing really wrong with it, other than the front lifting eyes having been fitted 90 degrees rotated from how they should sit, but I’ve been making some corrections of the kind I would also have done had I bought and built this kit myself.

                    Most important are the rivets on the lower hull, because Dragon gives you a welded hull:

                    [ATTACH]506562[/ATTACH]

                    The kit represents a fairly early M4 made by the Pressed Steel Car Company (“PSC” to Shermanophiles) but those had a riveted rather than a welded hull until the summer of 1943 — while the direct-vision flaps on the hull front mean the model represents a tank that was made in August 1942 at the latest. That meant punching a bunch of domed rivets … To get their locations correct, I took an unbuilt MiniArt M3 medium tank kit from the stash and removed its hull side plates from the sprue, so I could hold them next to this model’s hull and make pencil marks where the rivets were to go.

                    Oddly, Dragon also forgot to add the bolts on the sides that hold on the nose armour, when those were present on all Shermans, whether with riveted or welded lower hulls. They’re not in the picture because I only added them after taking that.

                    The rest was more minor corrections:

                    [ATTACH]506563[/ATTACH][ATTACH]506564[/ATTACH]

                    Most obvious is probably all of the filler, necessary to get rid of the scars left by removing the armour plates and the stowage box on the rear of the turret, as well as add some texture where it wasn’t moulded at all. The lifting eyes on the gun shield are from an Asuka kit, and I deleted the commander’s vane sight (on the right front roof of the turret) as well as the “ears” to the gun shield to each side of the barrel and the spotlight on the roof, because those were not present on early Shermans.

                    On the hull front, I straightened out the lifting eyes and replaced the headlight guards by Asuka parts again, as they’re not as too thick as Dragon’s The holders for the plugs for the headlight mounts are also Asuka (and they’re parallel to the glacis plate because this is an early Sherman) while the siren on the left mudguard is from the Rye Field Models Sherman VC kit. The strip with bolts along the top of the nose should really be replaced by one where the bolts aren’t recessed, but I can’t remove it. Maybe I will carefully file it flat and replace the bolts with new ones. Maybe

                    In the splash guard around the turret, I drilled some drain holes and also bevelled the upper edge of the rear part, because that’s how PSC made the real ones, which Dragon missed.

                    On the back, the guards over the lights are also Asuka, the bracket for the tow cable is resin from an unknown make, and I removed the sledgehammer that was on the rear plate as well as reversed the large wrench (that had been glued on the wrong way around).

                    Comment

                    • peterairfix
                      SMF Supporters
                      • Jul 2012
                      • 11075

                      #100
                      Not so much what's on the bench more like what's on the shelf gathering dust been looking at me for best part of the year so it's time to finish it just happens to be revells 1/32 tornado Click image for larger version

Name:	IMG_20240414_151310.jpg
Views:	5
Size:	5.1 KB
ID:	1222420

                      Comment

                      • Guest

                        #101
                        The Sherman I was given is now just about finished.

                        [ATTACH]506695[/ATTACH][ATTACH]506693[/ATTACH]

                        The tow cable came with it, but I needed to shorten it a bit to bring it to the correct length. I did replace the D-clasps that secure it to the towing lugs at the front by ones from Asuka, and that brand also supplied a much finer clamp for the machine gun on the commander’s hatch.

                        On the bow, I did take the plunge and cut, scraped, filed, and puttied away the ridge and bolts at the top. Once the putty was dry, I punched out a bunch of bolt heads from 0.5 mm plastic card and added them along the top edge:

                        [ATTACH]506694[/ATTACH]

                        Not that easy to see because they’re white against the white putty, but if you look carefully you’ll see them The painted patch is because on the real tank, there was a prominent casting number on the plate there, so I thought I’d add that from Archer transfers (which are printed with resin so they’re 3D, forming letters, numbers, foundry marks, etc.). Because those adhere poorly to bare plastic, I painted the area first. Unfortunately, it then turned out that the set doesn’t include much of anything that’s useful to create the marking that needs to go here

                        And I’ve started on the tracks:

                        [ATTACH]506696[/ATTACH]

                        This is a MiniArt set of T41 tracks, which were fitted to early Shermans. I separated and cleaned up all of the end connectors (lower right) and two sprues of block parts (upper left). Only eight sprues more to go …

                        Comment

                        • David Lovell
                          SMF Supporters
                          • Apr 2018
                          • 2186

                          #102
                          Got a hankering for some panzer gray so a break from all things russian I've built this one ready for primer
                          Click image for larger version

Name:	20240330_120543.jpg
Views:	5
Size:	7.3 KB
ID:	1222533
                          And have made a start on this
                          Click image for larger version

Name:	20240415_153502.jpg
Views:	5
Size:	7.0 KB
ID:	1222534
                          So have gone with the same drive sprocket as the box top looks more stugie in my little world
                          Click image for larger version

Name:	20240416_171658.jpg
Views:	5
Size:	3.6 KB
ID:	1222535
                          The one on the right
                          Click image for larger version

Name:	20240416_171823.jpg
Views:	5
Size:	4.2 KB
ID:	1222536
                          All good fun so far after the grief with the BM-8-24(see under construction) im keeping pics etc will start a proper build thingy once up to primer on both. Dave

                          Comment

                          • Guest

                            #103
                            Rather than Panzer grey like David, I felt more like yellow:

                            [ATTACH]506872[/ATTACH]

                            This because I did some research, and Shermans of this type were used in Tunisia in early 1943, with a stripe, cryptic unit markings and US star on the turret and a big number on the hull sides, all in yellow. That’s why I first primed those in white, and have now airbrushed Tamiya matt yellow over that. Next step will be to design the markings in Adobe Illustrator, then print them out and stick them to the model with PVA before spraying the tank olive drab.

                            Comment

                            • Guest

                              #104
                              Now with the actual markings:

                              [ATTACH]506888[/ATTACH][ATTACH]506889[/ATTACH]

                              I first applied the line around the turret, which is 3 mm wide masking tape (made by cutting a 6 mm strip in half), and then cut parts out of it to make room for the other markings. The stars and 7s were made by drawing them in Adobe Illustrator, printing them (my toner cartridge smudges something terrible ) and then cutting them out, so I could paste them to the model with a bit of PVA. The tactical markings, which consist of a vertical bar with a dot next to it, are masking tape: 2 mm strips of the 6 mm tape plus a 2 mm disc I made with my punch and die set. Those symbols indicate E Company, 1st Armored Regiment, 1st Armored Division, US Army in Tunisia, early 1943 — which is to say, around the time of the Battle of Kasserine Pass. I’m not trying to replicate any specific real tank, but this seems plausible based on photographs taken after that battle.

                              Comment

                              • adt70hk
                                SMF Supporters
                                • Sep 2019
                                • 10409

                                #105
                                Hi all

                                I need to paint the pilots for the FW 190s and had a few more things lurking that need the hairy stick treatment, so took the spray booth off the table, worked out what paints I'd need for everything and started working it all last night.

                                ATB

                                Andrew


                                Comment

                                Working...