
Outstanding work Mark, love following this.

-
-
November Updates - 2015
Hi Everyone!
Thanks for your patience. I was able to move all of my model building stuff to my new location so after this update you will see some pics of my new work area. For this months update I have 15 new pics for you to view. I've been spending most of my time trying to mount and balance the Enterprise model into the Overhead modules. This scale ship weighs a lot more than the 1/350 scale version, so the issue of weight stands out a lot more in this build. I'm trying to get the Enterprise to appear as level with the drydock as possible so it will appear to be floating inside of it. It is taking a lot of tweaking to get it centered and balanced. After I get it as leve as possible I can then seal up the saucer section and permanently Secure the Enterprise armature to the Dock. Some of the pics in my update show how I've centered the model. Then I marked off all of the holes to drill for the mounting bolts. There will be three bolts holding the ship in place via the armature. I just had to take several pics of this. It just means I'm that much closer to finishing this build. I think you will like these pics.
Also I've begun measurements for the Hanger deck that is in the Overhead module. The Starboard side module will show the depth of the Hanger. This will also suggest that both modules actually look this way even though only one will have the doors in the opened position. I've taken all of the Shuttles Craft that I've cast both in opaque and clear castings and will be preparing them for painting. Some of the craft will be lighted up while others will be in a stand by mode. I've also cast many Travel pods and cargo containers as well as work bees. These will all be painted up and stored in the hanger.
Because of the framework of the overhead modules I will not be able to go as deep into the model with the hanger deck as I wanted. I was thinking of adding a mirror at the back end of the hanger to add some depth to it. I'll see how this works out as I continue to add details to this part of the build. That's it for this month. See you next Update. Take care,
Mark
http://www.NemVia.comComment
-
February Updates - 2016 Okay! Finally I've been able to get some updates back on the site. I've started by adding 12 new pics to the February Updates- 2016 page. My primary work is for the Hanger bays seen on the front of the Overhead modules. My version of the dock will also include Hangers on the rear of the dock as well. The larger one will have the Hanger doors open so you can see into the hanger and view the storage containers as well as the work bees and shuttle craft that are stored there. After I finish the assembly of the hanger walls I will be working on the main hanger deck. I'm also adding a little more functionality to the smaller flight decks that are seen on the Starboard side module. I'm adding some access doors to the back walls to give them a little more depth. Thanks for your patience in all of this. I will have more updates coming next month! See you then!
Mark
http://www.NemVia.com
Comment
-
Nice to see this still going Mark, looking superb mate, waiting for the next instalment.Comment
-
March Updates - 2016
I've got a whole slew of pics for this months update! I've been concentrating on the larger hanger deck for the rear Starboard side of the overhead modules. As with the 1/350 scale version I'm adding a warehouse-like storage area for one side of the Modules. The front end of the Drydock will appear as it did in ST:TMP. The idea of showing the hanger is just to show what might possibly be on the interior of these modules. I figure that since the Enterprise is facing forward inside the dock it would make the most sense to have the supplies and cargo containers come out of the aft end of the modules to be loaded into the Shuttle Bay on the Enterprise. I'm trying to make this hanger a lot larger than the 1/350 scale version. I'm currently adding a lot of detailing to the walls and ceiling, etc. I've make some extra holes in both the deck and the ceiling for overhead lighting. As of this update I've pretty much have all of the wall details in place and I've begun spraying the parts both for light leaks and final colors. There are 30 pics in this month's update. Take a look and let me know what you think! See you next month!
Mark
http://www.NemVia.comComment
-
April Updates - 2016
This month I've been doing a lot of painting on all of the Overhead module hanger decks and entryways. The painting process can take quite a while because of all of the masking that needs to be done. All of the decks needed to have landing stripes and other colors added to them. I've been able to paint the main hanger deck and I think it looks pretty cool. It looks like a parking garage for the shuttles. I'll be adding the shuttles, Work bees and cargo containers soon. Well I 52 pics in this months updates. I mainly showed how the painting process was done. Check them out and let me know what you think. We'll see you in a month.
Mark
http://www.NemVia.comComment
-
July Updates - 2015
Hi my fellow model builders!
This month's updates are now posted for your enjoyment. I have pretty much been doing a lot of clean up with the port side framework. I'm getting all of the tension rod assemblies in place as well as the port side mark light bars which run along the length of the model. I've also added all of the panel frame details to the sides of each of the panel frames. Everything is pretty much in place and all I have to do now is connect all of the wires and do a lighting test to make sure everything works okay. The only part I didn't detail as of yet is between the top tier 2nd and 3rd panel frames. This is because I will have to cut into the tubing to allow the armature tower to fit in between these panels. I'm a little bit nervous about cutting into these tubes just because I don't want to ruin anything. But this has to be done in order for the ship to be supported inside the dock.
In the meantime, I will be painting up all of the added details that I've put on this last month to match the rest of the dock model. In the updates there are 32 new pics for this month. I've taken more photos to show how the tension rods are added one by one into the structure. It takes about 40 to 45 minutes to complete one panel frame. This is mainly because of all of the small parts I'm using to build this part of the dock. I can't tell you how many times I've wound up dropping parts while trying to put them all in place. I've also been doing some piece counting for the model. There are 9 parts to each of the tension rods. 2 mounting nuts, 2 mounting bolts, 2 washers 2 turnbuckle sleeves and one tension rod. There are 12 tension rods on each panel frame. So just for the tension rod assemblies alone there are 108 pieces per panel frame. 42 panel frames total including the port and starboard frameworks. This equals 4,536 individual pieces just for the panel frames alone. At the end of the entire build I will give you a complete total of all the individual parts needed for this model.
In other areas, I have scratch built some support clamps that are needed to hold the mark lighting rods in place on the outside of the port framework. These clamps were all cemented to the outside of the dock and aligned so that the entire length of the rod would appear straight over the entire length of the dock. The mark light rods are then snapped into the clamps holding them in place. Next I will be doing the wiring for these lights and then do a light test. After everything looks good I can then paint all of these parts to match the dock. I can finally move to get the Enterprise in place. Hope you enjoy all of the pics for this months. As always if you have any comments or questions I'd be happy to hear from you. See you next month! Be safe!
Mark
http://www.NemVia.comComment
-
Here is the video update for the Drydock hanger chase lighting effects https://youtu.be/TUxS4FTIoZUComment
-
October Updates - 2016
Hey Everyone! No I didn't fall off the grid, I've just been extremely busy these past few months. I'm still working on the Drydock, but what I accomplished during August and September was very minimal and not worth the update. But I have a significant update and I hope you'll like it.
First off, I am still working on the lighting effects for the hanger bays. I've built some light sockets for the fiber optic effects, I've also been working on the shuttle craft that will be seen inside the open end hanger bay. They are all painted up and just need decals. I should be able to get those done by the next update. 4 of the shuttles will have some sort of lighting effect in them.
Next I took on the challenge of wiring together two sets of 60 LEDs for the work light Arrays. The soldering was very delicate and tricky. I needed to solder the wires as close to the LEDs as possible because there is a limited amount of space in the work light housing. I could have used the strip LEDs but they don't have the shape I wanted for the actual light fixtures. After getting them all soldered together I took a few lighting test pics which came out really good.
Next I started building the housing for the work lights. These are scratch built pieces with some ribbing details on the backside of the housing. I made these so they would slide over the back of the lighting array. There are some touch-ups and puttying to do but they are finished.
Also in the scratch build department I needed to build the vertical boom arm pivots. This piece will slide into the Boom arm turrets and support the boom arms for the work cranes and work lights. I made a master to be molded with silicon rubber. I then cast 7 of these pieces for the turrets. I also drilled holes into the vertical pivot so I can add the boom arms and wiring.
Lastly I was able to scratch build the boom arms. I used some Plastrux tubing for the main part of the arm. I had to taper one end and lathe the other so it will have some interesting details. I also added some other details. Pieces that I call fins, as well as adding some eyelettes to the boom arms to support some thin rod pieces that come out of the vertical pivot. I don't know what their function is but it makes for interesting details. I managed to complete the two work light booms and assemble the arrays to the boom assembly. Now I need to work on the turret mounts so that all of the work cranes can be connected to the panel frames in some manner.
There are 27 new pics in the October updates - 2016 page if you would like to see how the building process went. Well, that's all for this month. Next month I should most of these items all painted up. See you then.
Mark

Comment
-
November Updates - 2016
For this month's update I've finished wiring all of the turrets with their lighting effects. I've fed the wires through the bottom section of the turret and through a styrene tube at the back of the base of the turret. This makes it look more the filming miniature versions. After getting this all set up and adding the fiber optic strands to each of the work booms I've also been working on the painting of the Work booms as well as the booms for the Work Light Array. There are 3-4 different colors used on these pieces. The main color was and off Yellow which somewhat resembles the color of our modern day work cranes. There are also gray and rust color stripes added as well as some military green. They were sprayed in layers, masked and then the next color was added. The final color was the yellow. They will need some touch ups to cover up some small pot holes created by the resin-molding process.
On the 1/350 scale dock I was not sure how I would mount these turrets to the dock because at that time there were no good pictures of the dock available. What you saw on the screen was all I could go by. But having seen the filming miniature in person I now know what to do to mount these pieces to the 1/260 scale dock.
There are some specialized mounting brackets that hold the turrets into place, so I'm trying to replicate them as best as I can using styrene. So far they are turning out okay and they look like they'll be able to support the weight of the turrets, especially the light arrays. I should have them all painted up by the next updates. There are 20 new pics under the November Updates - 2016 page. If you wish to see more Enjoy and feel free to comment. Thanks everyone. See you next update!
Mark

Comment
-
February Updates - 2017
SO WHAT HAPPENED TO DECEMBER AND JANUARY????????
Uh..... I dunno..... Just had to take a break. Been busy with work family and a multitude of other things...... BUUUUUUUUUT! I'm ready to get moving again.
The pics are loaded up on the February Updates - 2017 Page.
Okay, so I really didn't get a whole lot done the last couple of months, But I did manage to work on a few things. The mounting clamps for all of the work booms are now complete and I mad the pincers for the ends of the booms. I kind of improvised on these because I couldn't see any functional need to the Drydocks end pieces as seen in the movie. I will be making alternate pieces that mimic TMP end pieces so they will be interchangeable. They will just slip onto the ends of the booms. Anyway, the booms were cut to the same length when I first made them and I really can't finish them until I get the Enterprise in place. Then the booms will be cut to the appropriate lengths and the end pieces will be put on. I will also cut the optic fiber to be flush with the end of the boom.
Back to the turret clamps. I have these mounted on the bottoms of the swivel shaft and they are painted up to match the panel frames. I've also started to do some re-wiring on the Enterprise Deflector dish. my client wanted the ramp-up, ramp-down lighting effects added in so I need to run a few more wires through the dorsal. I've also replaced the LED in the dish reflector with a dual color LED. I should have this wired up by next update.
In other areas, I'm starting to apply the decals for all of the shuttles that will go in the Aft Hanger bay. I also needed to take out some of the wiring for the thrusters on the Enterprise model to make room for the Gang way on the Dock. There's just too much packed into it and it might cause problems later on. I've also mounted the Enterprise onto the dock but I'm afraid the ship might just weight too much for the bracket, so I might have to stabilize the ship with some wires. .013mm I think is what I bought.
I know this wasn't much of an update, but I should be back on track during this month. Thank you everyone for your patience. I know this is a long project, but please bear with me and you WILL see it complete. Ahh yes I love that word complete. So check out the pics, let me know what you think and I will see you next month. Take care everyone.
Mark.

Comment
-
New weblink:
http://www.nemvia.net Please disregard anything with Nemvia.com. I'll explain later.
MarkComment
-
Cant load the mobike version of the site and... none of the pics load up for me.
Comment
-
Sorry, Dougie. I'll look into that.
July Updates - 2017
Hey Everyone! My apologies to all for the big delay. As you may have noticed my website was hacked and my NemVia.com version of my is no longer functioning for my website. I have had to update my site to NemVia.net and try to clean up as much of the garbage that the hackers have caused and try to get things back in order as best as I could. I've had a few setbacks with the Drydock build, sick relatives and other problems have caused further delays. Although I do have a small update for this month I think you'll find some of it interesting.
I became discouraged when I found out that I made a mis-calculation with my armature for the ship. This armature was to keep the ship level inside the dock and also allow it to appear to be floating while inside the dock. I poured over ways to correct this problem including some extremely thin steel fishing line that would hold the engines level with the dock. I decided to do what I did with my 1/350 scale dock armature and just bend the heck out of the thing until it help the ship upright and level the way I wanted it to.
Using a pair of pipe wrenches, I found the point where the armature meets the connection rod and pushing in opposite directions I twisted the armature enough to pre-load the tension in order to hold the weight of the ship in place. I have a pic of how I was able to do this in the July Updates - 2017 page. It took me a couple of tries, but I finally got the ship to appear level inside the dock. She FLOATS! I exclaimed! Anyway that was a huge hurtle to get past. Now I can finish the wiring for the main deflector dish and torpedo launchers and finally seal off the saucer section and get ready to add the port side panel frames into place.
In other areas I had to replace the hanger deck on the aft side of the Dock. Some of the fiber optics were not lining up the way I wanted to so I redid the entire deck. It looks much better now and I have all of the chase lighting done for the entire aft end of the modules. The small hangers have the chase lighting heading into the deck whereas the larger hanger has the lighting running in take-off mode with a few shuttles in position for launch. I have 7 new pics and 4 new videos of the chase lighting effects in this month's updates I should be able to get more done in the upcoming month. Once again I apologize for the long delays. Hang in there and I'll get this thing done soon. Thanks for your patience and keep checking for more updates.
Mark
http://www.NemVia.netComment
-
July Updates - 2017 - Supplemental...
Okay, I usually don't jump ahead of my posts here, but I just had to add this to the blog.... I recently purchased a 80cm motorized camera dolly and I wanted to use it for several special photography effects on the side. But most importantly, when I finished the drydock build I wanted to make a duplicate flyby movie that would match ST:TMP's drydock flyby. I made a few passes with the model in it's unfinished state to get an idea of what I can do for a final project for this build. The results of the tests came out very good even though the lighting was not corrected the models are incomplete, none of the effects lighting is operating and there is no space background. But if you could just ignore all of that and take a look at the video's potential, you might understand why I had to do an early posting of this video. Now I really can't wait to finish this project. Take a look at the test video.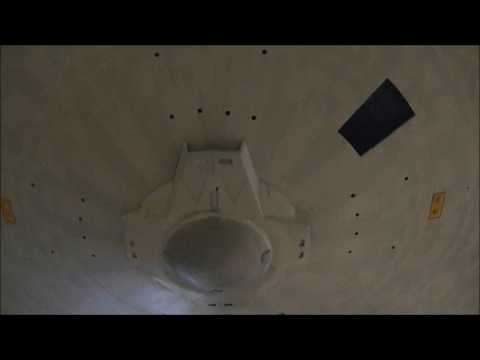
See you in a few weeks
MarkComment
Comment