If this is your first visit, be sure to
check out the FAQ by clicking the
link above. You may have to register
before you can post: click the register link above to proceed. To start viewing messages,
select the forum that you want to visit from the selection below.
Morning Max.
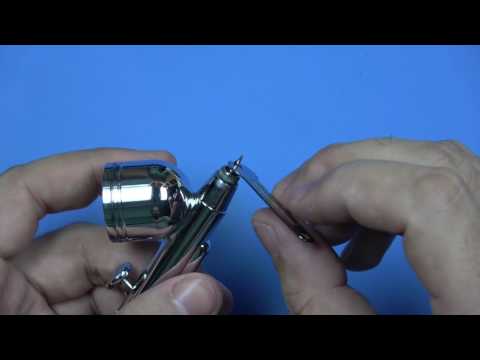
His control was perfection on the wing, and the backing music was great, but polishing needles !
I always believed that tolerance was achieved by machining well in the first place, and can't imagine polishing.
As for the Beeswax seal....... How that improved the line painting I just don't know. One minute he's carefully polishing the needle the next he's applying heat to the most sensitive area the needle tip.
I'm not one for knock offs in the first place, I'd rather buy a H&S or a well known make rather than play around like that.
What did you think ?
John.
Morning John
Okay, firstly I’ve got to agree with you on the heat issue; that really worried me. Next, like you, I couldn’t for the life of me see how the wax would make any difference, unless the ring seal was damaged. The needle polishing is a slightly different matter. I agree with you that machining quality will certainly be of prime importance, but under magnification will (directly from the machine) show a surface that isn’t ‘smooth’. Now I know that we’re only talking microns here, and whether or not that would have any impact on airflow I don’t know. But, I don’t see that very careful polishing would be detrimental, assuming that it’s done evenly, and the only way I can see that being possible is if it’s done in a lathe. Also of course the polishing medium would be of importance, and the type he was using would be comparatively coarse in comparison to say Brasso. I suppose the long and the short of it is, I don’t know the answer, and it does of course take more than one Swallow to make a summer!
By removing the O-ring he's moved the nozzle back, which might make a difference, but not sure how! The polishing might make a difference if it had been ground with 'rings' around the circumference, which would cause turbulence. I think that Tamiya polishing compound is a 'structured abrasive' like professional car compound, i.e. the particles break down into finer grit during the process. It should be even all round, if you keep turning the needle while polishing - not perfectly, but very close.
I've got a cheapo airbrush, I might give it a try.
Guys I just watched the video. Seriously I wouldn't spend time tinkering with the airbrush and prefer to spend more practising with the amount of finger pressure and pull to correlate with the distance from the surface to be airbrushed. Both one and two in the demonstration looks the same to me. He was more restraint on the second pass.
Also remember that we are spraying on 3D surfaces that curve or bend away or towards the airflow so both your hands will have to work in tandem, one holding the airbrush , the other the kit.
I say just practise till it becomes second nature.
Forgot, the other is eye coordination. You have to get used to an imaginary spot that the paint would hit the surface because it's quite hard to see the airflow with very transparent paint and low air pressure.
Forgot, the other is eye coordination. You have to get used to an imaginary spot that the paint would hit the surface because it's quite hard to see the airflow with very transparent paint and low air pressure.
Cheers,
Richard
As someone who is yet to use an airbrush, this post is particularly interesting and something I hadn’t imagined. Thanks
Max
Hi Max, Richard is right about practice. The more the better, and remember it’s an airbrush, not a spray gun. My painting improved no end once I took that approach.
For practice you can use black ink and a kids colouring book. When you first start out...don’t go straight for a model because you will just disappoint yourself....put in an hour or two on paper to get used to paint thinning and using the brush. Time spent like this will really pay off later....like a musician playing scales, you will be building up muscle memory so you don’t have to think about “how to do it”, just “what you want to do”....
Cheers
Tim
Thanks for that Tim, I appreciate the helpful post. It’s pretty much what I’d intended to do anyway, but it does bring up a question; does ink stain?
I agree with the others - practice, practice and more practice.
Tim is right about using some cheap ink to practice judging where the paint will hit the surface. A good exercise is to draw some straight lines on paper, about 4 inches long, then practice painting a line of paint on the pencil line, starting and stopping at the beginiing and end of the pencil line. This will teach you where the paint hits the paper, keeping a straight line, and starting and stopping in the right place.
The order of actions are: move your arm, let the air flow, let the paint flow (to hit the start of the line), at the end of the line stop the paint, then stop the air, then stop your arm. This way you should not get any blotches of paint building up at the start of end of a line. Don't worry if you cannot master it straight away - it takes practice.
When you are reasonable happy with that exercise, try the same with some curved lines.
A other good exercise is to draw a grid and try to hit each intersection with a dot of paint.
Most of all - have fun and wash the airbrush very well.
Morning John
Okay, firstly I’ve got to agree with you on the heat issue; that really worried me. Next, like you, I couldn’t for the life of me see how the wax would make any difference, unless the ring seal was damaged. The needle polishing is a slightly different matter. I agree with you that machining quality will certainly be of prime importance, but under magnification will (directly from the machine) show a surface that isn’t ‘smooth’. Now I know that we’re only talking microns here, and whether or not that would have any impact on airflow I don’t know. But, I don’t see that very careful polishing would be detrimental, assuming that it’s done evenly, and the only way I can see that being possible is if it’s done in a lathe. Also of course the polishing medium would be of importance, and the type he was using would be comparatively coarse in comparison to say Brasso. I suppose the long and the short of it is, I don’t know the answer, and it does of course take more than one Swallow to make a summer!
Max.
Loved your quotation at the end, very true. Yes a lathe would to me be the only ways to do it well. We will have to wait now for Peter to give it a try.:smiling2:
John.
I agree with the others - practice, practice and more practice.
Tim is right about using some cheap ink to practice judging where the paint will hit the surface. A good exercise is to draw some straight lines on paper, about 4 inches long, then practice painting a line of paint on the pencil line, starting and stopping at the beginiing and end of the pencil line. This will teach you where the paint hits the paper, keeping a straight line, and starting and stopping in the right place.
The order of actions are: move your arm, let the air flow, let the paint flow (to hit the start of the line), at the end of the line stop the paint, then stop the air, then stop your arm. This way you should not get any blotches of paint building up at the start of end of a line. Don't worry if you cannot master it straight away - it takes practice.
When you are reasonable happy with that exercise, try the same with some curved lines.
A other good exercise is to draw a grid and try to hit each intersection with a dot of paint.
Most of all - have fun and wash the airbrush very well.
Peter
Appreciate the detail you’ve put into your reply Peter. I’m keen to get started, but showing remarkable restraint (wink wink) at the moment by trying to get a grip on what I intend to do, in advance of actually doing it! I found an old model in one of my drawers the other day that I’ve decided I’ll use to practice on before I launch into my SE5a. I’ve read quite a lot of old threads on here in addition to the questions I’ve asked of you good people, and feel I’m close to making a start. There’s still a few more pounds to spend before that though, and a lot of practicing to do!
Max


Comment