Scale Model Shop

Collapse

Wash types and use

Collapse
This topic is closed.
X
X
 
  • Time
  • Show
Clear All
new posts
  • Guest

    #16
    Yes, sorry, I forgot to mention that on this last model, and as recommended up here by a lot of people, I used an acrylic gloss coat, and only pin washed the lines and rivets with black and brown oil paints disolved in turpentine.


    On the provious model I used the same wash, but covered the whole surface first on a matte coat. The result doesn't look as good or as realistic, as it's too messy and dirty.


    Thanks for all the help.

    Comment

    • Guest

      #17
      Originally posted by Flyermay

      I finally managed to apply washes on a model that I'm happy with.


      I was about to give up, since it's really dissapointing mess up a model in the final step after so much work; and in fact I didn't even try it on 3 of the last models I built for fear of doinging it wrong again.


      Anyway, after many tries, I'm convinced those commercial acrylic washes can't be used with the same techniques as the home made oil based washes for external panels and rivets -at least the particular one I bought-; never got it to work well, nomatter the type of coat or the drying time. It's probably why in every video guide I saw in YouTube these type of commecial washes are only used in a different way for interiors like cockpits.


      I'm also curious on whether you guys always weather your models -since I have 3 that are not-. I suppose it's a personal choice, but would you guys ever consider a model finished without wheathering it? I mean, do you ever intend to leave them clean and looking new?
      It depends on where the subject operated. If I built a Fw 190 operating on the Eastern front in winter, it would be heavily weathered, however, a brand new Me 262 would not have much, as it's panel lines were puttied and sanded. Same for a Ta 152, as they relatively had minimal operating time, however, it would have some engine exhaust staining, but nothing too drastic

      Comment

      • Guest

        #18
        Originally posted by Airfix Modeller Freak

        It depends on where the subject operated. If I built a Fw 190 operating on the Eastern front in winter, it would be heavily weathered, however, a brand new Me 262 would not have much, as it's panel lines were puttied and sanded. Same for a Ta 152, as they relatively had minimal operating time, however, it would have some engine exhaust staining, but nothing too drastic
        I see, so you try to replicate exactly what each particular model would look like in real life, instead of treating all of them the same. Glad you mentioned that, because I finished a 190 last month and left it completely clean, and I was about to start a 262 and planning to weather it as much as possible; since I just learned how to do it.

        Comment

        • Guest

          #19
          I use the water-based washes by Florey models. They are clay-bases. As others have said, they need to be applied over gloss varnish because matt holds washes closely and you can't wipe them fully during the finishing process. Following Florey's instructions, I fully wet a brush with the required colour and apply the wash generously, all over. Slurp it on. Then, after it has dried (probably 10 the 15 minutes), dampen a cloth by licking it and rub over the model. This will remove some of the wash, depending on how much you rub, but if you rub at right angles over panel lines they will retain the wash to make them more prominent. During the rubbing process, always parallel to the direction of airflow, you can vary the degree of rubbing in areas which need varying amounts of wash. If you don't like the result, just wash it off with a cloth soaked in water and re-do. When dry, apply oil or dirt stains (oil pigment perhaps) and varnish  (matt, semi-matt or gloss) to protect from handling.


          Comment

          • Guest

            #20
            One more doubt? Do you do anything special before a pin wash with oil over decals?


            I just tried it on a P-51, which has many areas covered with stripped decals, and it's not getting well into the lines and rivets. I thought about using paint for those instead, but ended up going with the decals; now it's too late to go back.

            Comment

            • Guest

              #21
              You need to use a decal softener like Micro Sol to get them well bedded-down into panel lines etc.


              Then once the decals are fully dry, apply the gloss varnish over them. That way the wash will flow as easily over them as it does on the rest of the model.

              Comment

              • Guest

                #22
                Originally posted by Flyermay

                One more doubt? Do you do anything special before a pin wash with oil over decals?


                I just tried it on a P-51, which has many areas covered with stripped decals, and it's not getting well into the lines and rivets. I thought about using paint for those instead, but ended up going with the decals; now it's too late to go back.
                I do exactly what Patrick does- that will do the trick. However, if it doesn't work, cut the decals with a fresh blade along the panel lines. to open up the underlying surface. Run the pin wash along, and it should work perfectly as well. However, this should be a last measure procedure.


                John

                Comment

                • Guest

                  #23
                  Originally posted by Airfix Modeller Freak

                  I do exactly what Patrick does- that will do the trick. However, if it doesn't work, cut the decals with a fresh blade along the panel lines. to open up the underlying surface. Run the pin wash along, and it should work perfectly as well. However, this should be a last measure procedure.


                  John
                  Just ordered the softner Patrick recommended, though I'm afraid it would be too late for this model -don't think it will work one week after having placed the decals-; so thanks a lot for that tip.

                  Comment

                  • Guest

                    #24
                    Originally posted by Flyermay

                    Just ordered the softner Patrick recommended, though I'm afraid it would be too late for this model -don't think it will work one week after having placed the decals-; so thanks a lot for that tip.
                    I don't see why not (provided you haven't varnished over the decals).

                    Comment

                    • Guest

                      #25
                      Originally posted by Stevekir

                      I don't see why not (provided you haven't varnished over the decals).
                      I used a decal fixer, so I figured out it would be well dry by then and would not allow the decals to fill in the irregularities by applying the softener on top. I don’t really know, since I never used it before.


                      Anyway, I already varnished over yesterday morning, and just finished re-washing over the lines I marked with a blade; as John suggested.


                      Good to know for the next, so thanks.

                      Comment

                      • Guest

                        #26
                        Almost finished my first fully weathered model. Just needs a couple of details, uncover the canopy, and the final coat; in case I need to change anything.


                        I think it's overdone though. I mean, it doesn't look like in the pictures of the real one I saw on the web; specially of that exact plane. Anyway, criticism is allowed; as long as it is constructive.


                        Looks dirty; don't you think?

                        Comment

                        • dave
                          SMF Supporters
                          • Nov 2012
                          • 1828
                          • Brussels

                          #27
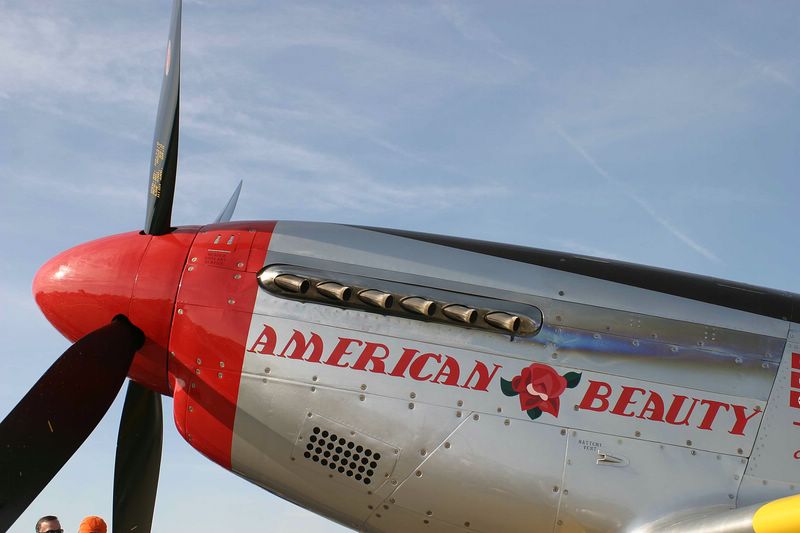
                          If you were looking at the same pics I was they are of the restored aircraft in a very clean state,  looking at wartime pictures of mustangs they are dirtier.


                          It looks fine to me. referring to photos I would have extended the exhaust staining a bit further towards the rear, but that is personal taste.

                          Comment

                          • Guest

                            #28
                            Originally posted by dave

                            If you were looking at the same pics I was they are of the restored aircraft in a very clean state,  looking at wartime pictures of mustangs they are dirtier.


                            It looks fine to me. referring to photos I would have extended the exhaust staining a bit further towards the rear, but that is personal taste.
                            Yes, I considered that. But I could only find older pictures in black and white; so I wasn't able to use them as a guide. This is one of the best I found in color.


                            I also think you are right about the exhaust stain; in most pictures I saw it covers that whole panel; which actually looks as if it was replaced. The exhausts themselves also look of a darker tone than the silver recommended in the kit; even though I already used steel; which should had been darker)


                            I'll see what I can do to correct those problems. Thanks a lot for your comments.

                            Comment

                            • dave
                              SMF Supporters
                              • Nov 2012
                              • 1828
                              • Brussels

                              #29
                              A point to note in the bottom picture you can see the whitish deposits on each exhaust pipe except the first, getting stronger as you go back, this is due to I believe lead in the fuel. And does not occur on German aircraft of the period due to a different fuel mix.

                              Comment

                              • Guest

                                #30
                                Originally posted by dave

                                A point to note in the bottom picture you can see the whitish deposits on each exhaust pipe except the first, getting stronger as you go back, this is due to I believe lead in the fuel. And does not occur on German aircraft of the period due to a different fuel mix.
                                Thanks for point out those small details; all have been added.


                                Someone mentioned, don't remember in which thread, that the stage he most likes is research and planning; are those the types of things you look for while researching? I mean, is it only those last touches, our do you research anything else while and before building a new model -I'm asking specially in regards to aircraft modelling-?

                                Comment

                                Working...